LAB GUIDE
Lab: Deploying a Docker based web application to Azure App Service
Learning Objectives
- How to build custom Docker images using Azure DevOps Hosted Linux agent
- How to push and store the Docker images in a private repository
- How to Deploy and run the images inside the Docker Containers
Pre-requisites
- Microsoft Azure Account: You’ll need a valid and active Azure account for the Azure labs.
- You’ll need an Azure DevOps account.
Length
40 minutes
Exercise 1: Create a new project in Azure DevOps
- Enter in Azure DevOps and log in clicking in Start free button
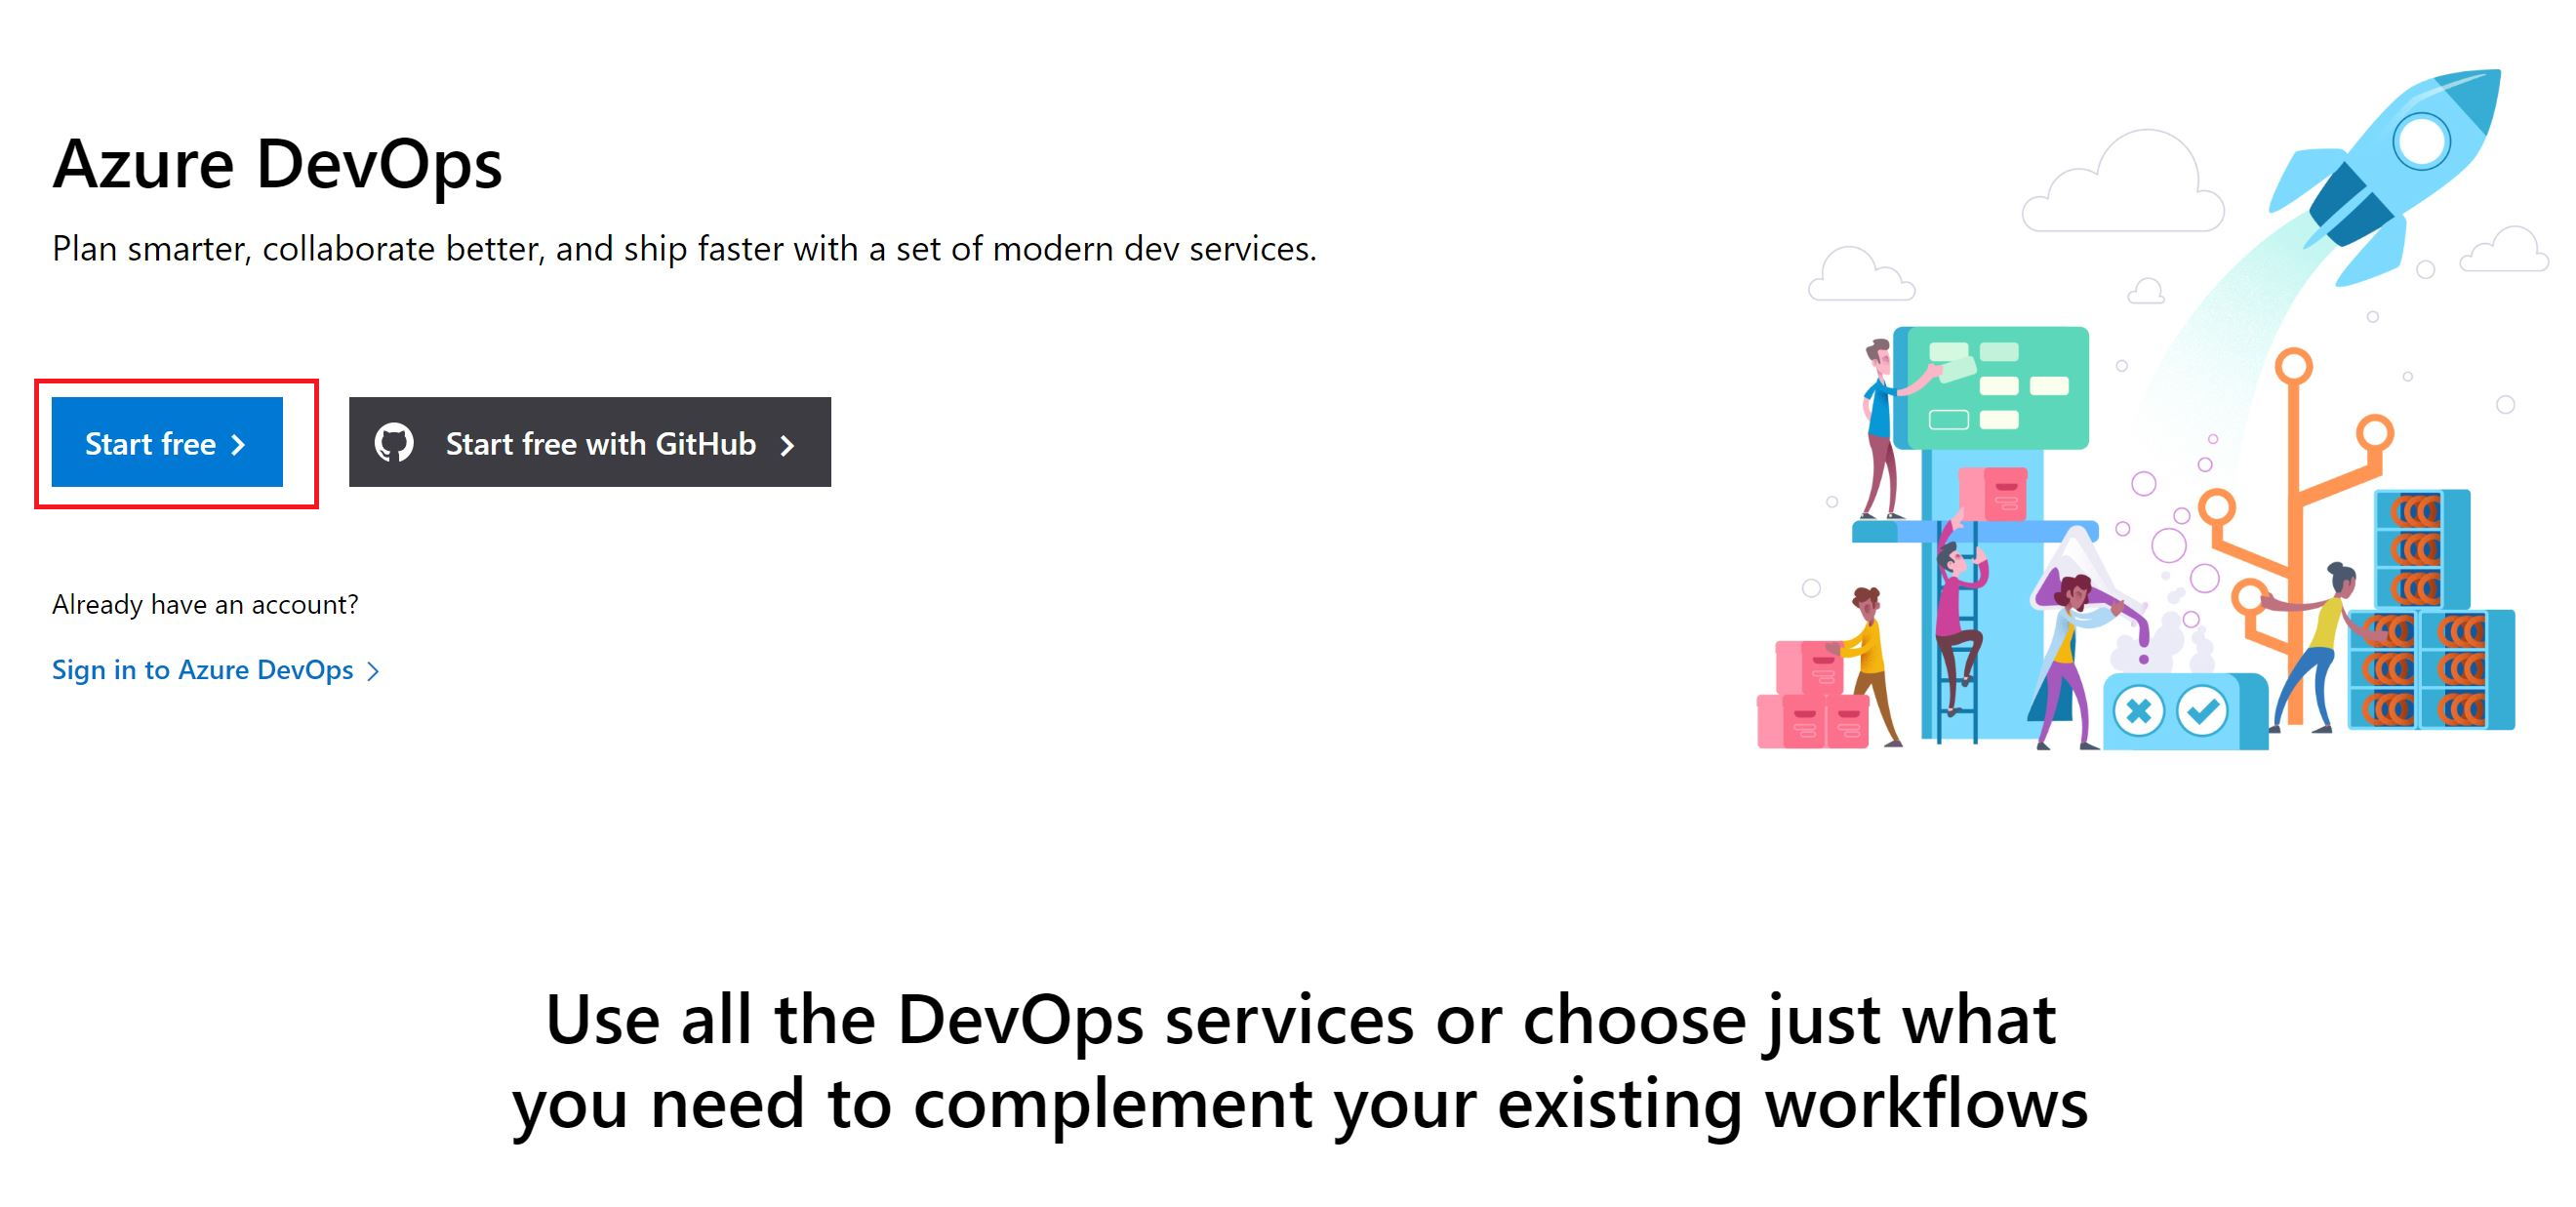
- Login with the same credentials you were given for Azure if you are not logged in already.
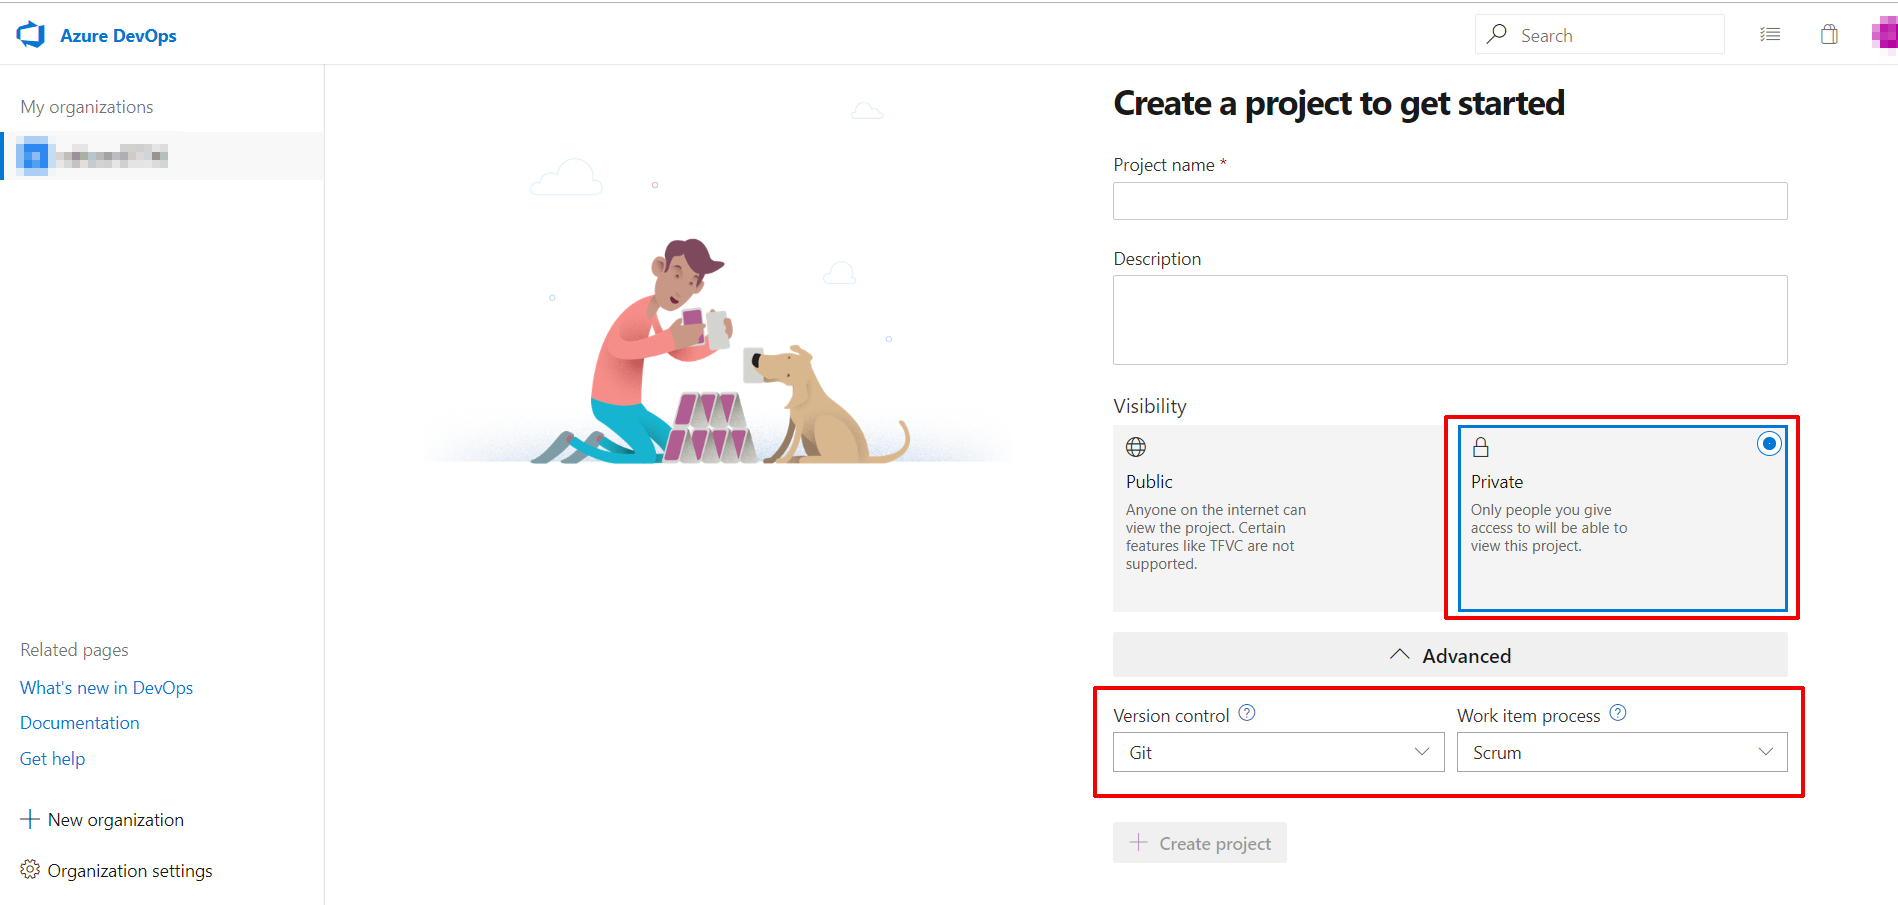
- Press New Project
- Set the Project name you want
- In visibility select Private
- Click on Advanced, in Version control select GIT and Work item process select Scrum then click on + Create project
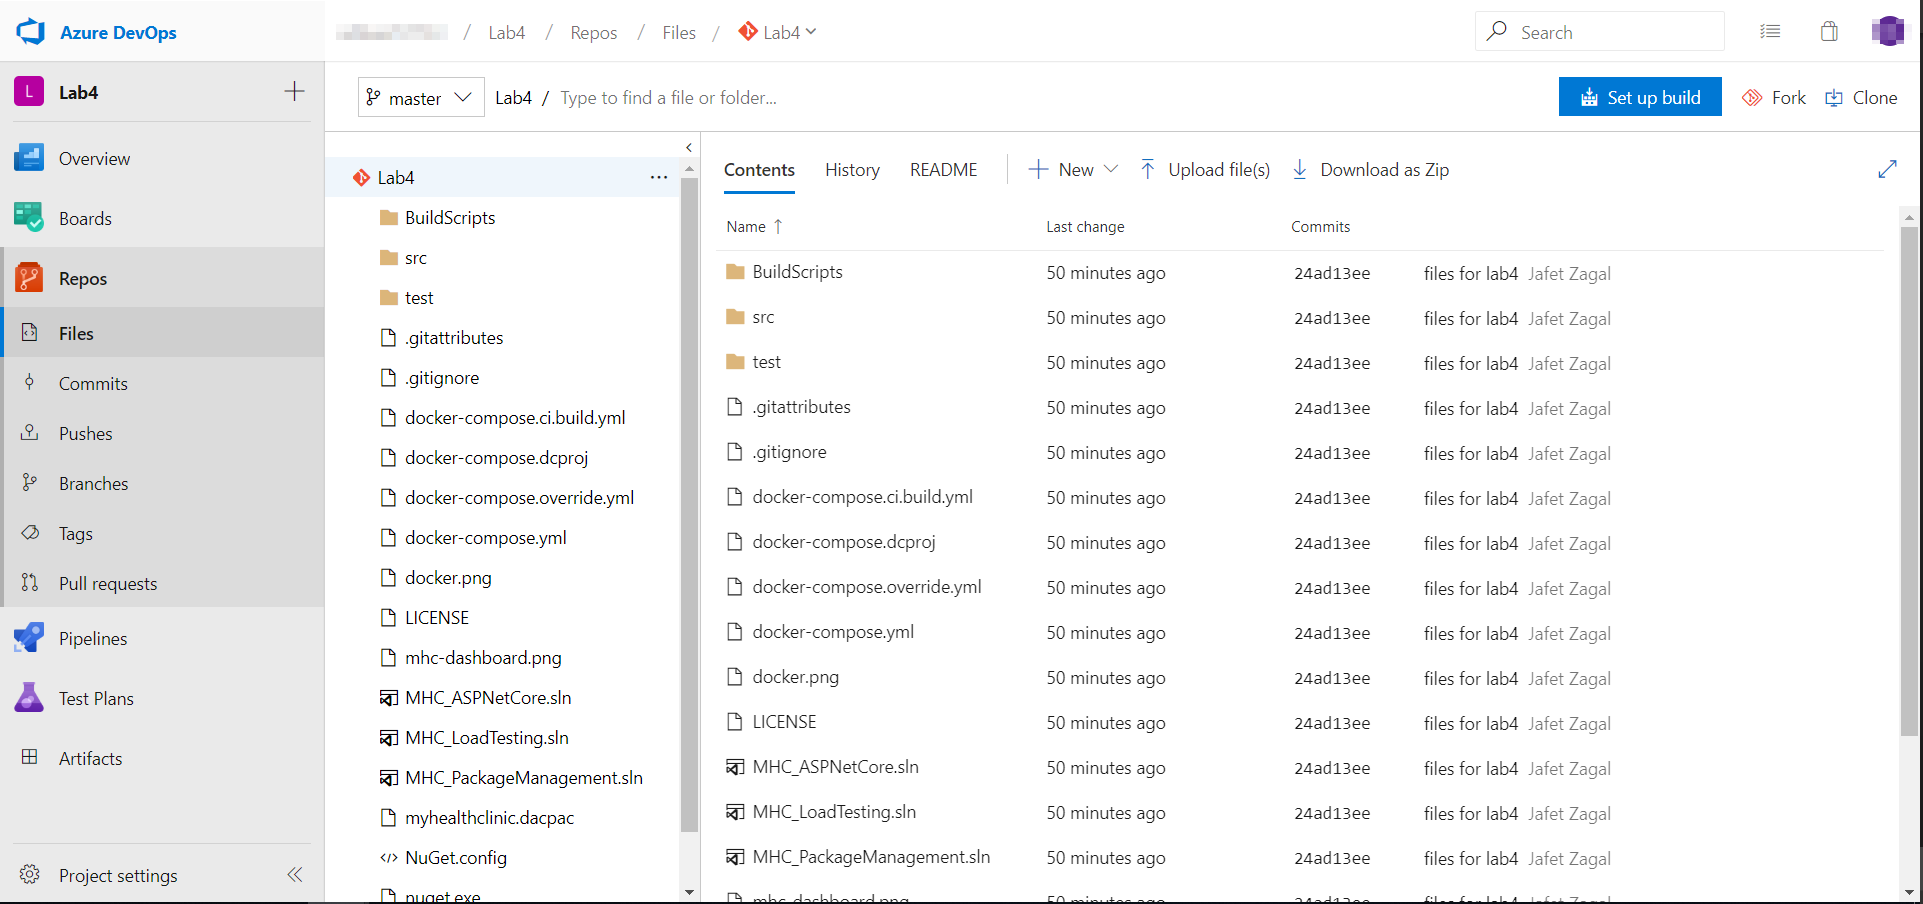
- Once your project has been created click on Repos option
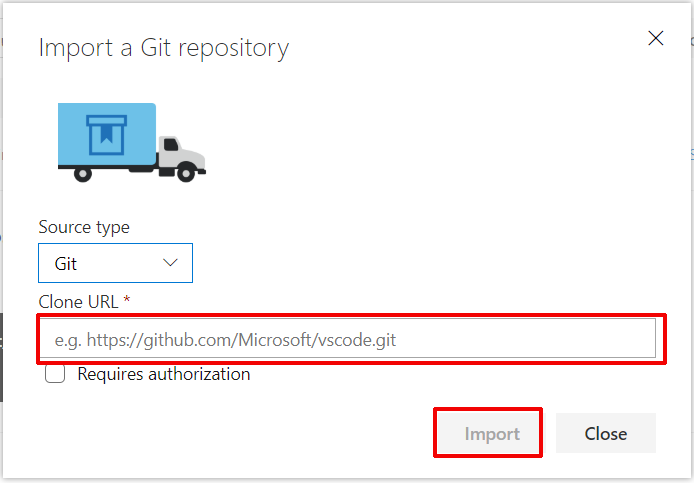
- In Repos page you’ll see many options to add some code, click on Import from Or import a repository option
- in Clone URL option put this URL then click on import
https://github.com/MSTecs/Azure-DevDay-lab4-demoProject.git
- Now if you click again on files you will see the code in your page
Exercise 2: Configure Continuous Integration
Task 1: Configure your basic Pipeline DevOps
- Log in to your Azure portal lab subscription.
- Note If you are using your own subscription, begin the deployment of Module 3 resources using this deployment script. Be sure to use lowercase letters with your initials Eg. - tjbmodule3. Click the Deploy to Azure button to start

-
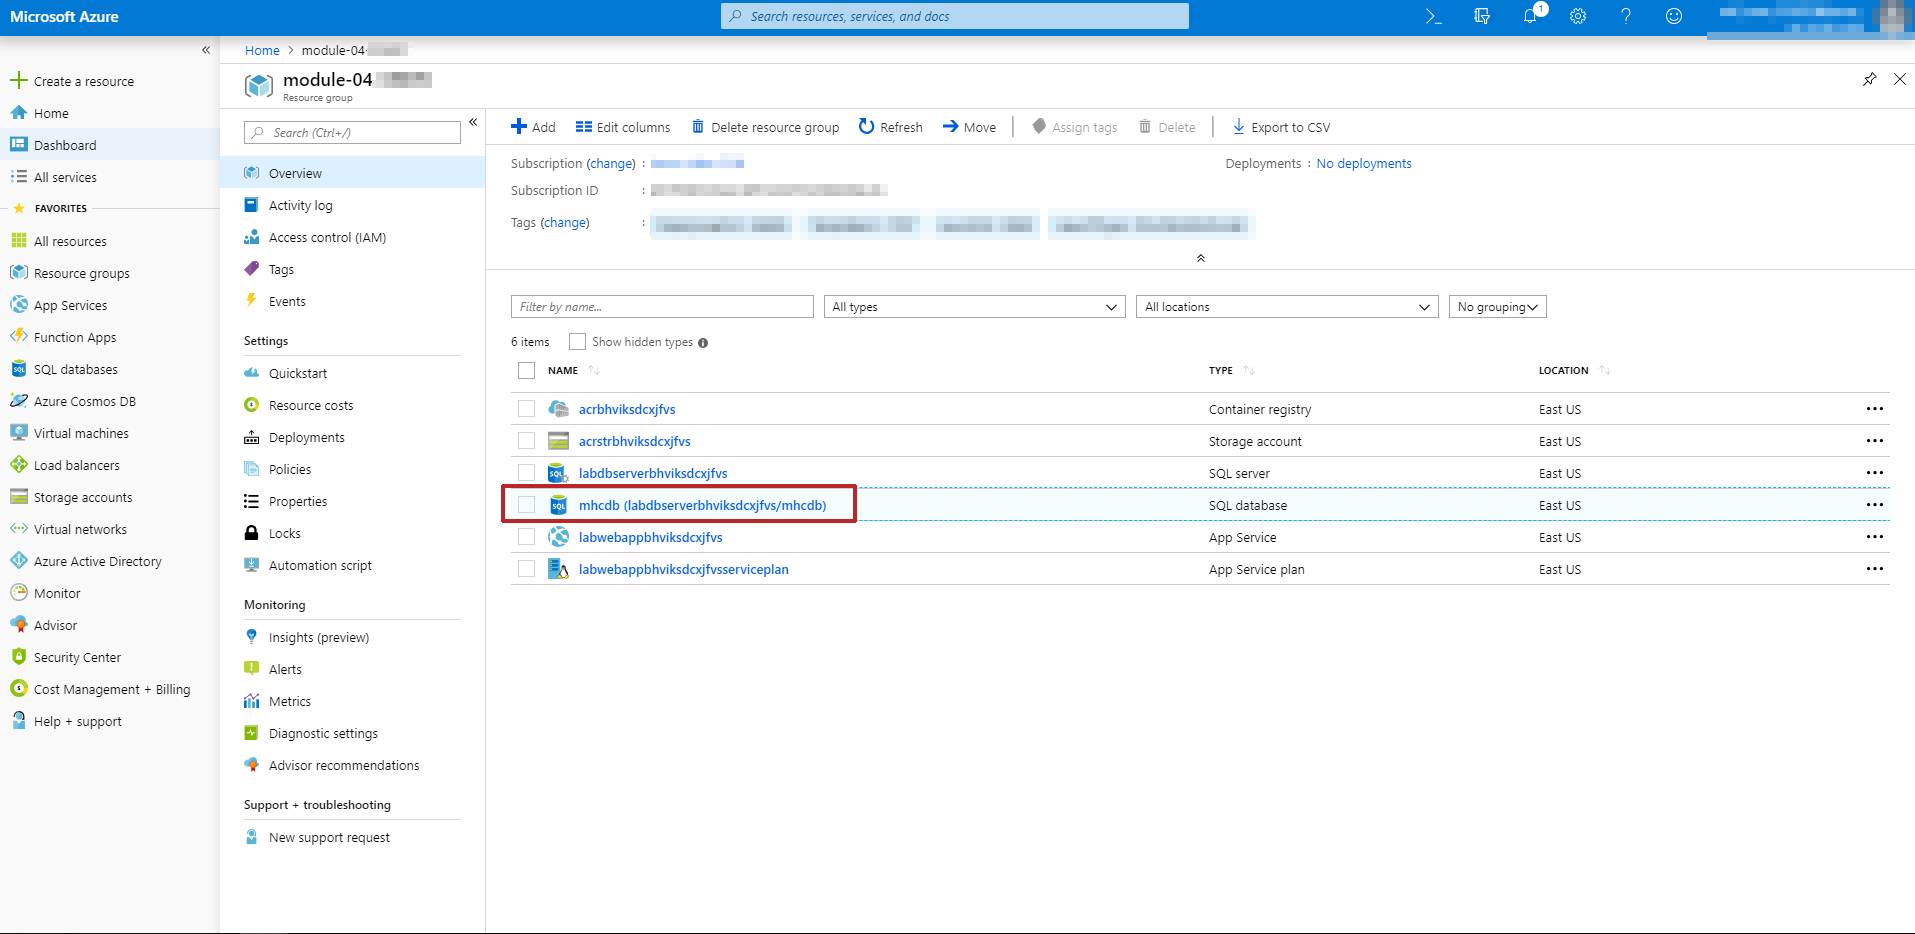
Go to resources groups and select the resource group that begins with module-04-***.
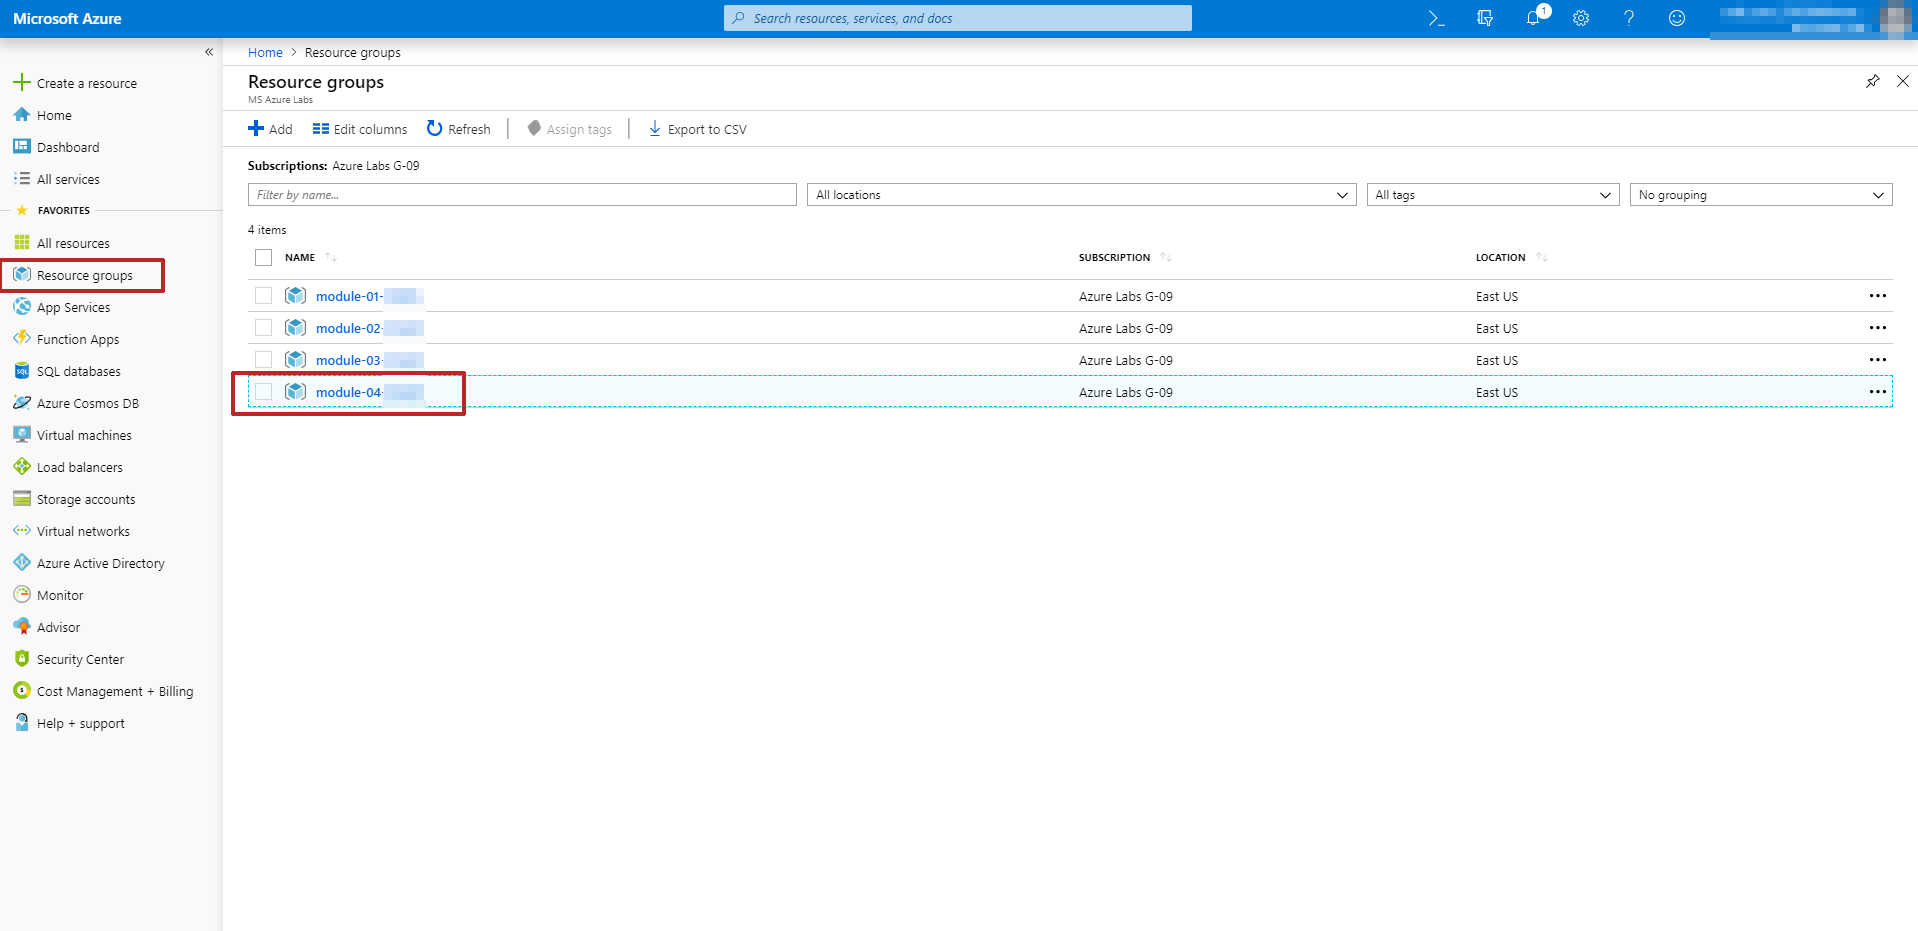
-
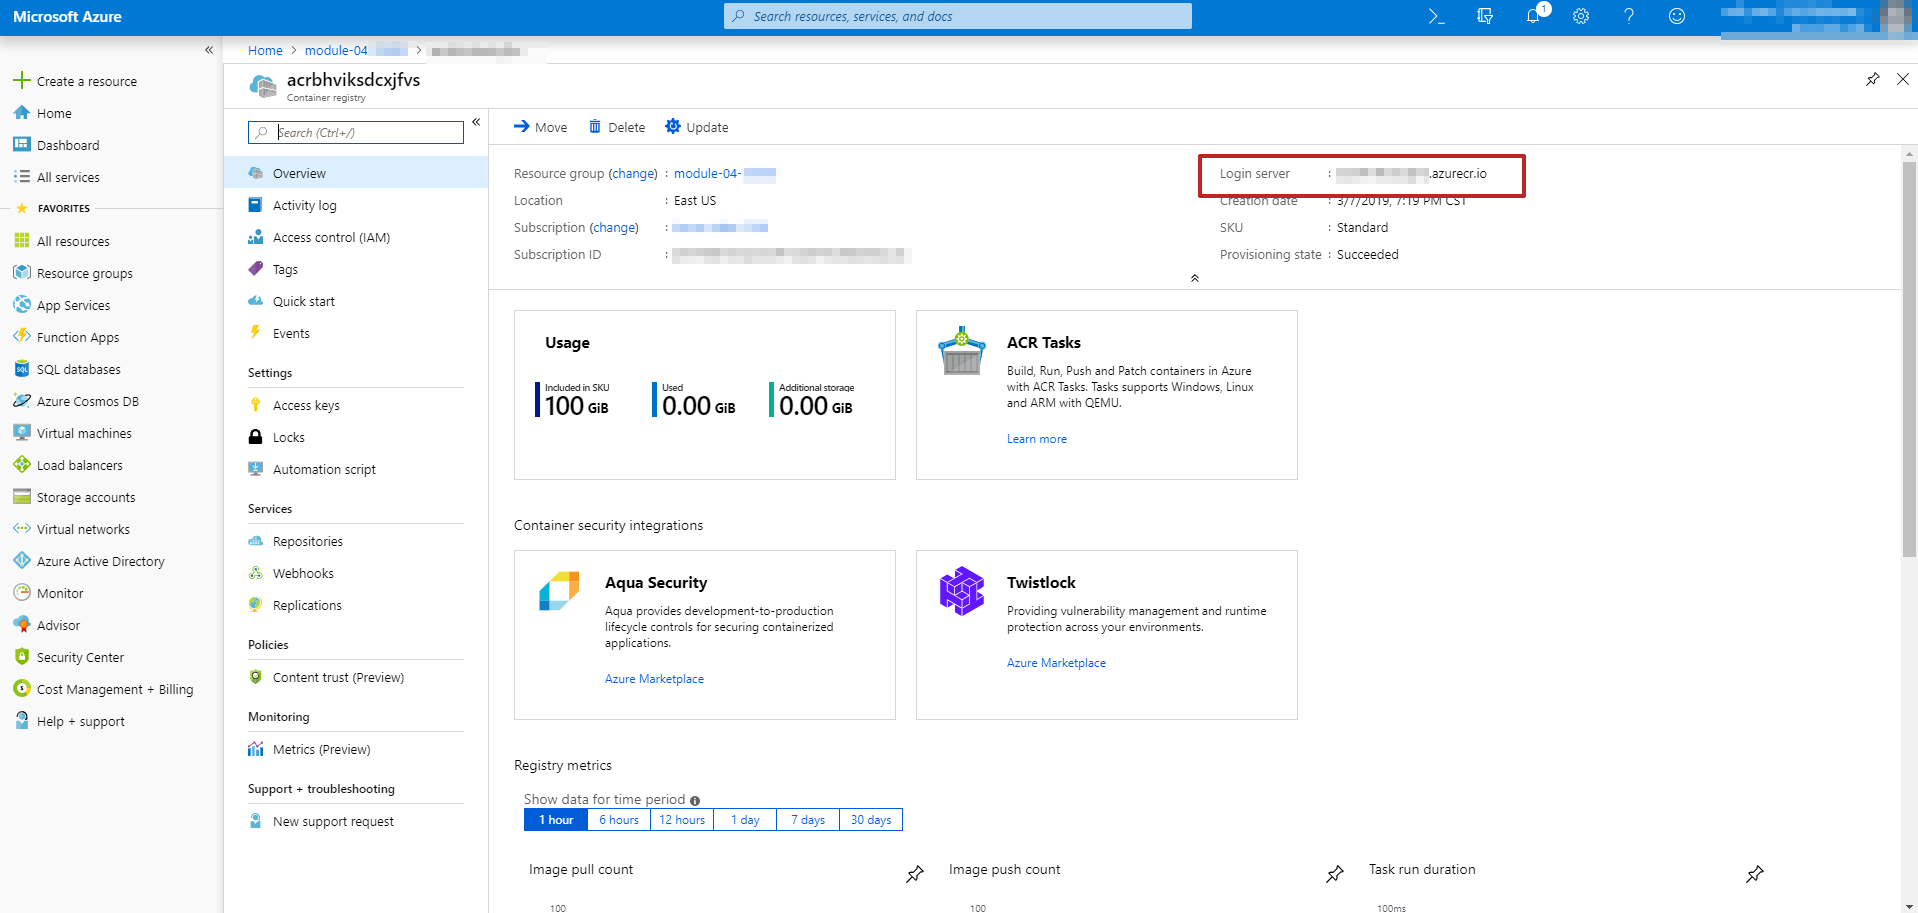
Open your container registry and take note of the login server - It’s recommended to keep this browser tab open as you’ll need these values later.
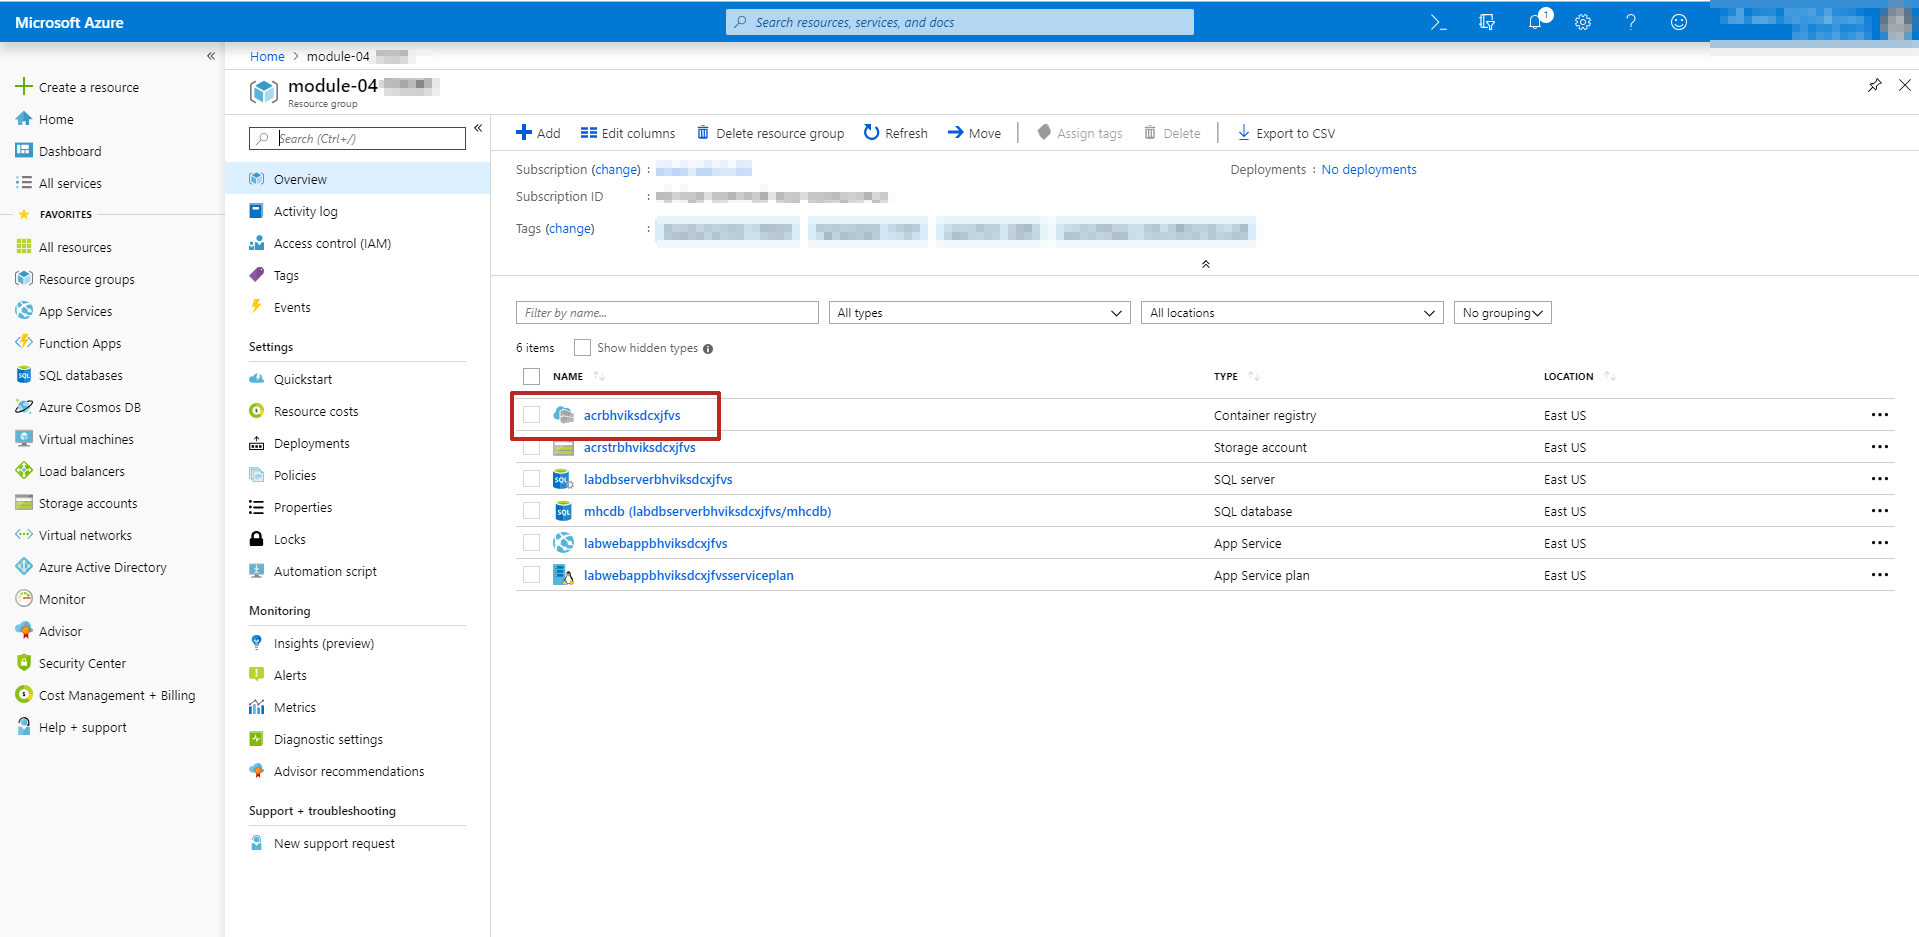
- Go back to your resources open your SQL database and take note of the Server name
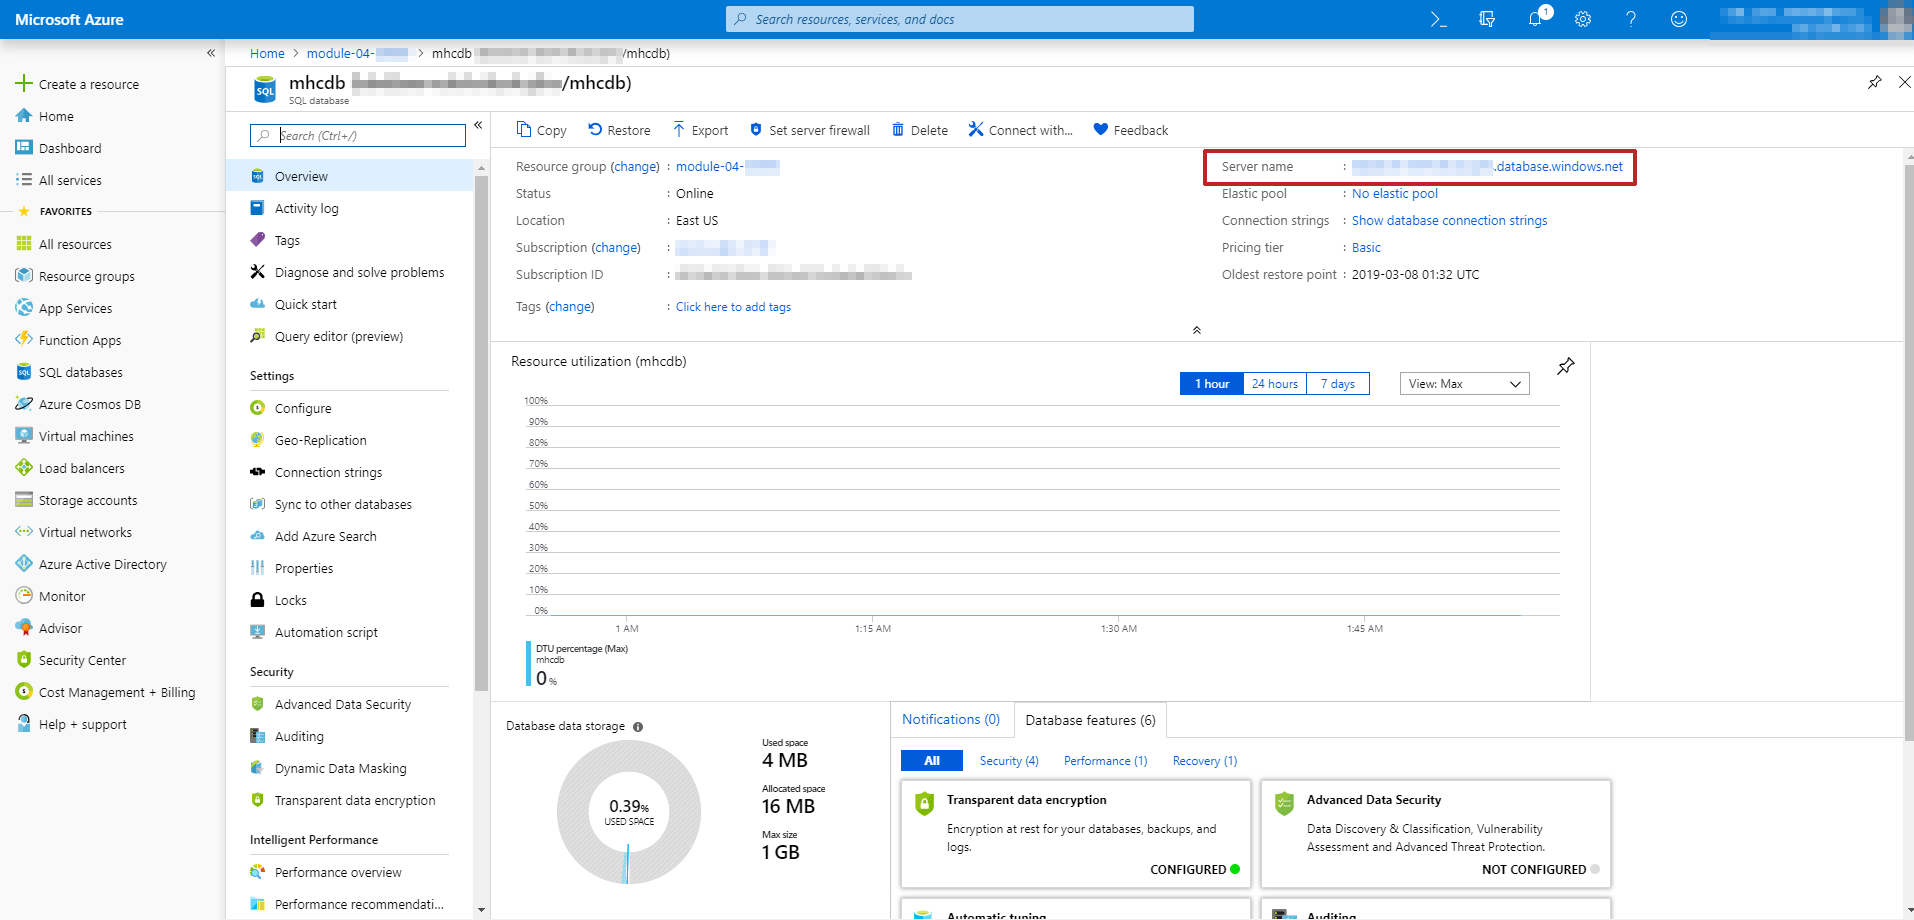
-
Return to Azure DevOps
-
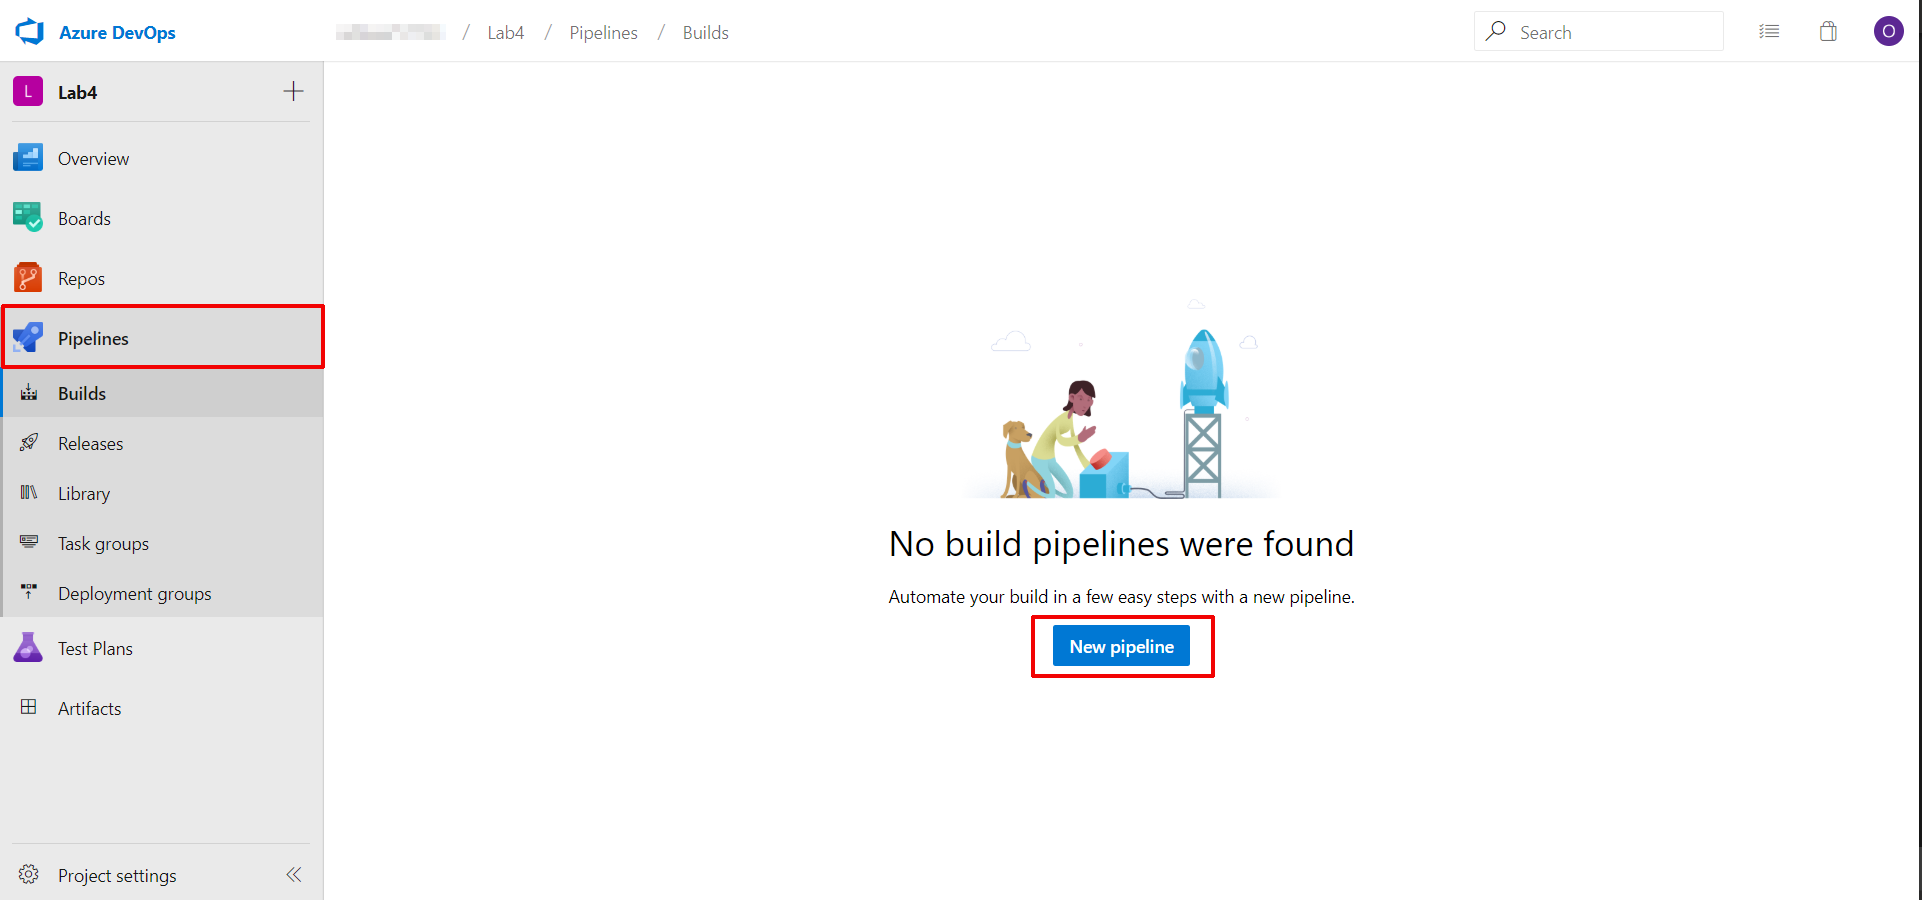
Navigate to the Builds option under the Pipelines tab and select new pipeline
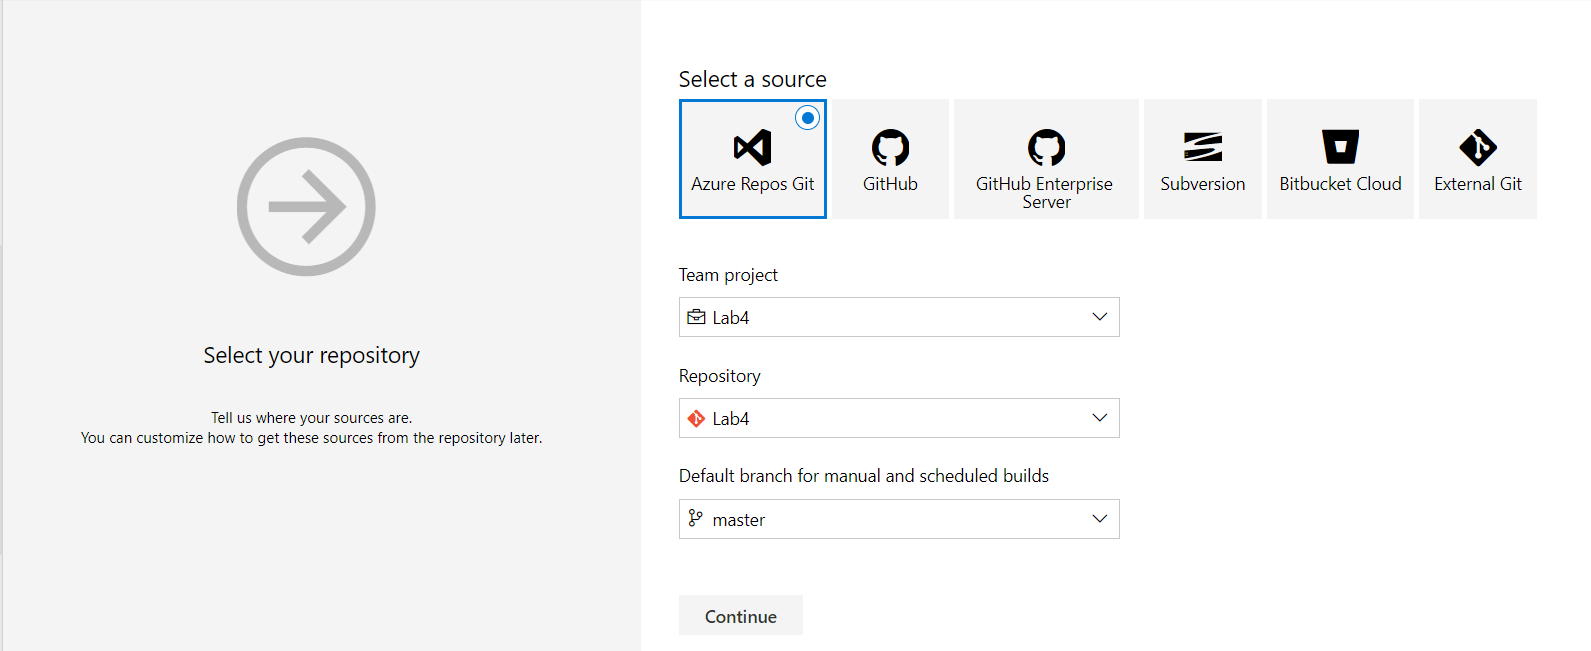
- Select Use the classic editor option
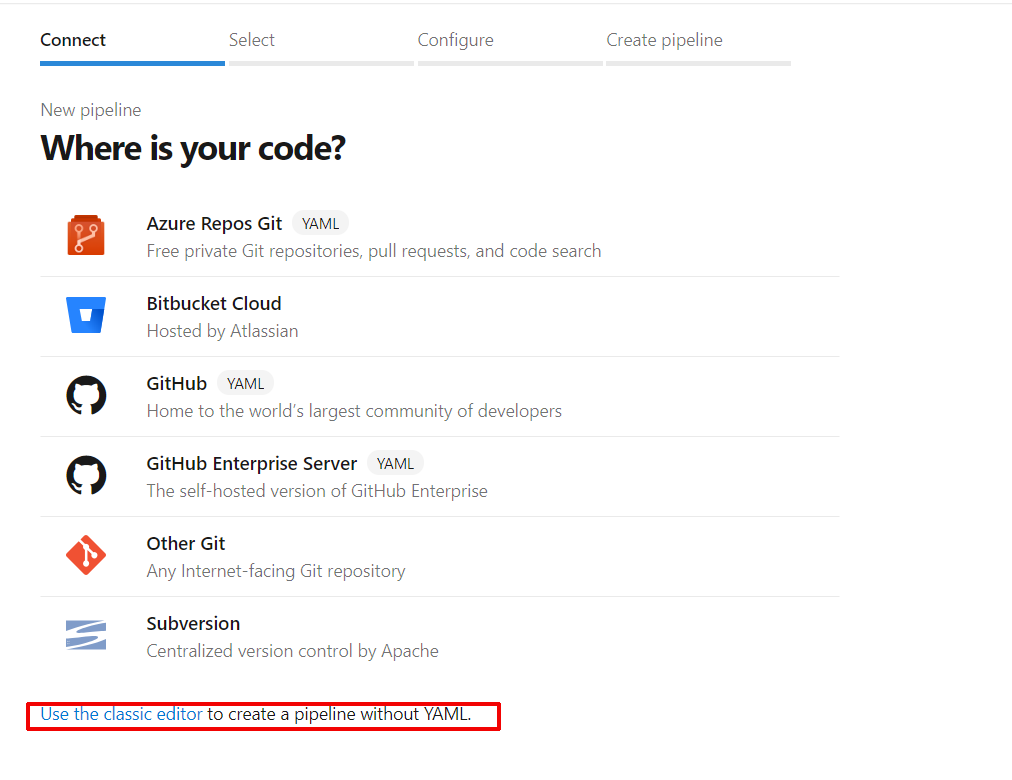
- Select Azure Repos Git and select your project and click on Continue
- Select the Empty job option

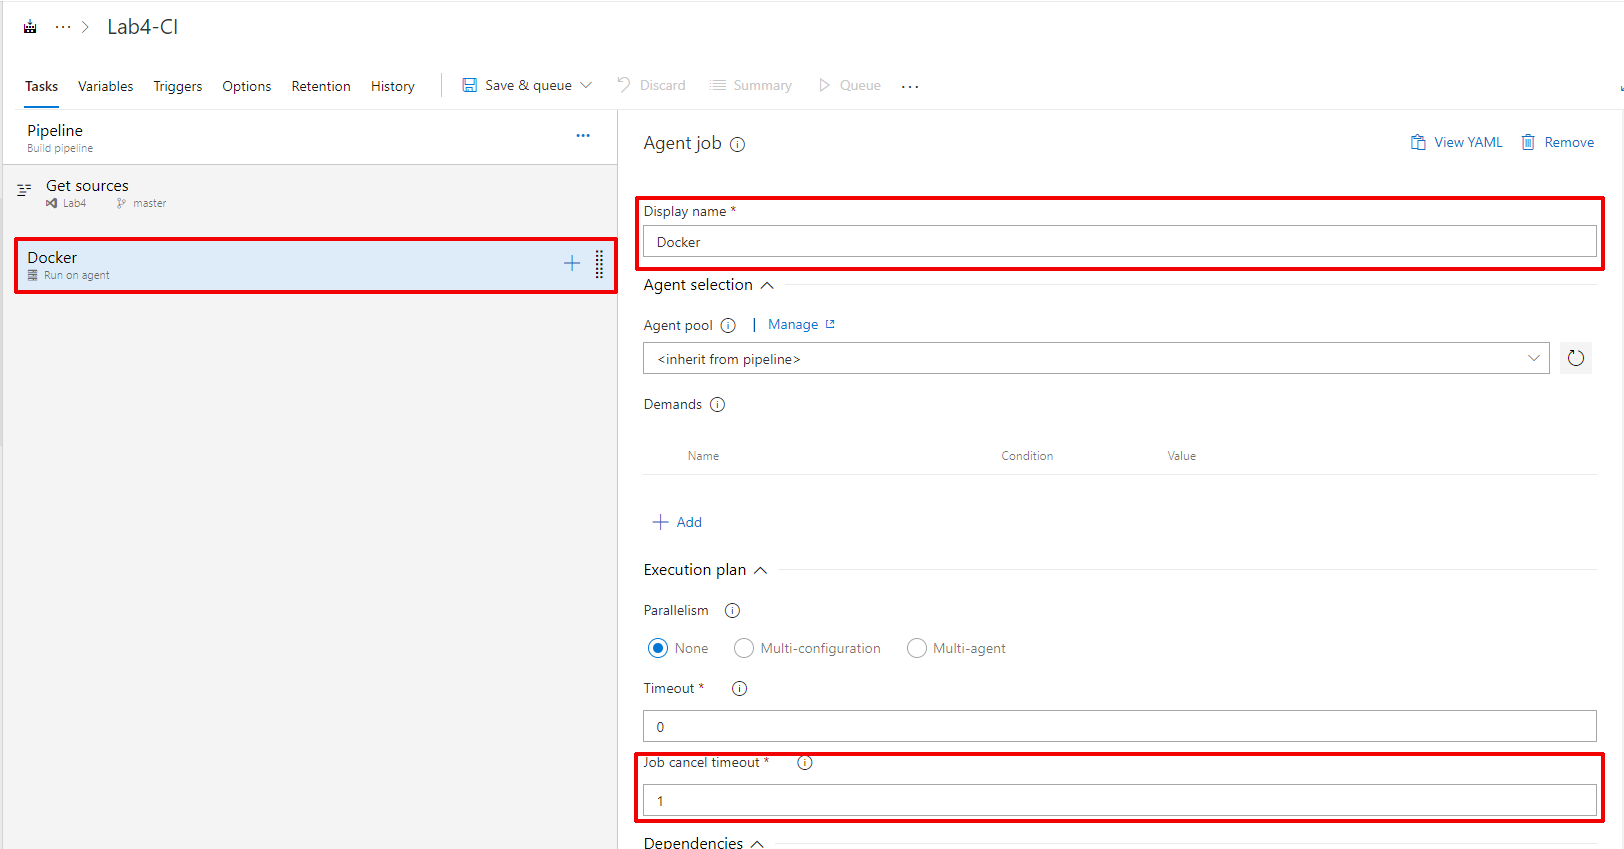
- Click on the Agent job 1 and change the display name to Docker
- On Execution Plan Section set 1 on Job cancel timeout input
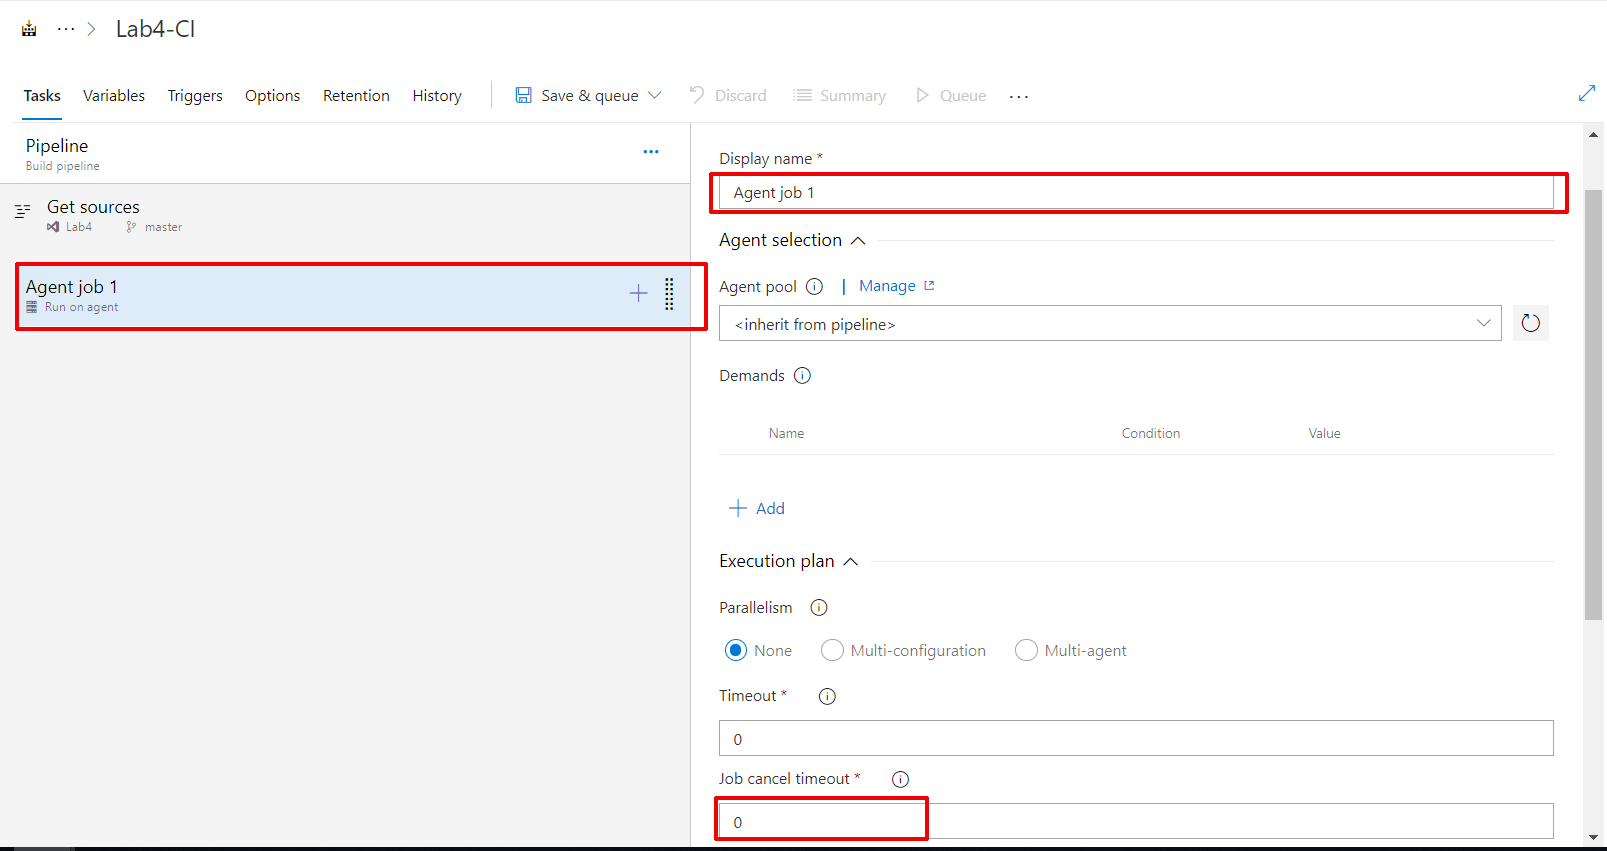 Your configuration should look like this
Task 2: create your Run Services
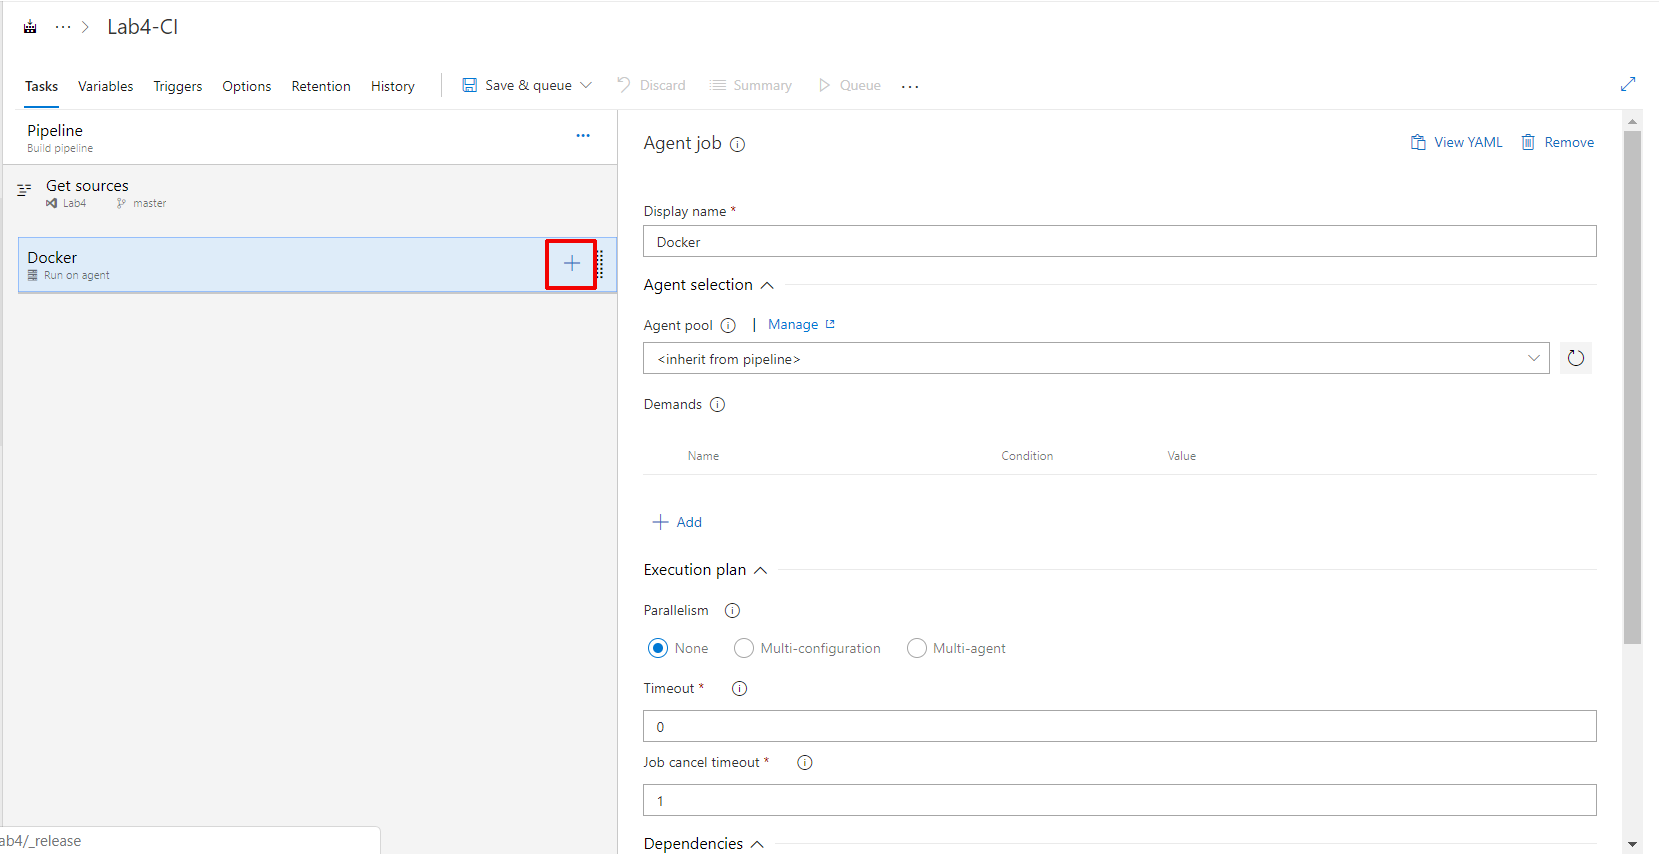
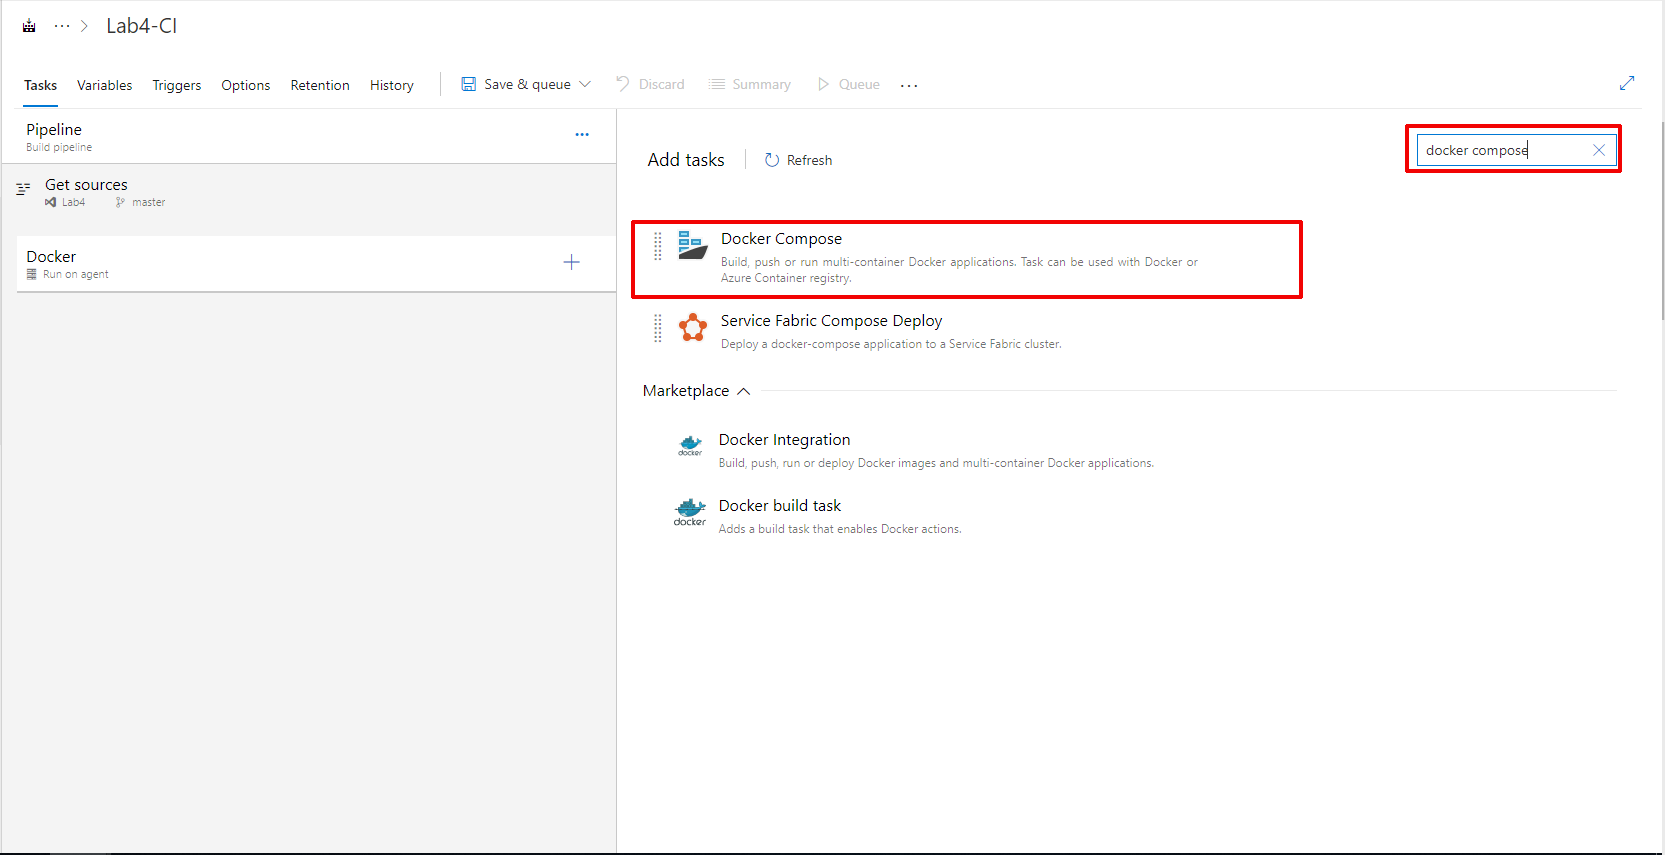
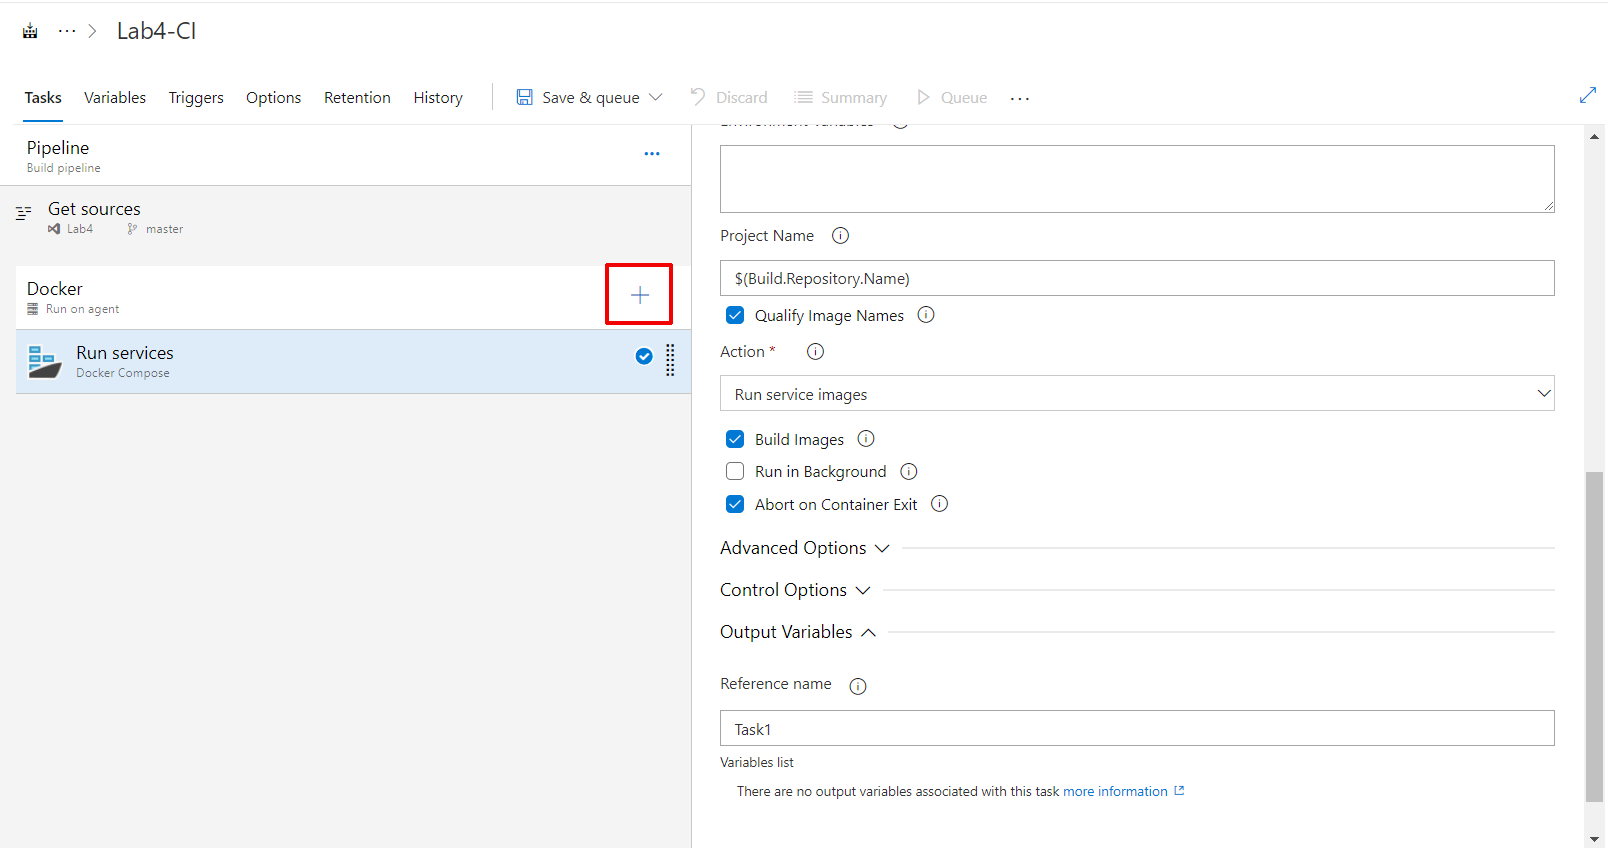
- Click on plus button + on your Docker agent
- Search for docker compose and select the first option
- Set
Run serviceson Display name input and select your azure subscription
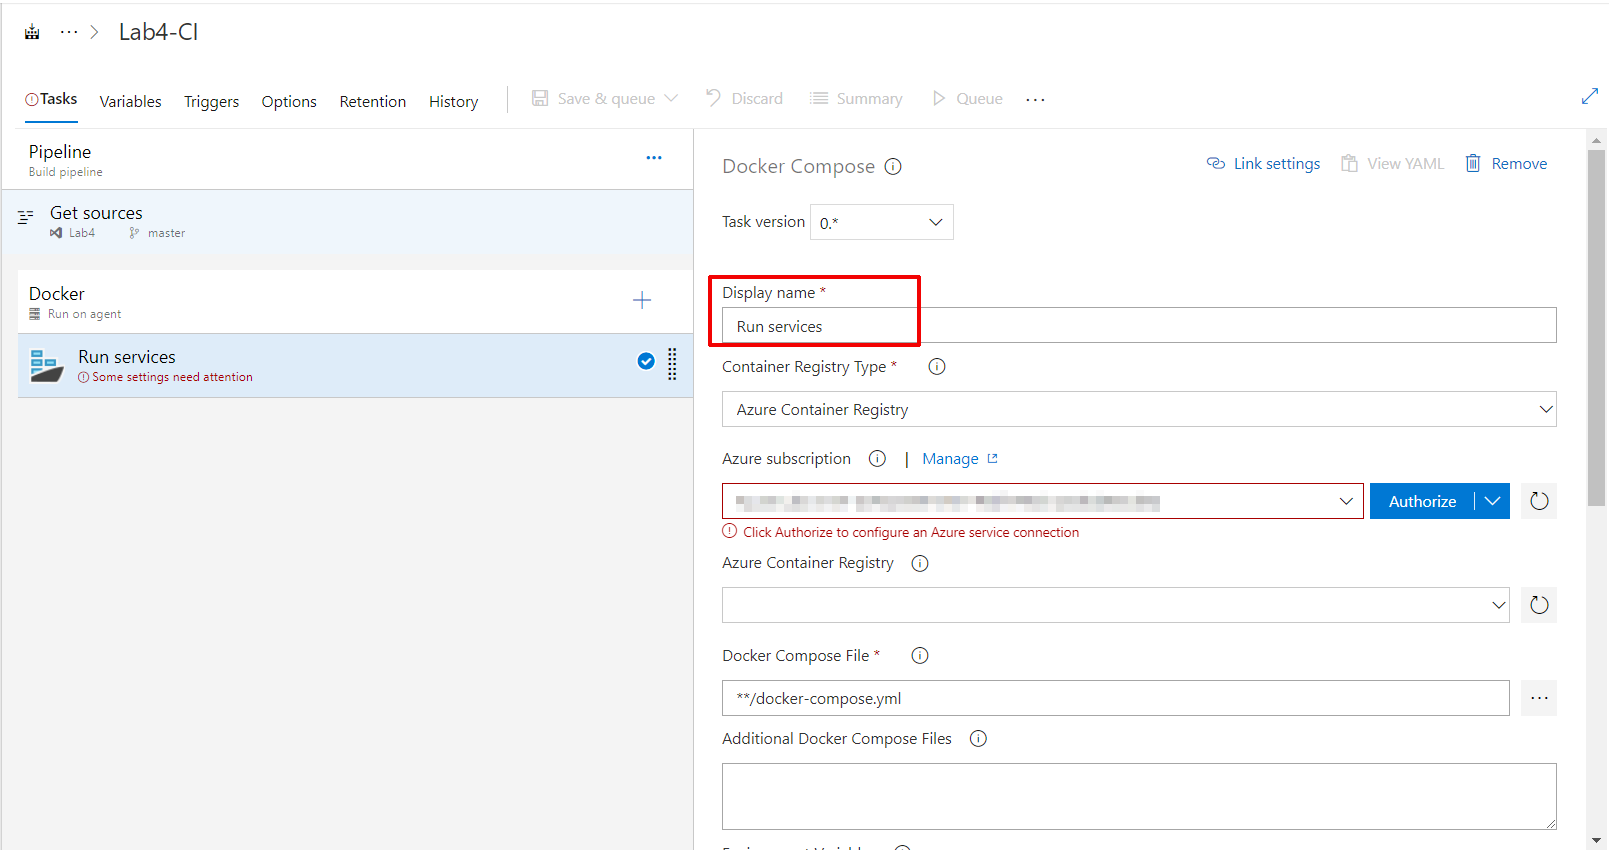
- You can use the authorize button to create a service connection to Azure. If you receive an error, click Advanced options as the image shown
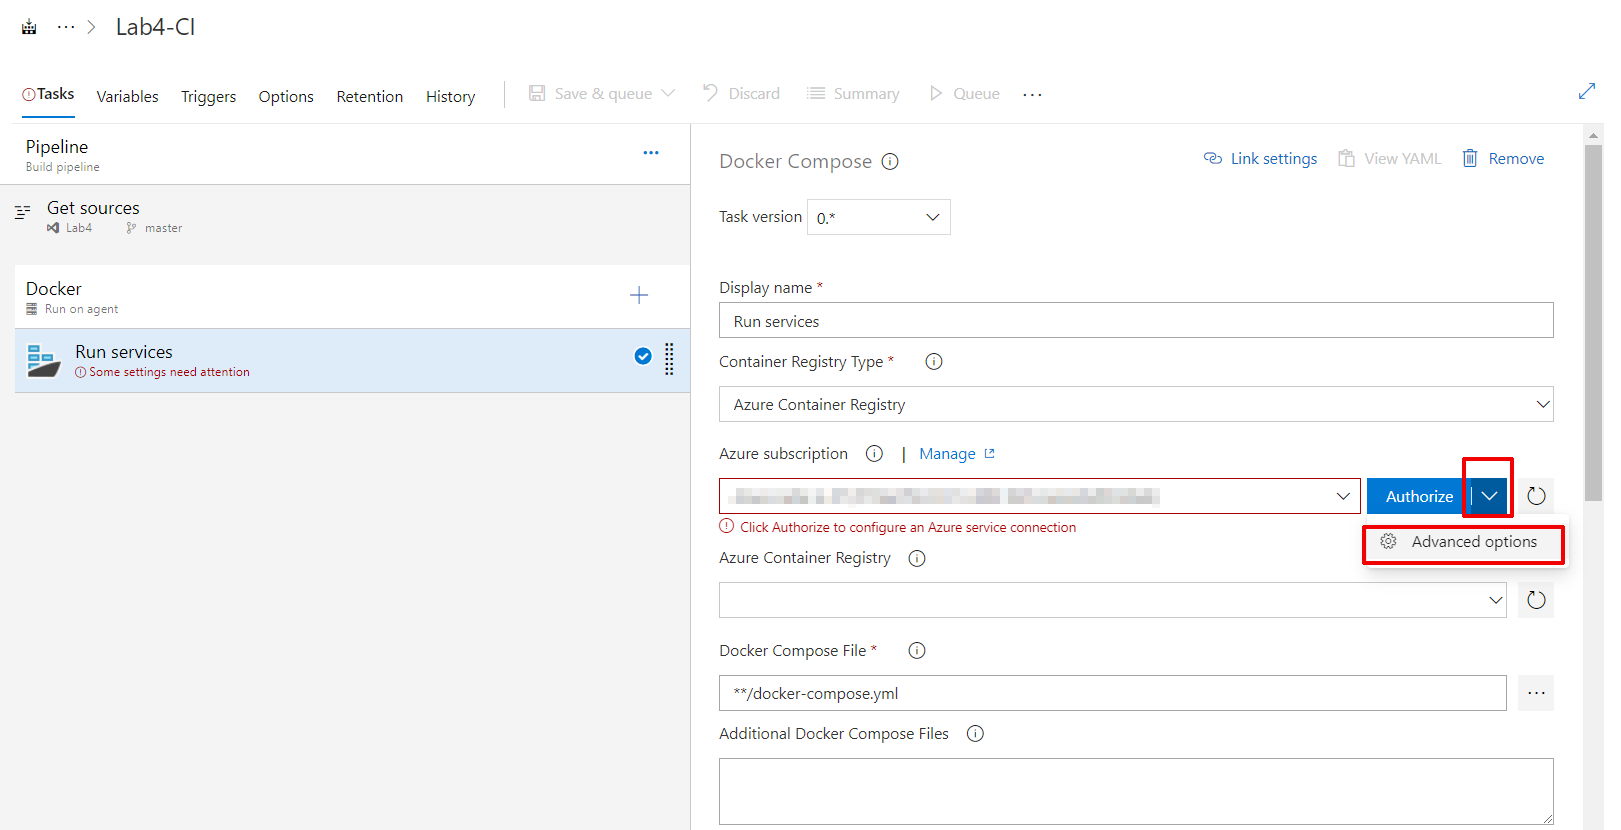
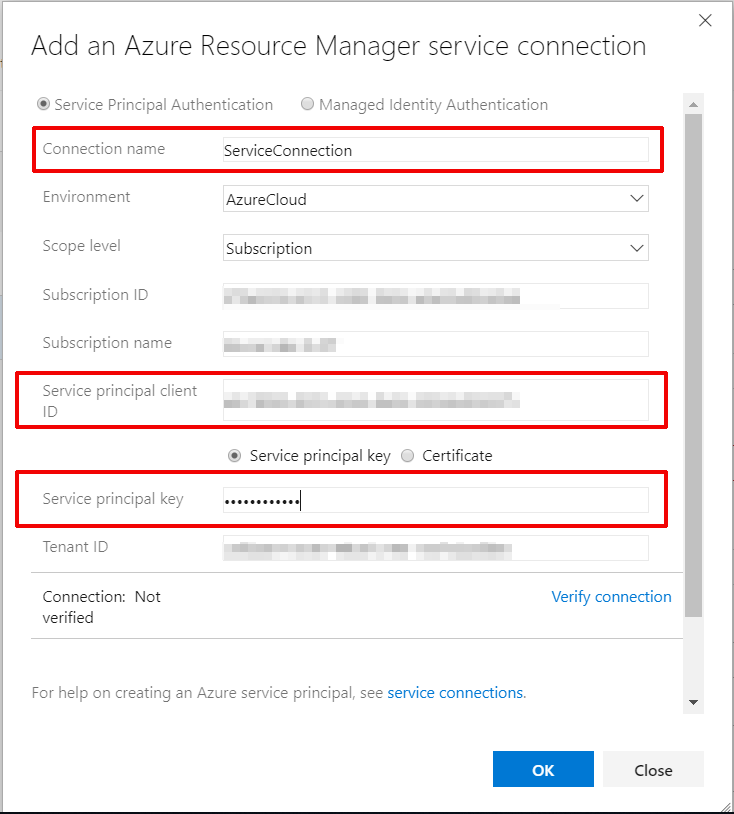
- Click on use the full version of the service connection dialog option
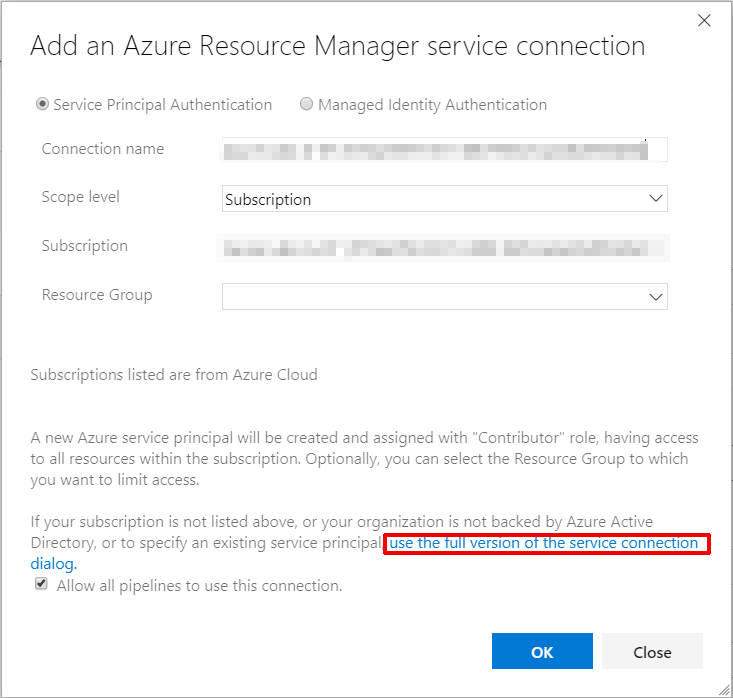
-
Set
serviceConnectionon Connection name input. -
Put your Service Principal Details given at the beginning of the lab and click in Ok
- Application/Client Id
- Application Secret Key
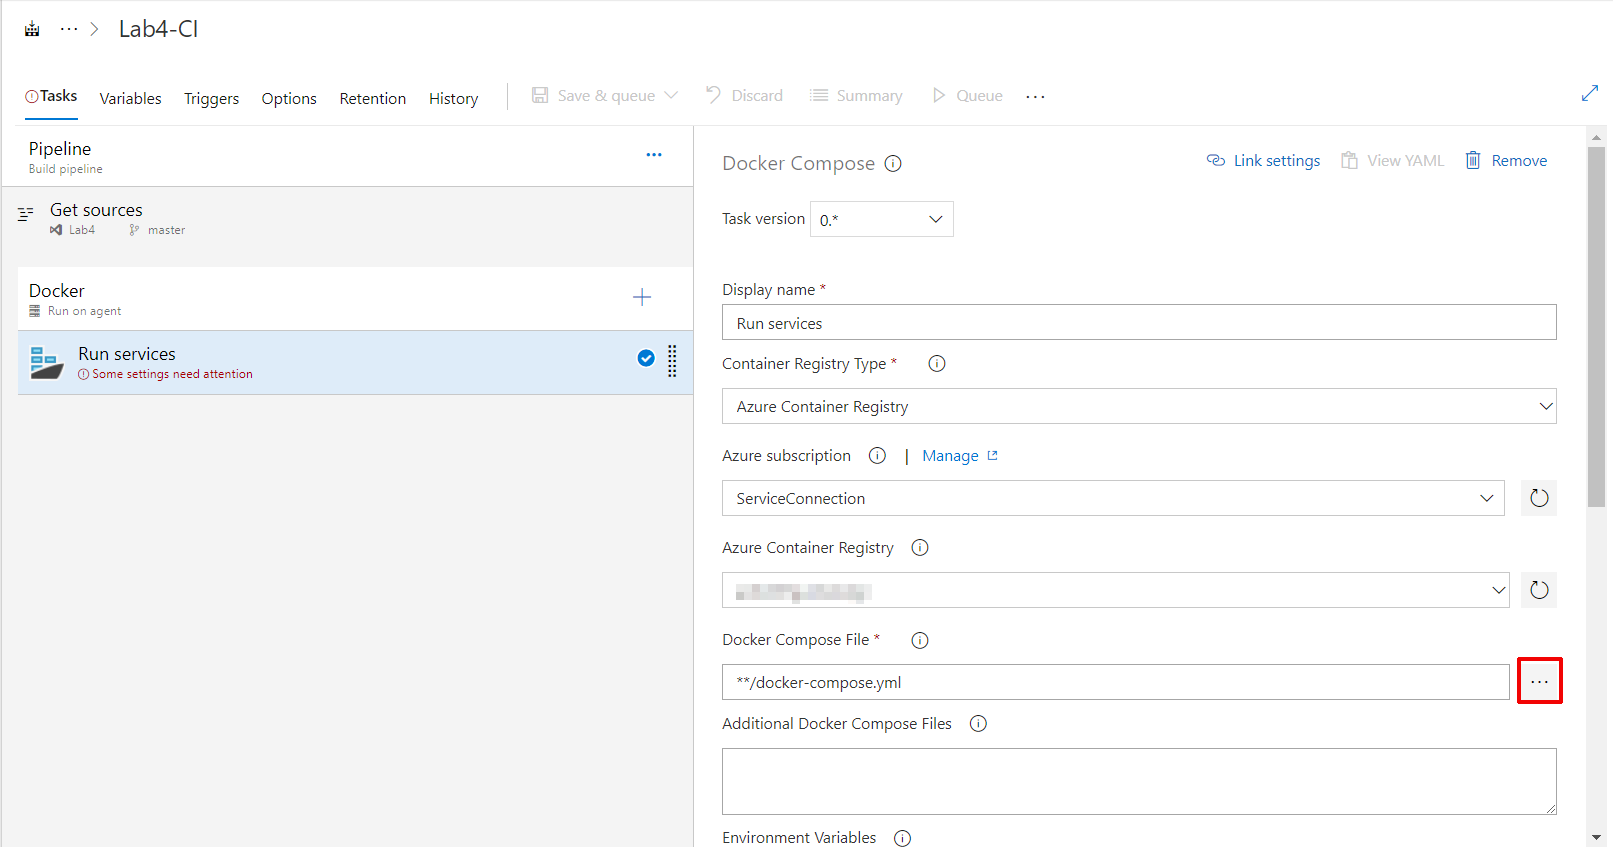
- Select your container registry
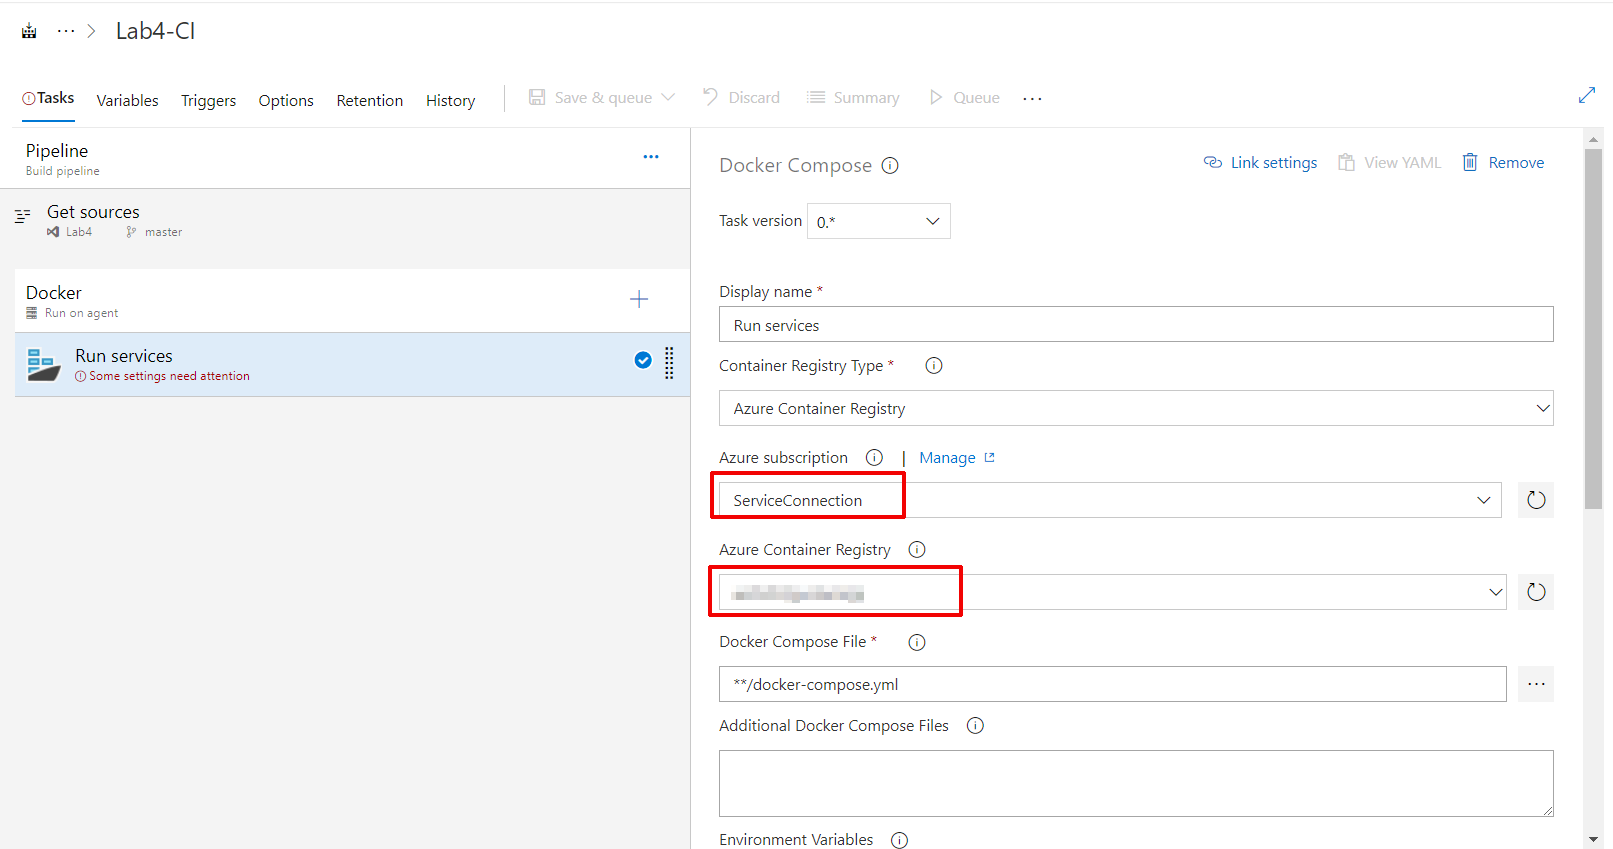
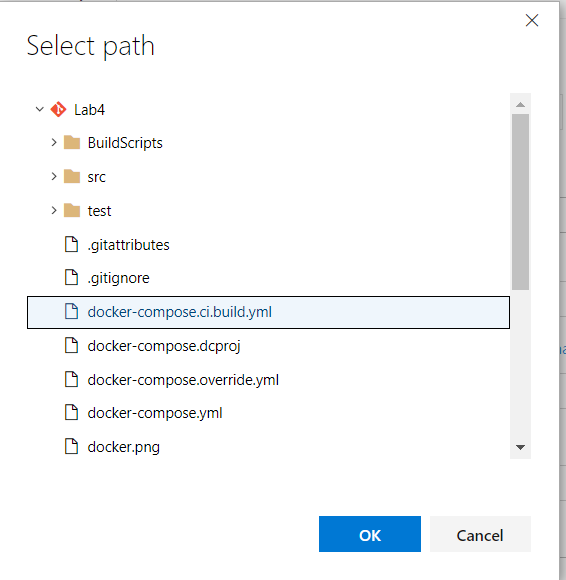
- Click on ellipsis button (…) and search the file docker-compose.ci.build.yml
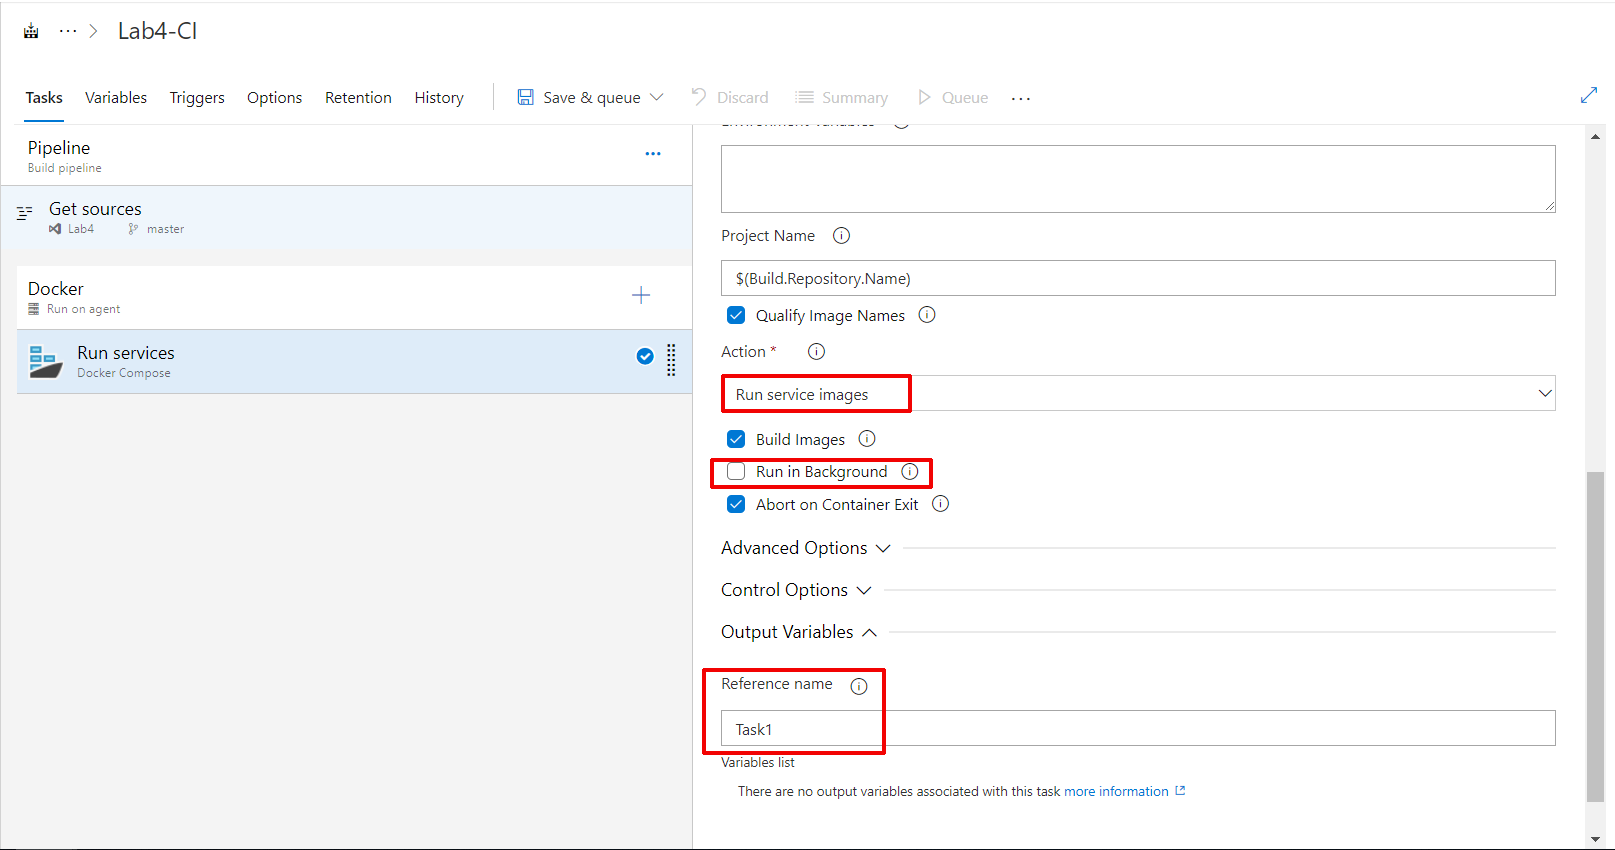
- Go down in your Run services configuration and select Run service images on Action option
- Uncheck the Run in Background option
- In Output Variables set as Task1 in Reference name input
Task 3: create your Build services
- Click on plus button (+) and search again for Docker compose
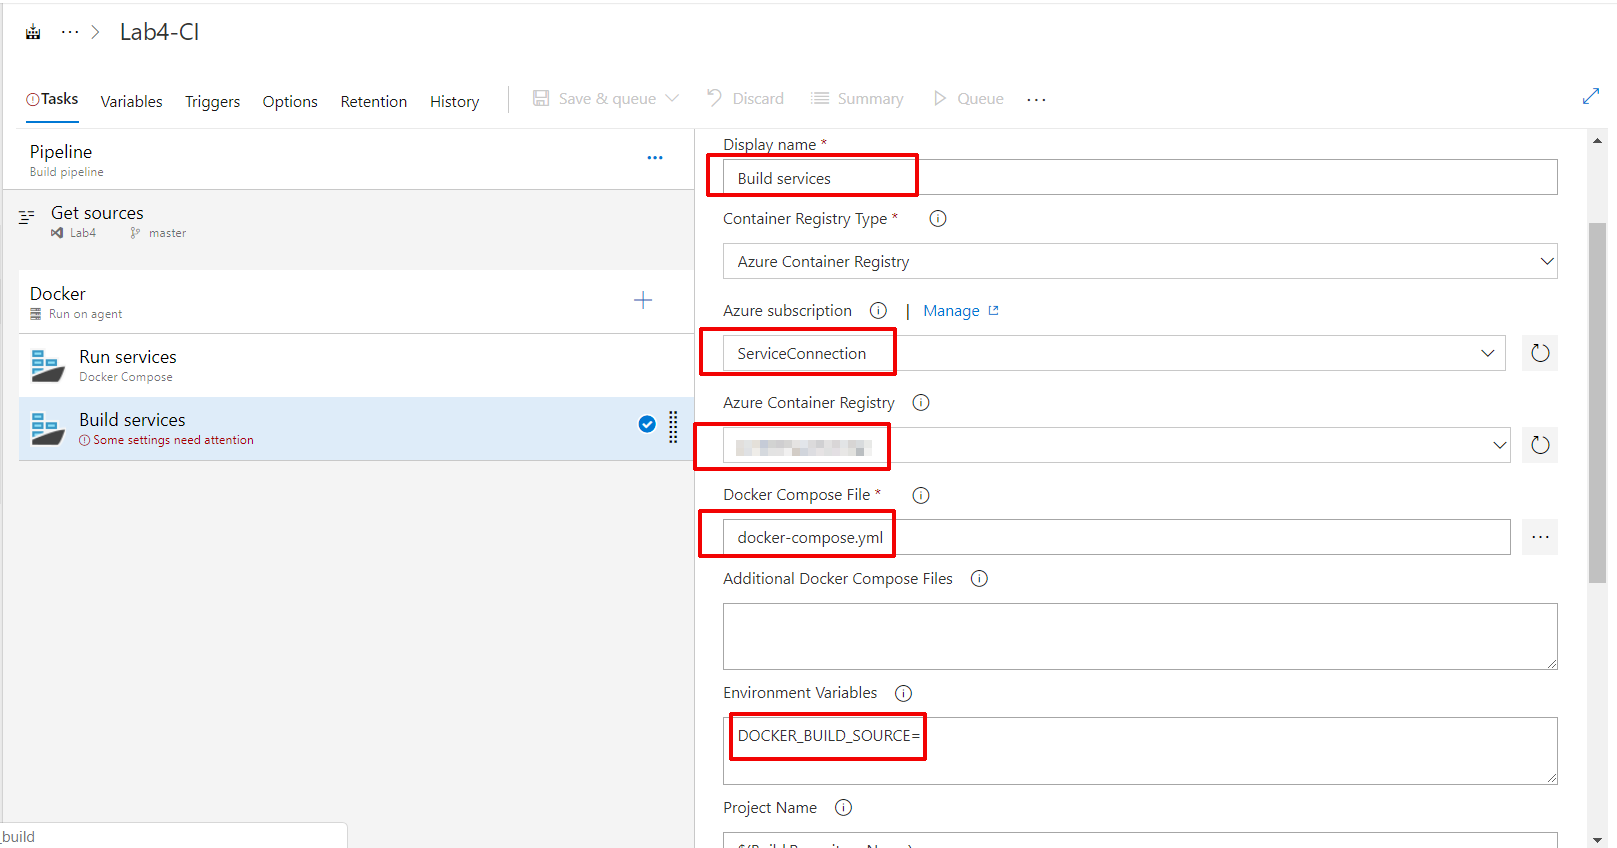
- Set
Build serviceson Display name input - Select your ServiceConnection previously created on Azure subscription
- Select your Azure Container registry
- Search the docker-compose.yml file clicking on the Ellipsis button (…), selecting the file and clicking Ok
- Put this line
DOCKER_BUILD_SOURCE=on your Environment Variables
Your config should look like this
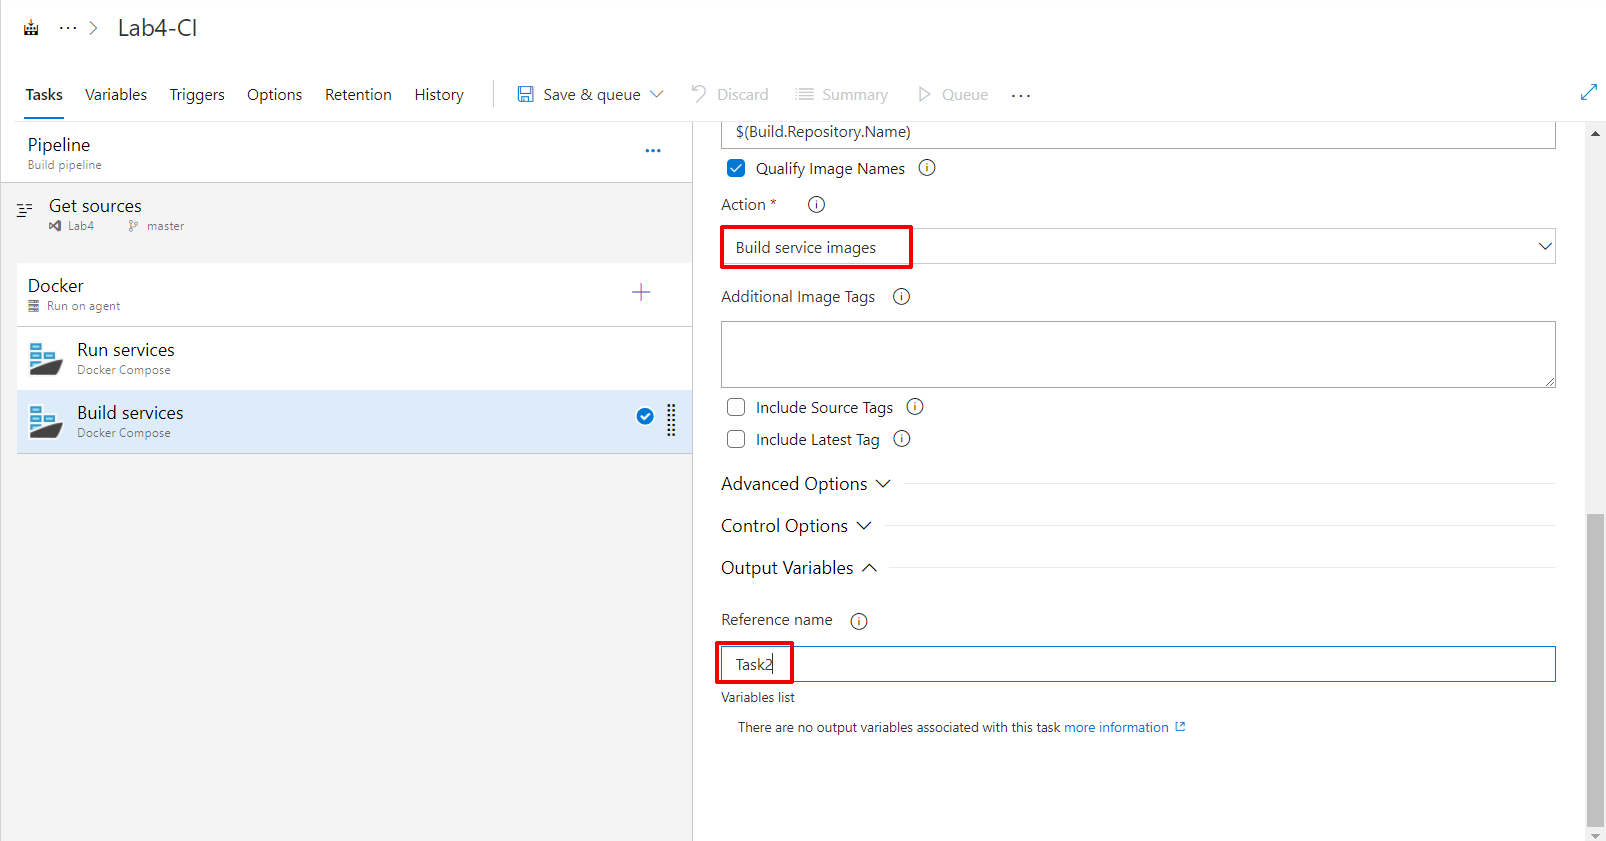
- Go down and select Build service images on Action dropdown
- Set as
Task2on Reference name on Output Variables section
Task 4: Create your Push services
- Click on plus button (+) and search again for Docker compose
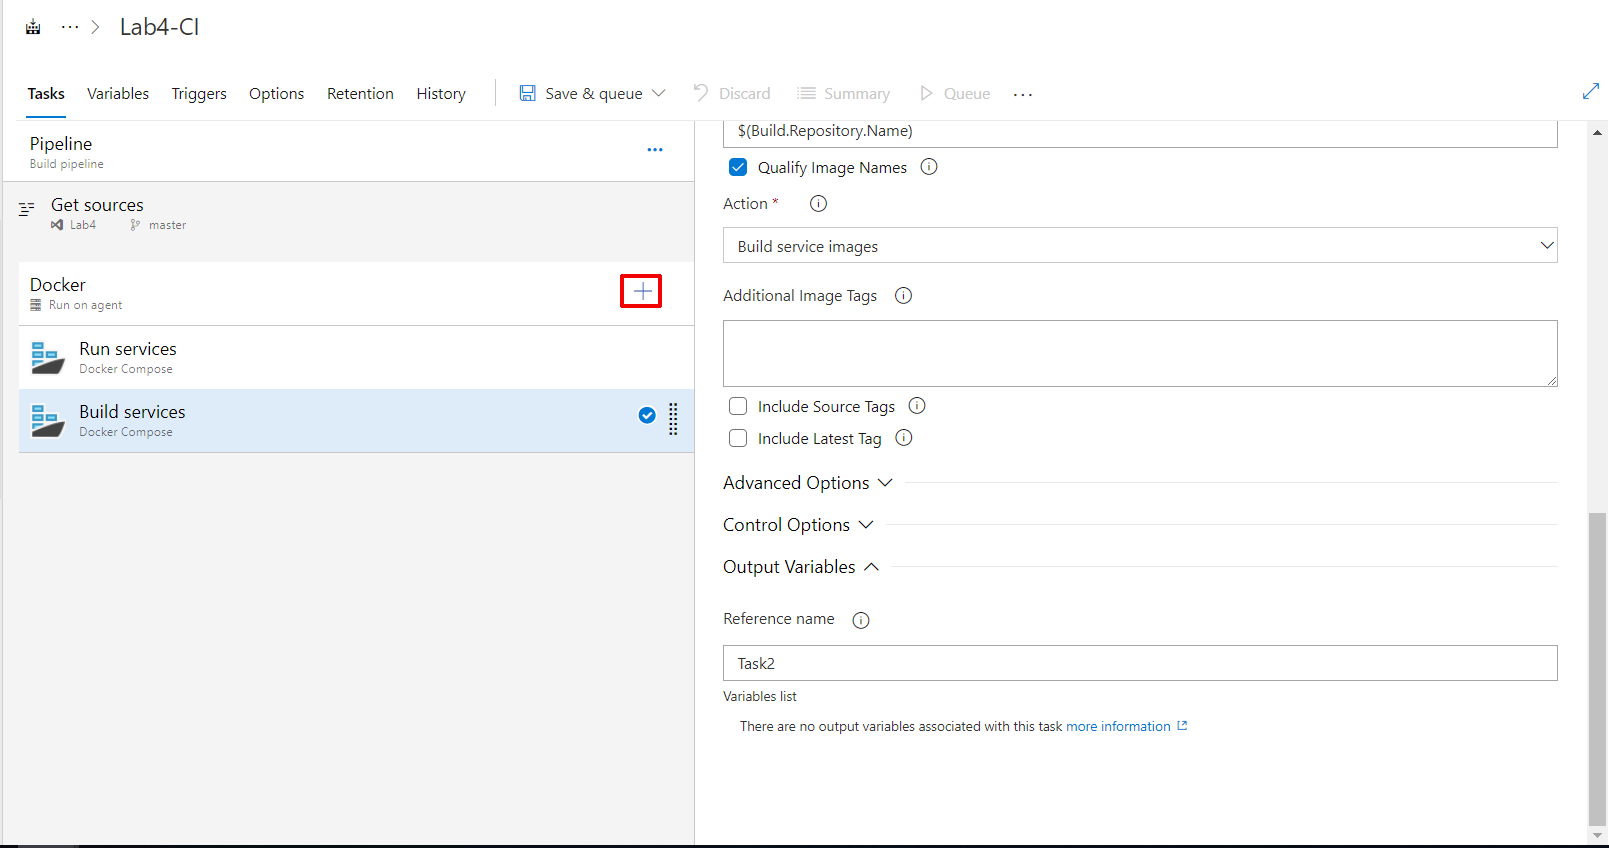
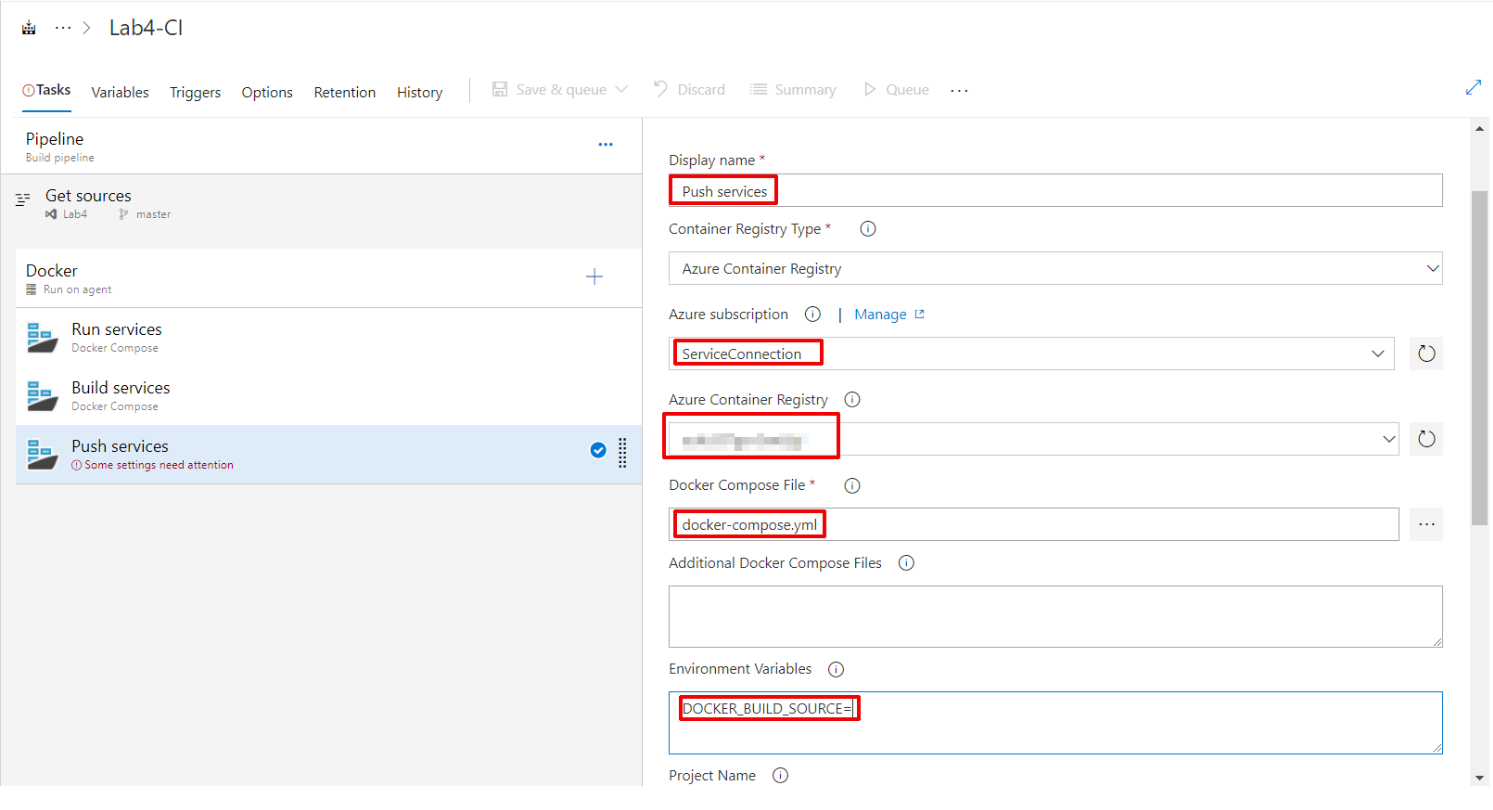
- Set
Push serviceson Display name input - Select your ServiceConnection previously created on Azure subscription
- Select your Azure Container registry
- Search the docker-compose.yml file clicking on the Ellipsis button (…), selecting the file and clicking Ok
- Put this line
DOCKER_BUILD_SOURCE=on your Environment Variables
Your config should look like this
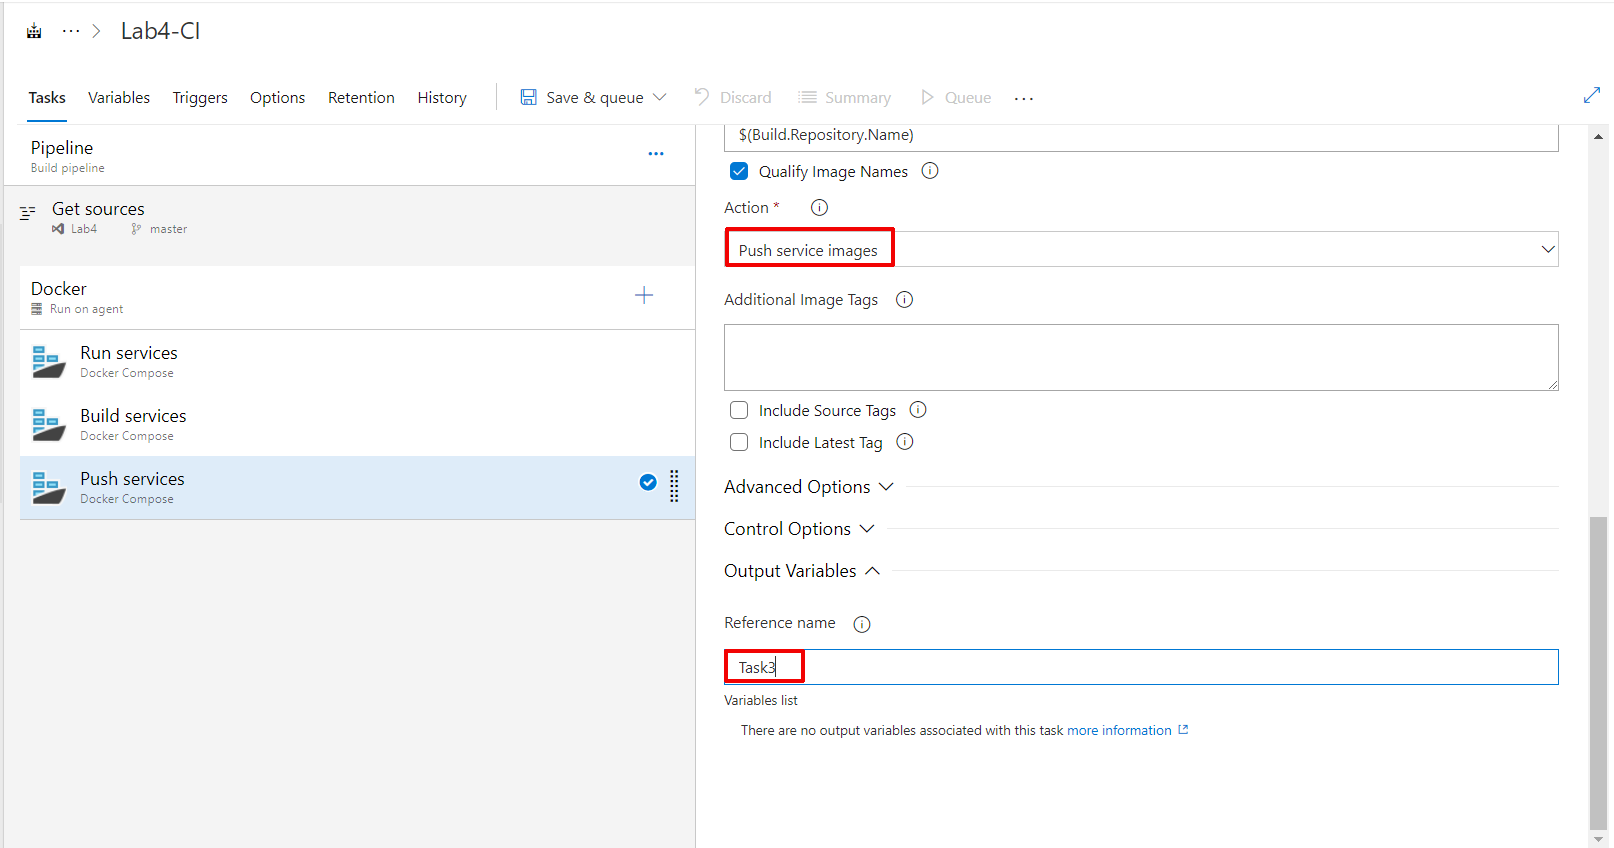
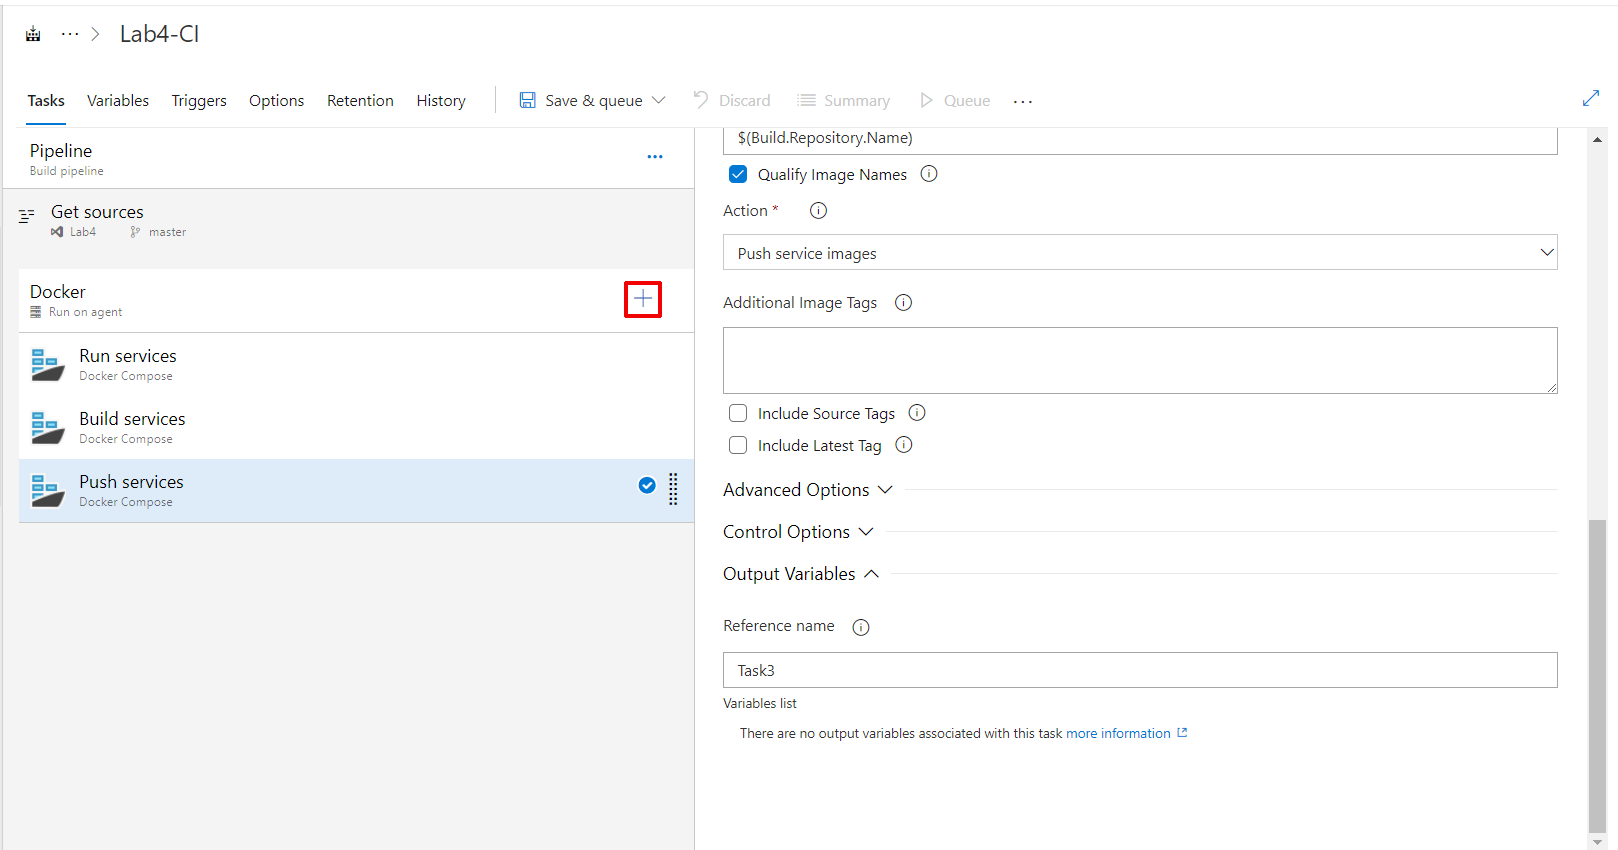
- Go down and select Push service images on Action dropdown
- Set as
Task3on Reference name on Output Variables section
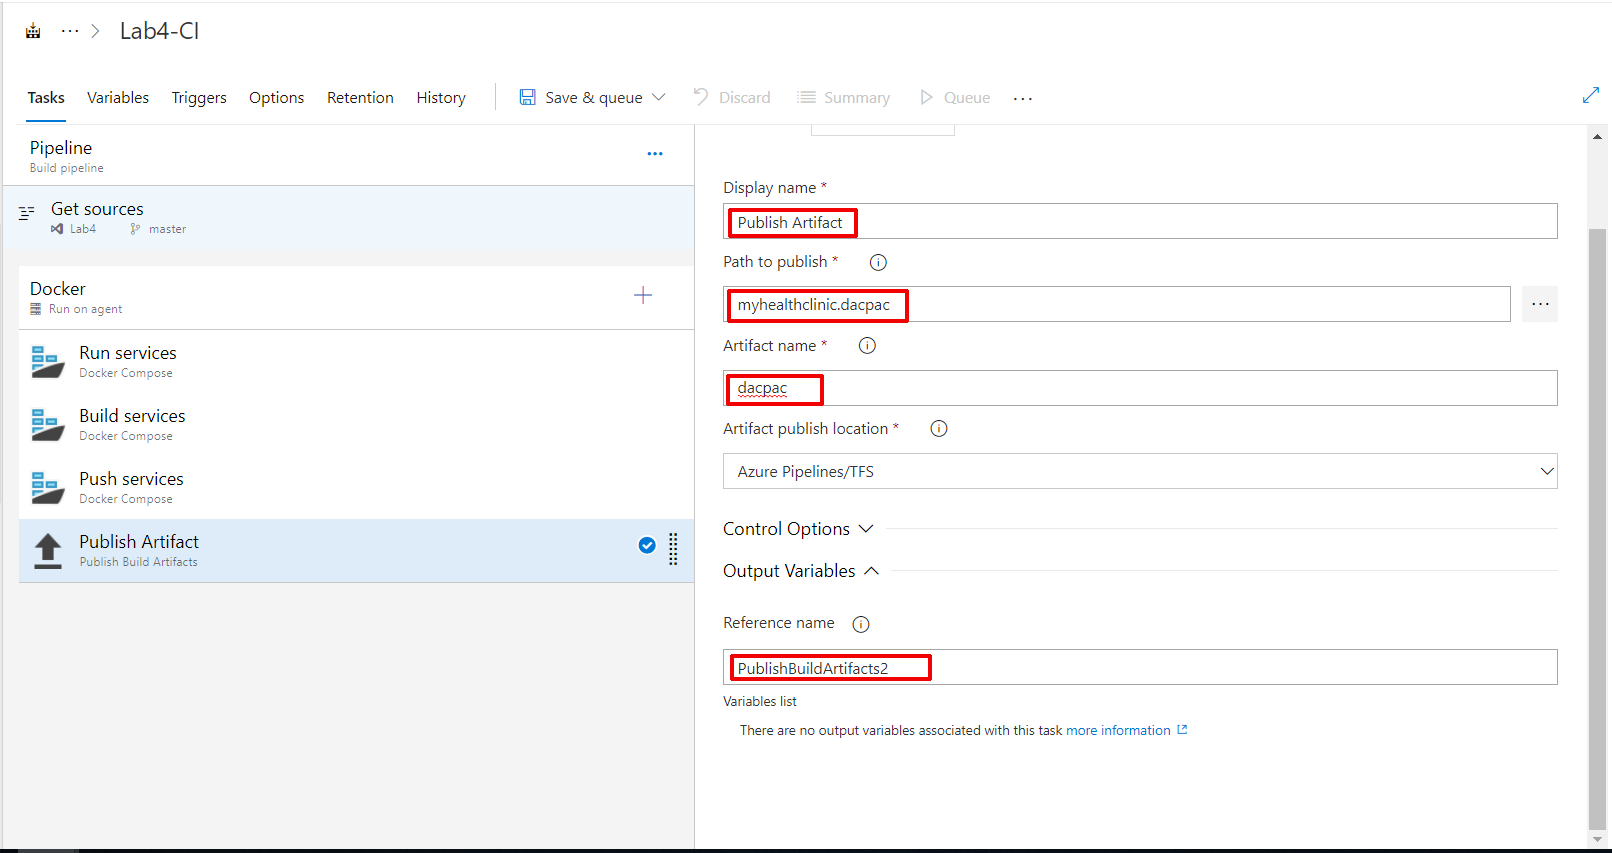
Task 5: create your Publish Artifact
- Click on plus button (+) and search for Publish build artifacts
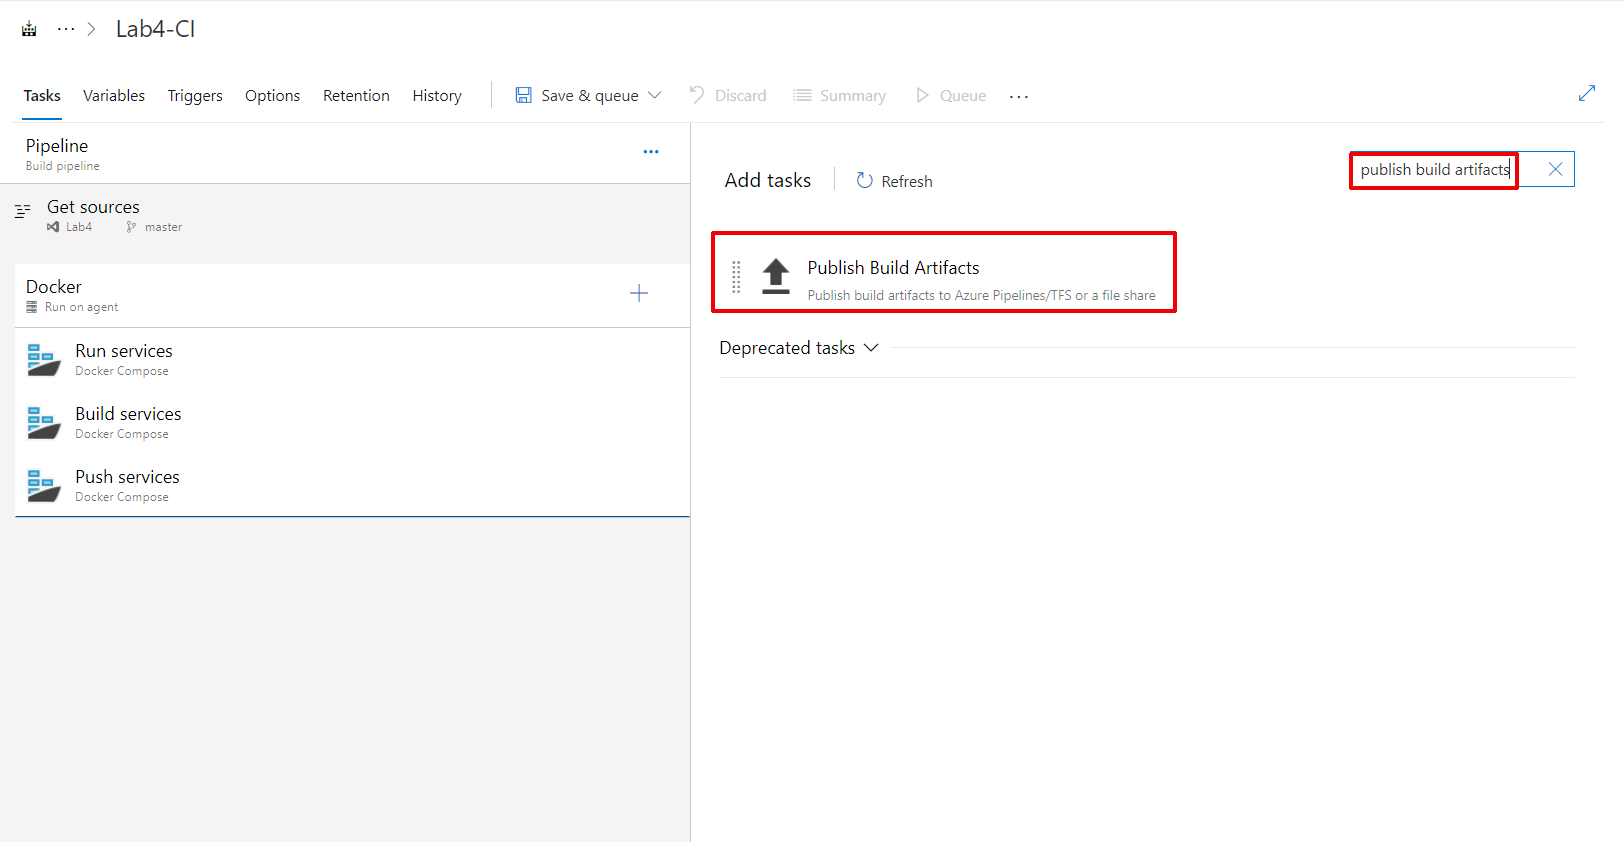
- Set
Publish Artifacton Display name input - Set
myhealthclinic.dacpacon Path to publish input - Set
dacpacon Artifact name input - Set
PublishBuildArtifacts2as your Reference name in the Output variables
Task 6: Set your variables
- Click on Variables tab
- Create these variables clicking on + Add button
- Name: BuildConfiguration Value: Release check the settable at queue time
- Name: BuildPlatform Value: Any CPU

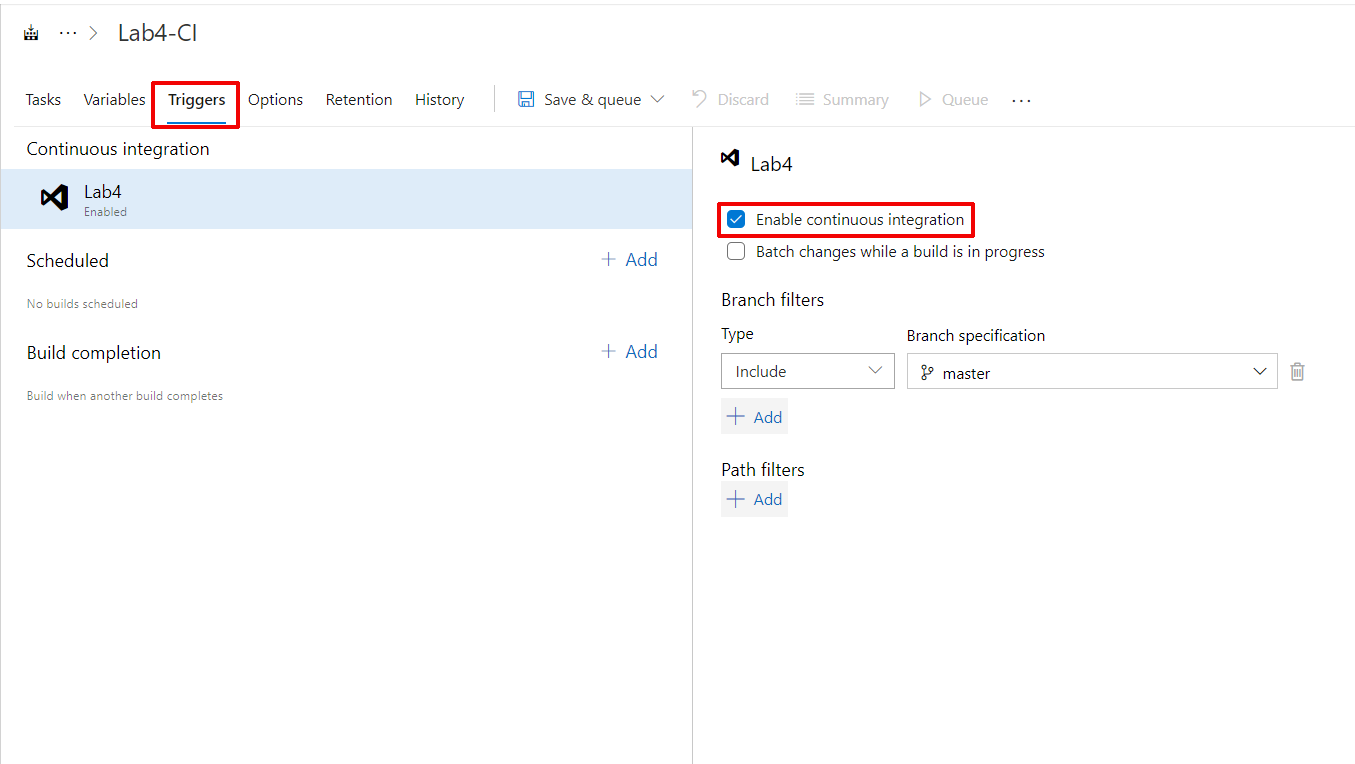
Task 7: config your triggers
- Click on Triggers tab
- Check the Enable continuous integration option
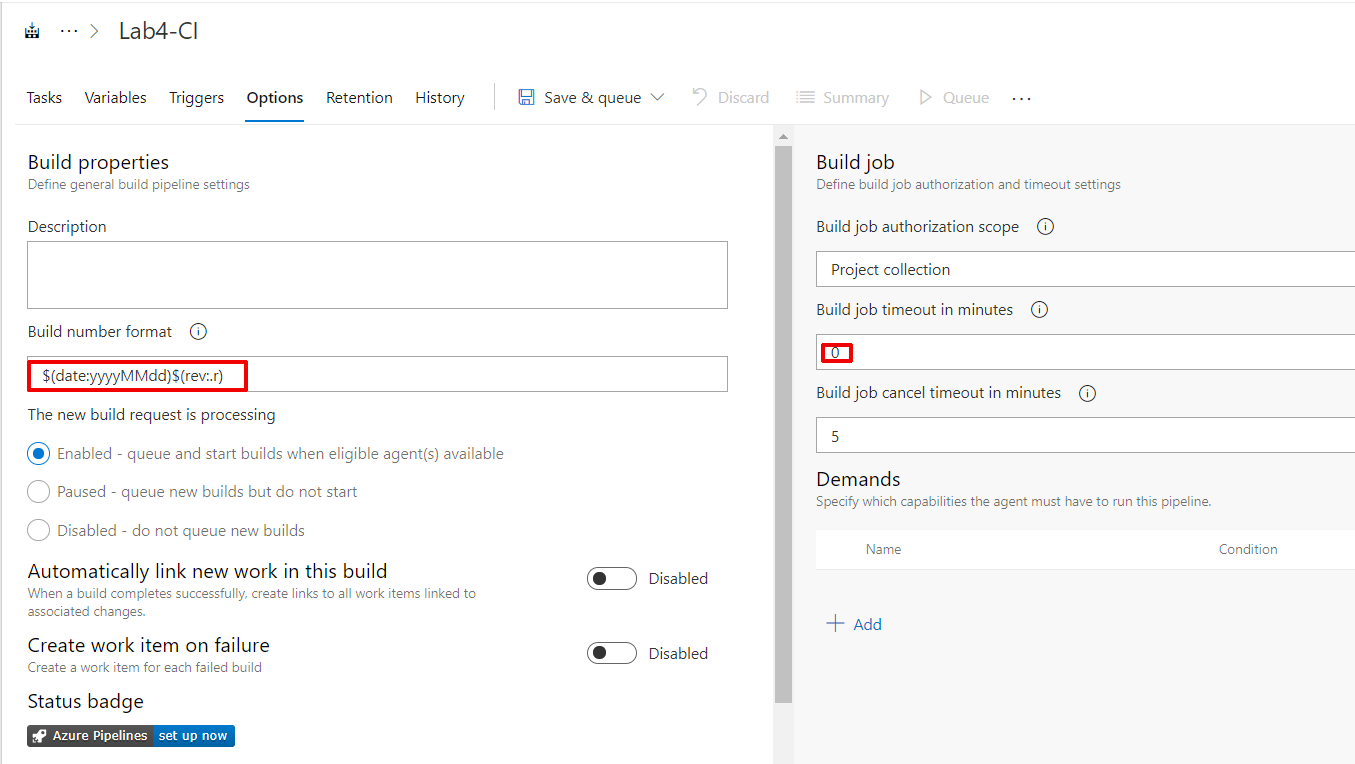
Task 8: config your options
- Click on Options tab
- Put this line
$(date:yyyyMMdd)$(rev:.r)on Build number format - Set as
0on Build job timeout in minutes
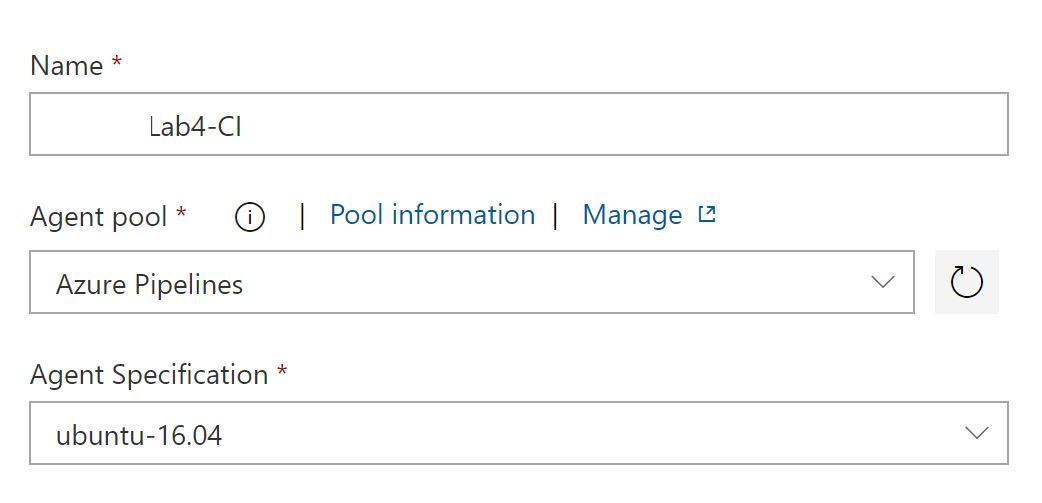
Task 9: Set your host
- Click on Tasks tab
- Click on Pipelines
- Select
- Agent Pool: Azure Pipelines
- Agent Specification: Ubuntu 16.04
- Click on Save & queue dropdown and select the save option
- Put any comment you want
Exercise 3: configure your Continuous Delivery
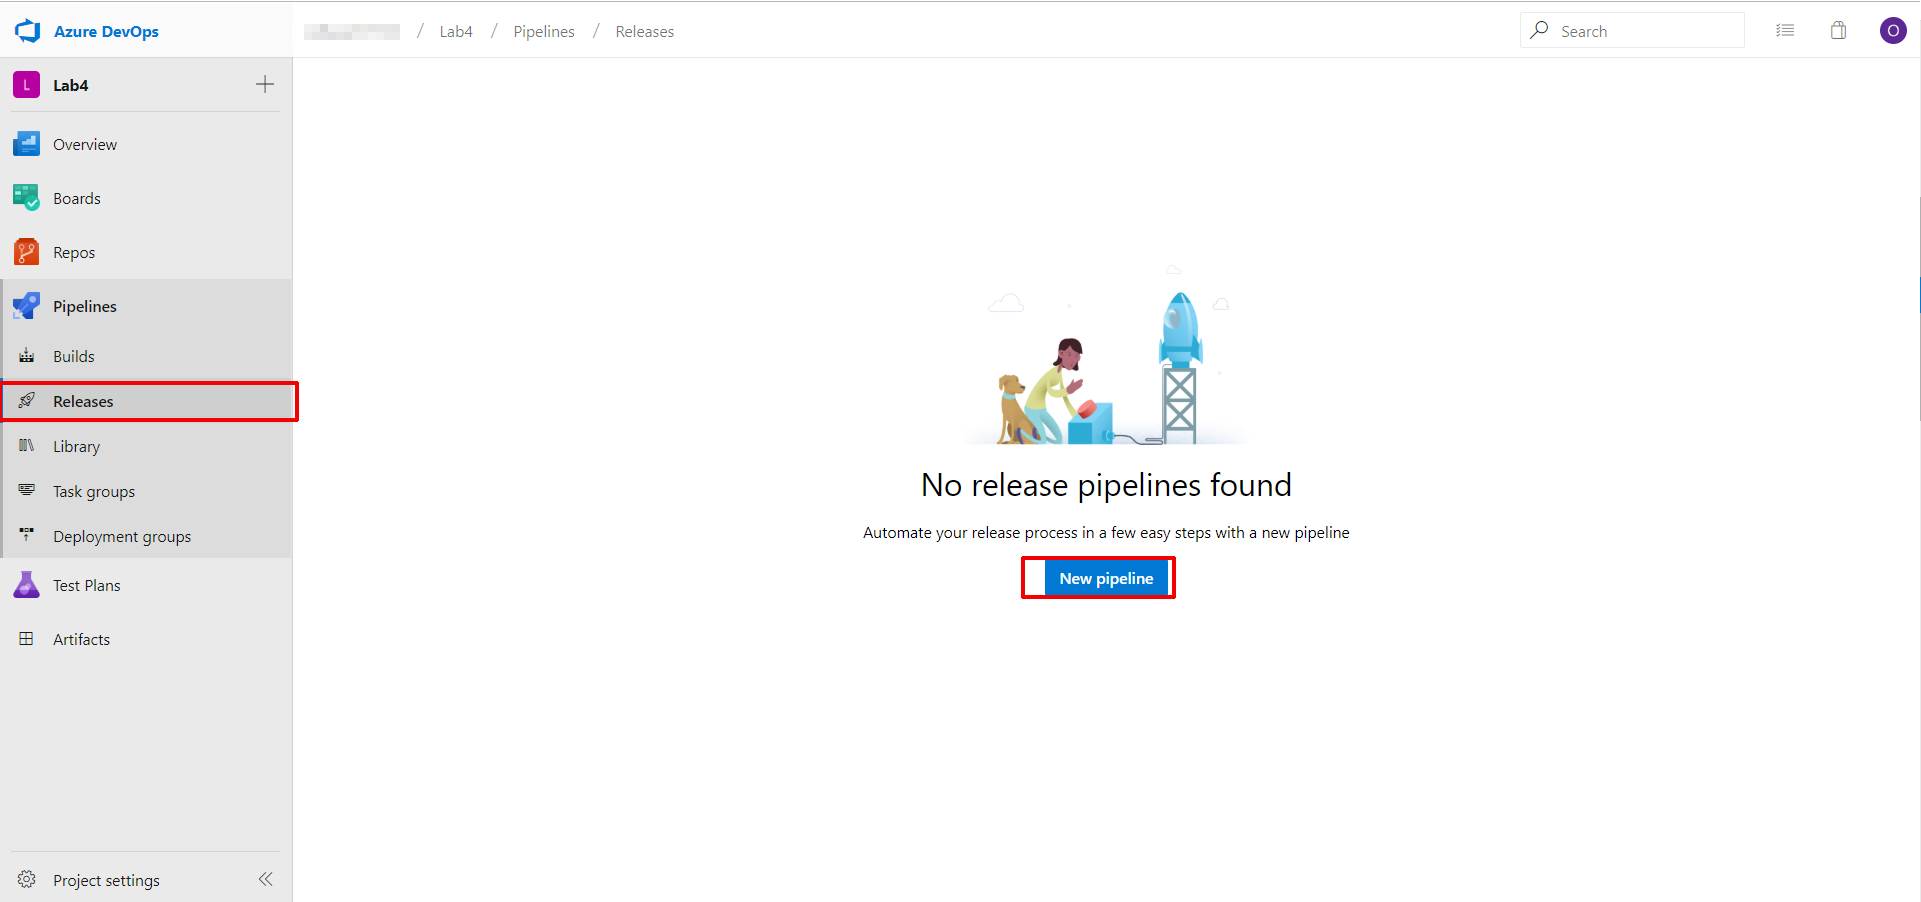
Task 1: create the pipeline
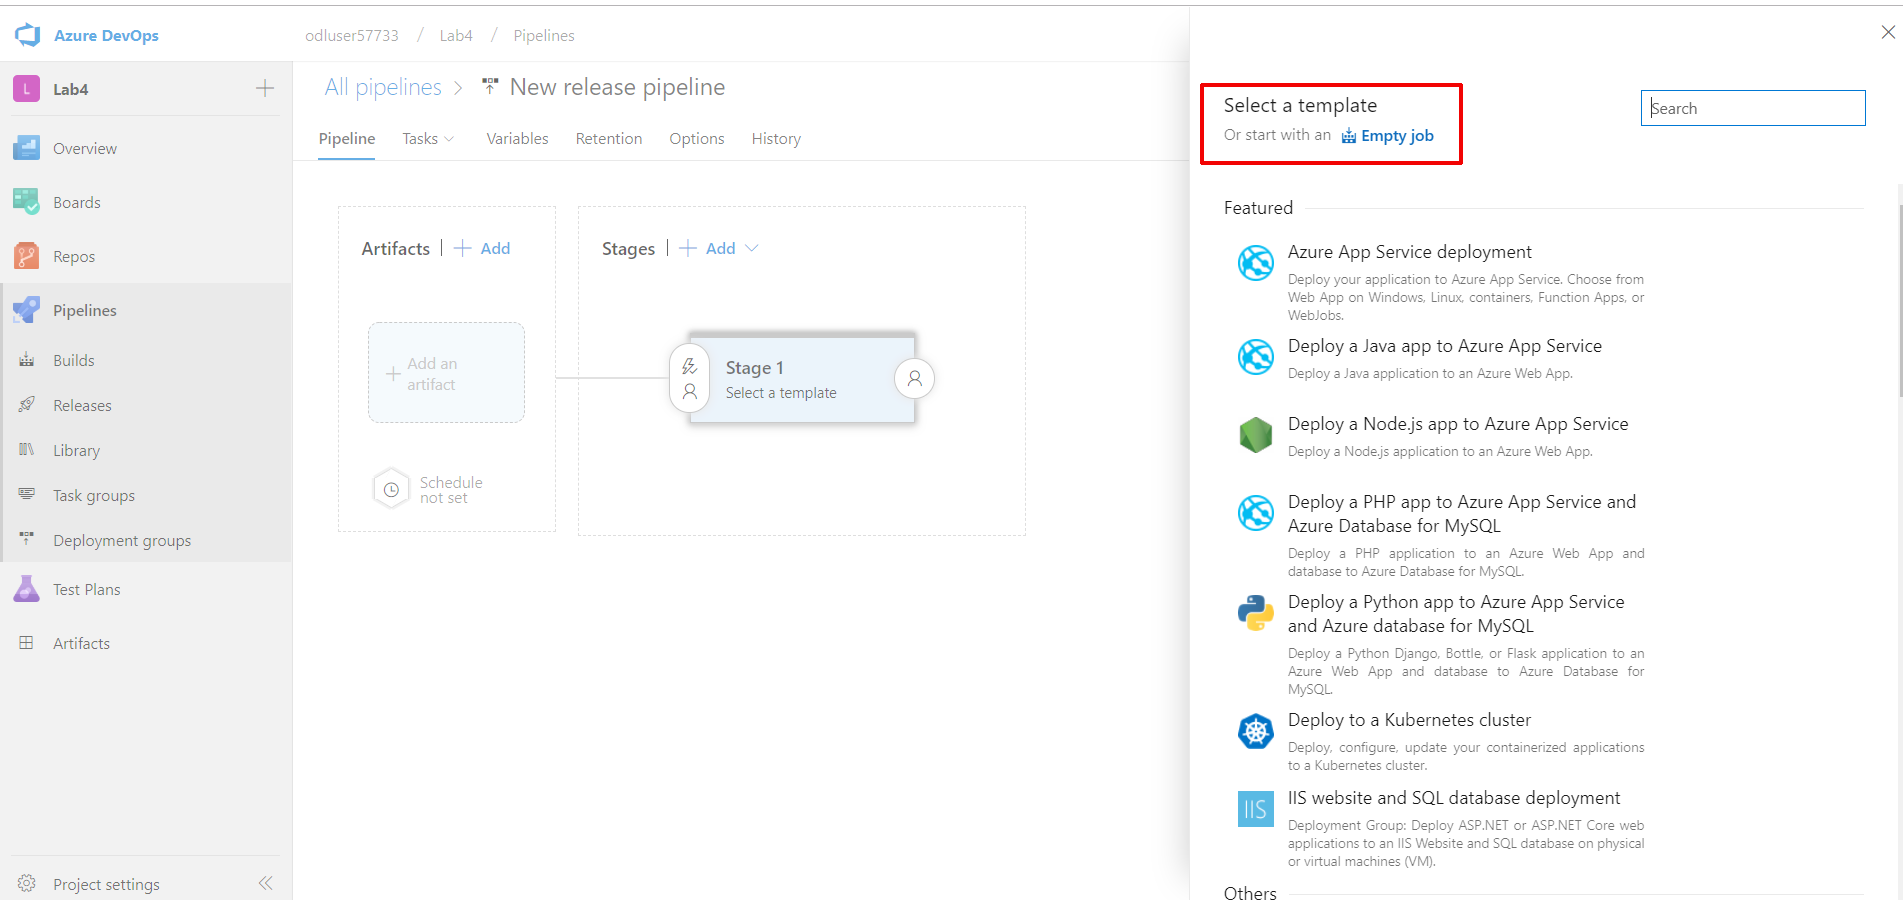
- Navigate to the Releases section under the Pipelines tab and select New pipeline and select Empty job
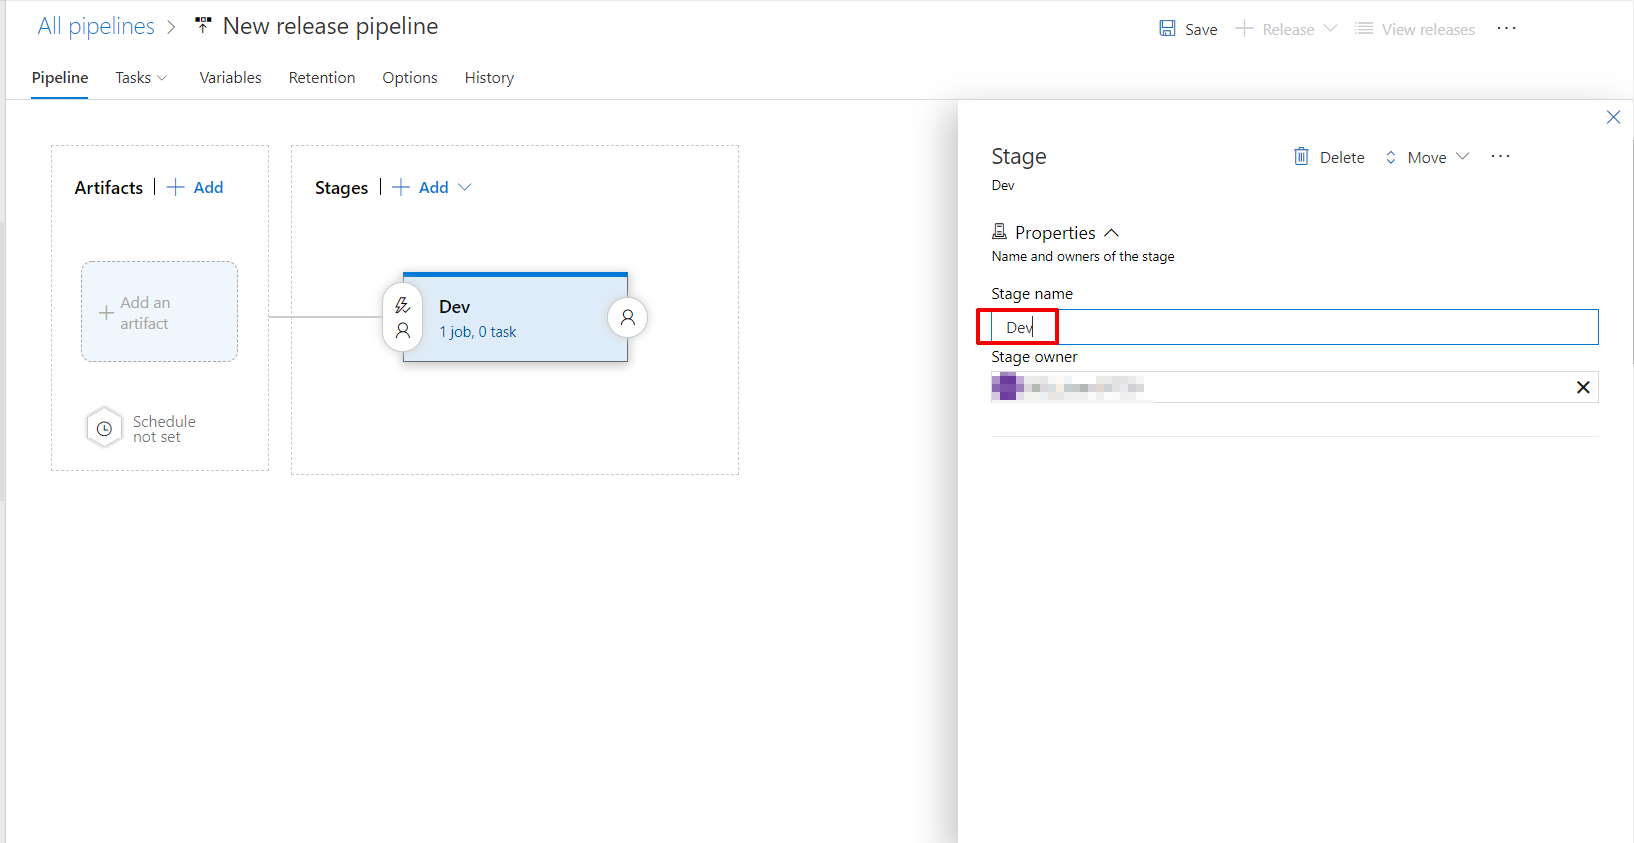
- Set
Devon Stage name option
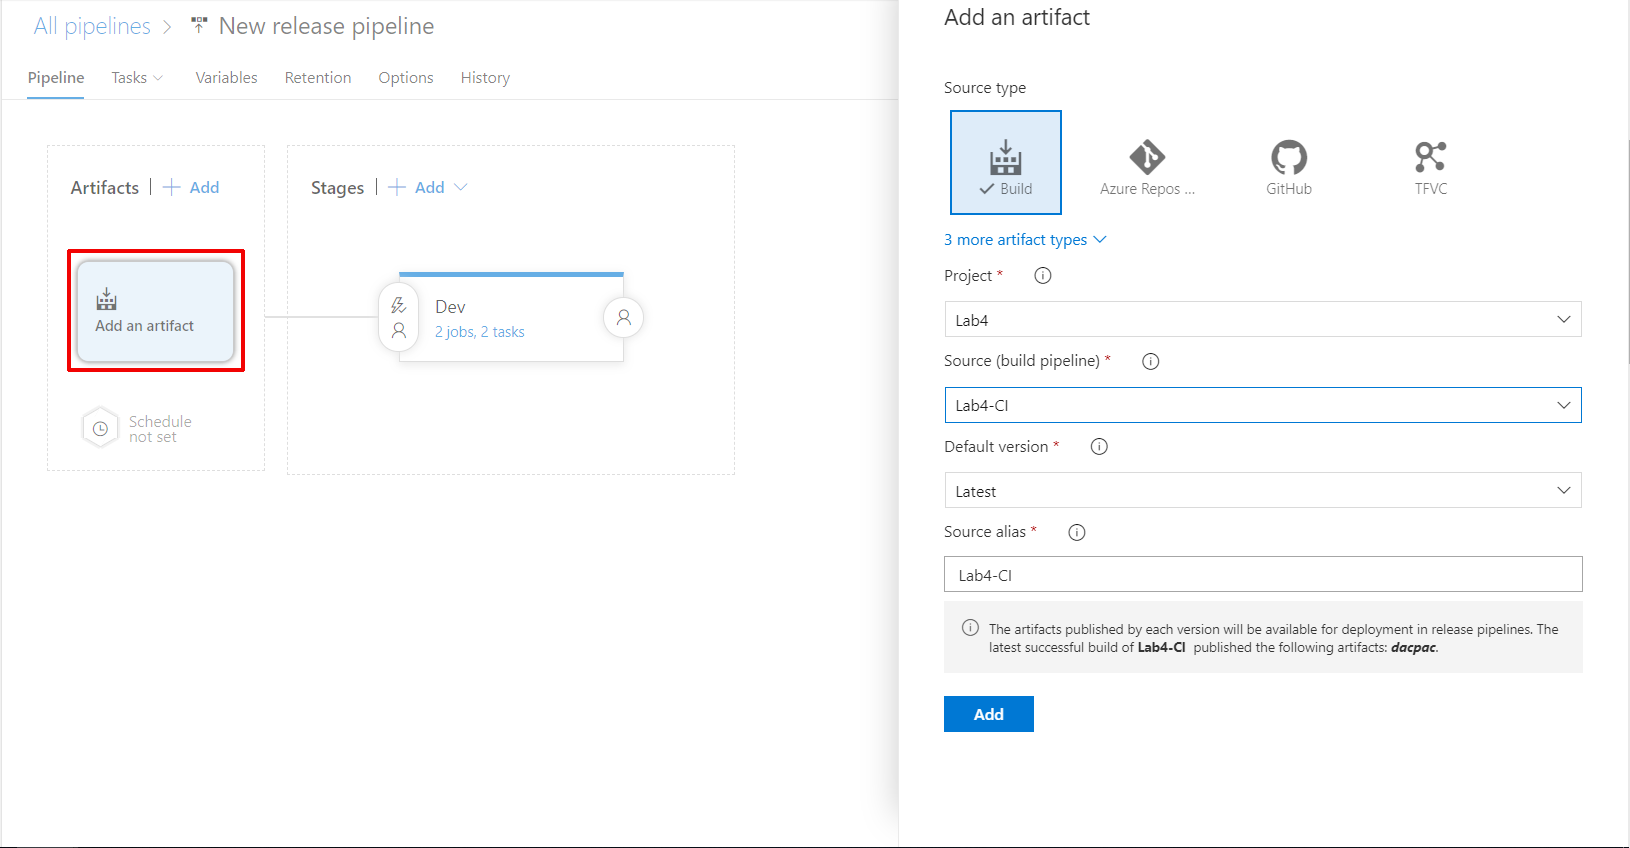
- Click on Add an artifact and set the inputs as below
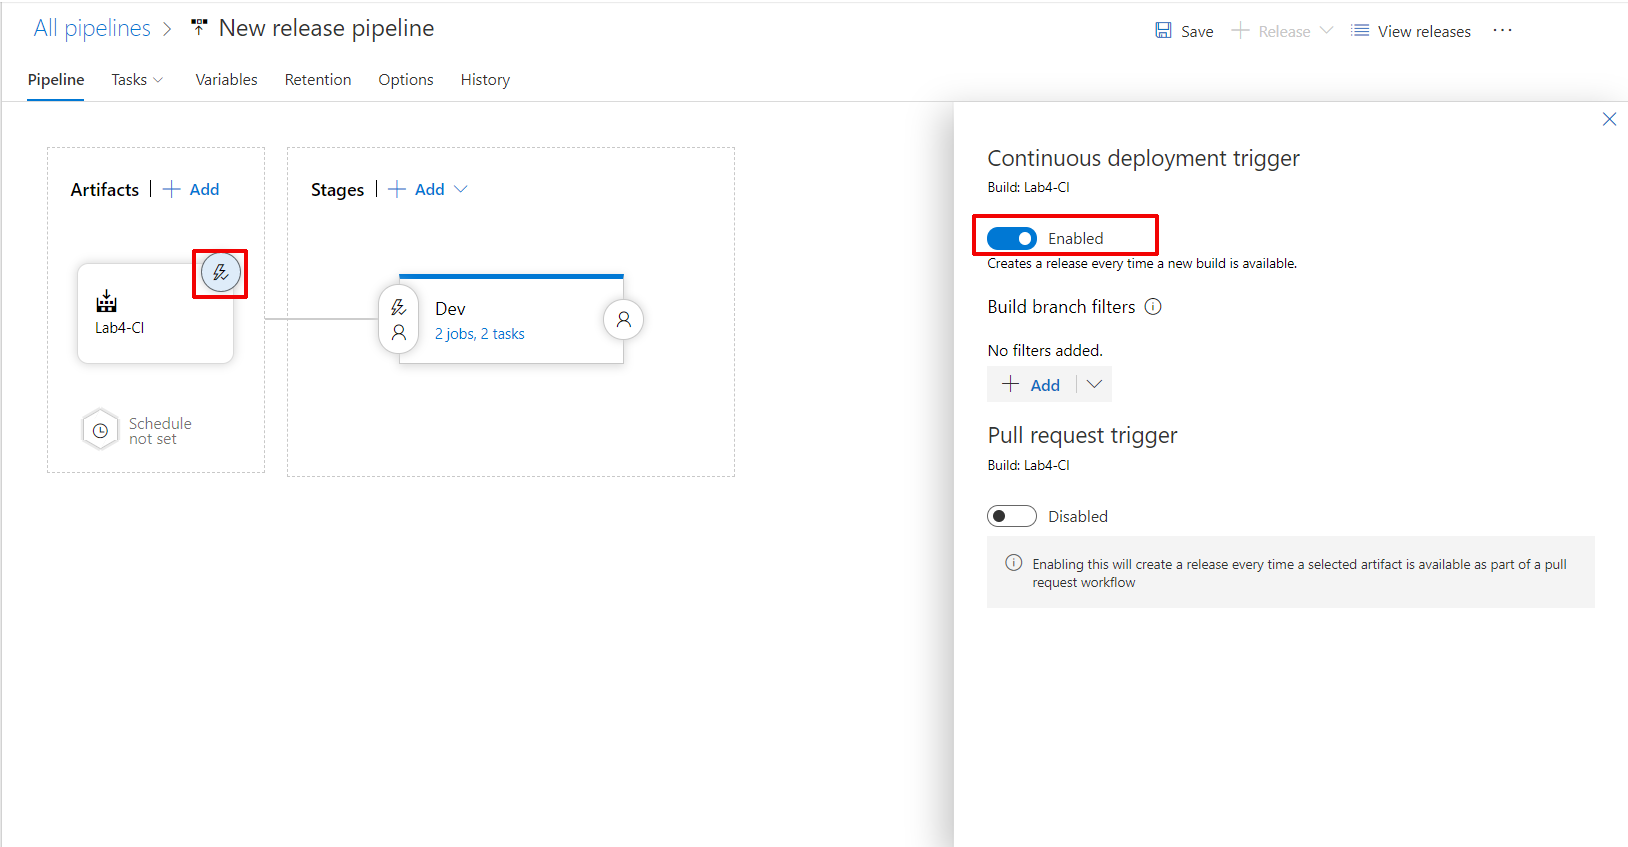
- Set Continuous deployment trigger clicking on the ray icon and switching to enable the Continuous deployment trigger
Task 2: Config your DB deployment
- Click on Tasks tab
- Click on Agent job
- set
DB Deploymenton Display name input - Create this variable clicking on + Add button
Name:
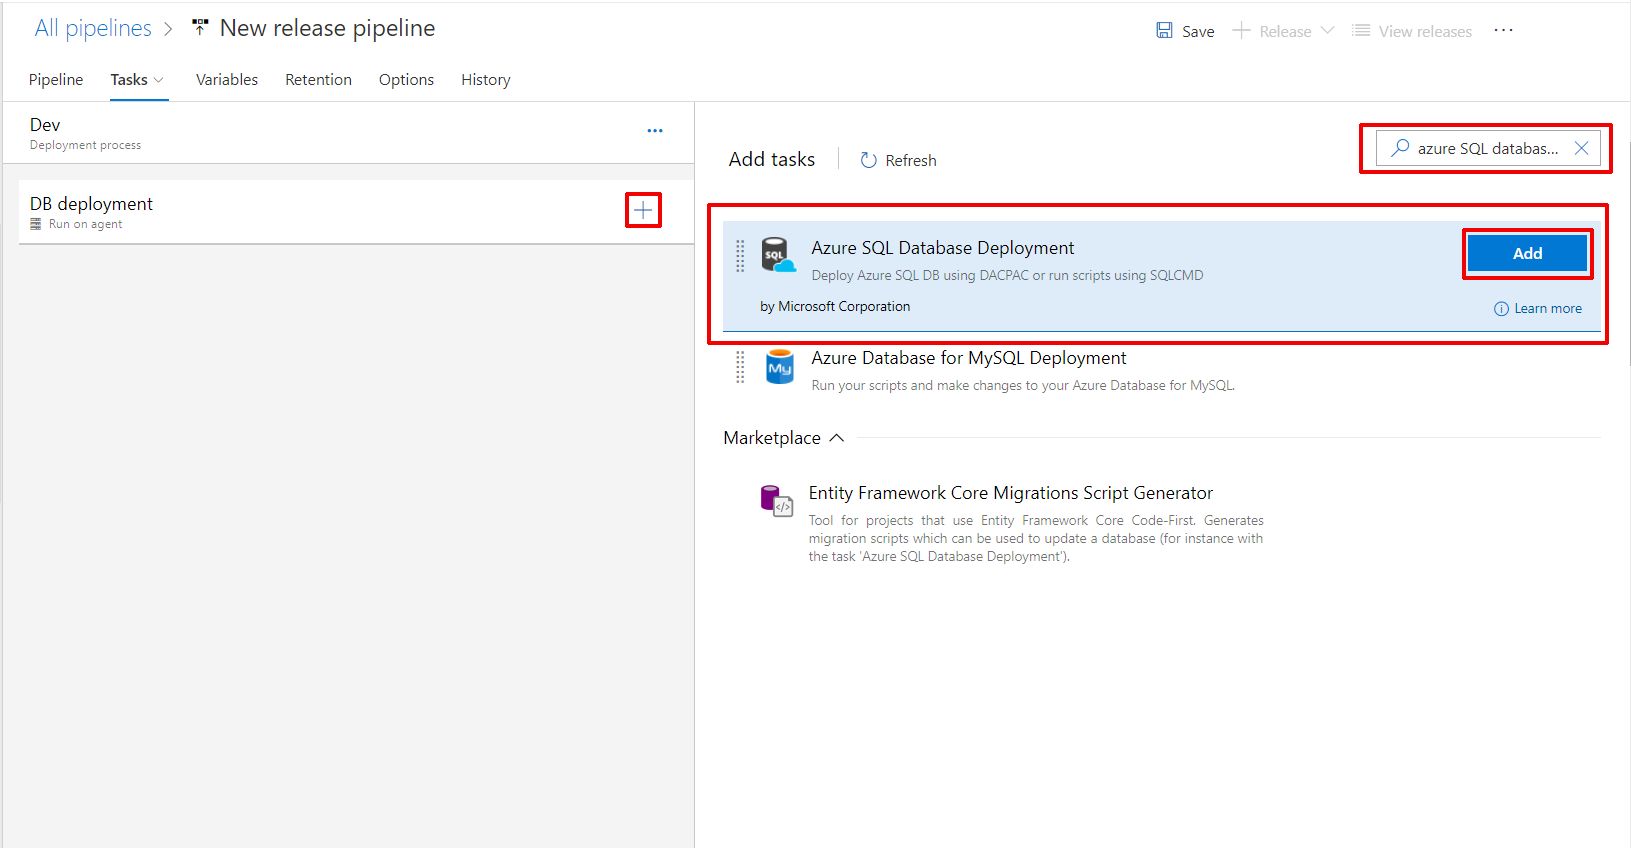
sqlpackageCondition:exists - Click on plus button (+) and search for
azure SQL database deployment - Select the first option then add
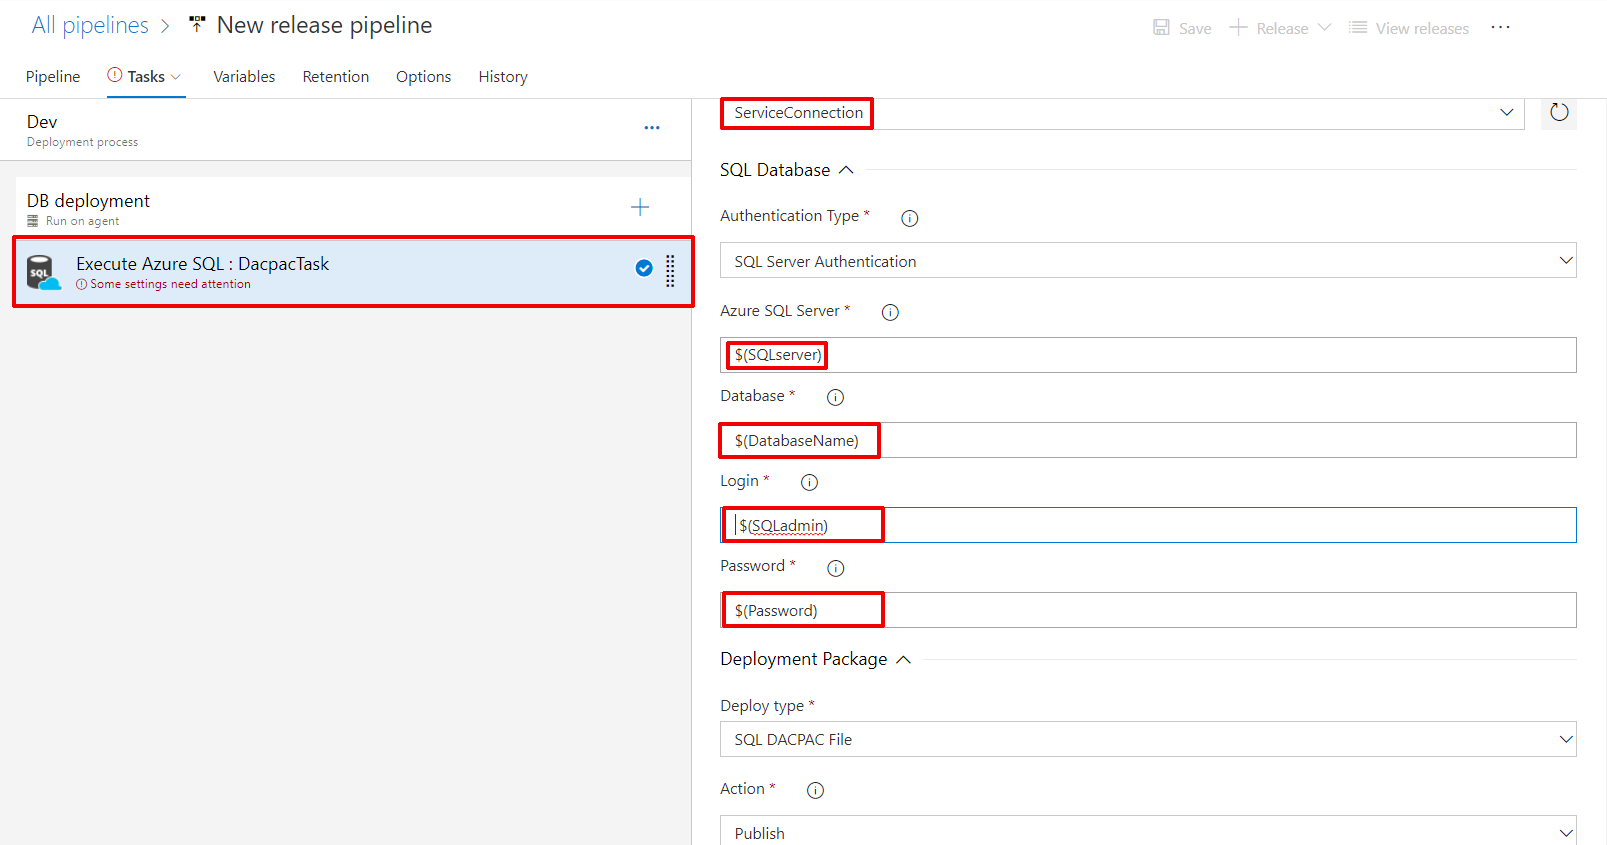
- Select your Azure SQL Dacpac Task
- Put
Execute Azure SQL : DacpacTaskas the Display name - Select your ServiceConnection on Azure Subscription
- Set
$(SQLserver)on Azure SQL Server input - Set
$(DatabaseName)on Database input - Set
$(SQLadmin)(with a blank space at the beginning) on Login input - Set
$(Password)on Password input
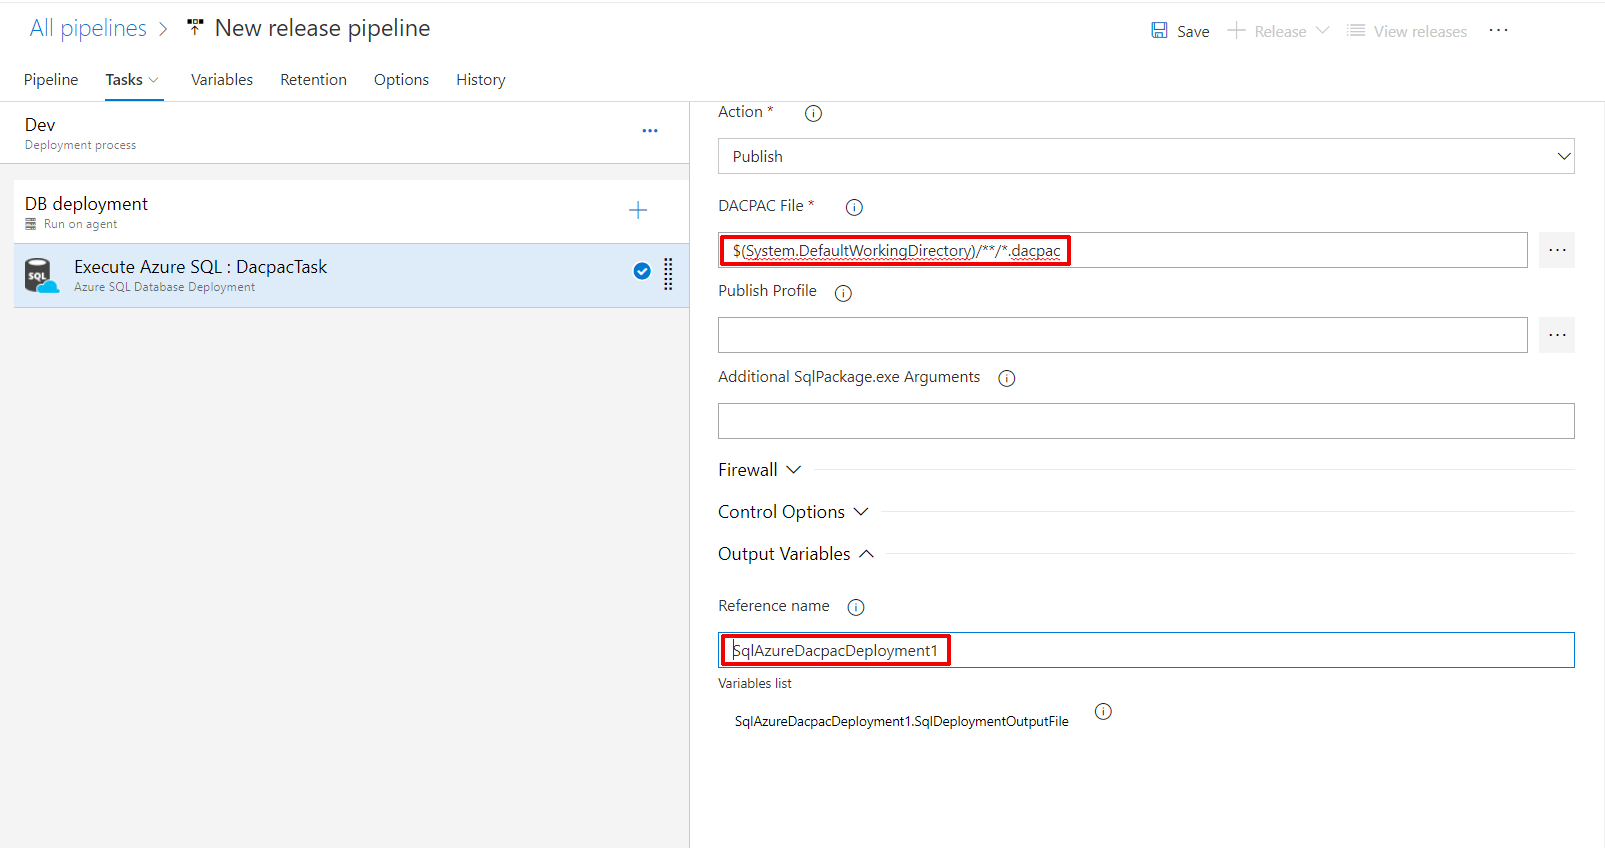
- Go down and set
$(System.DefaultWorkingDirectory)/**/*.dacpacas your DACPAC File on Deployment Package section - Set
SqlAzureDacpacDeployment1as your Reference name on Output Variables section
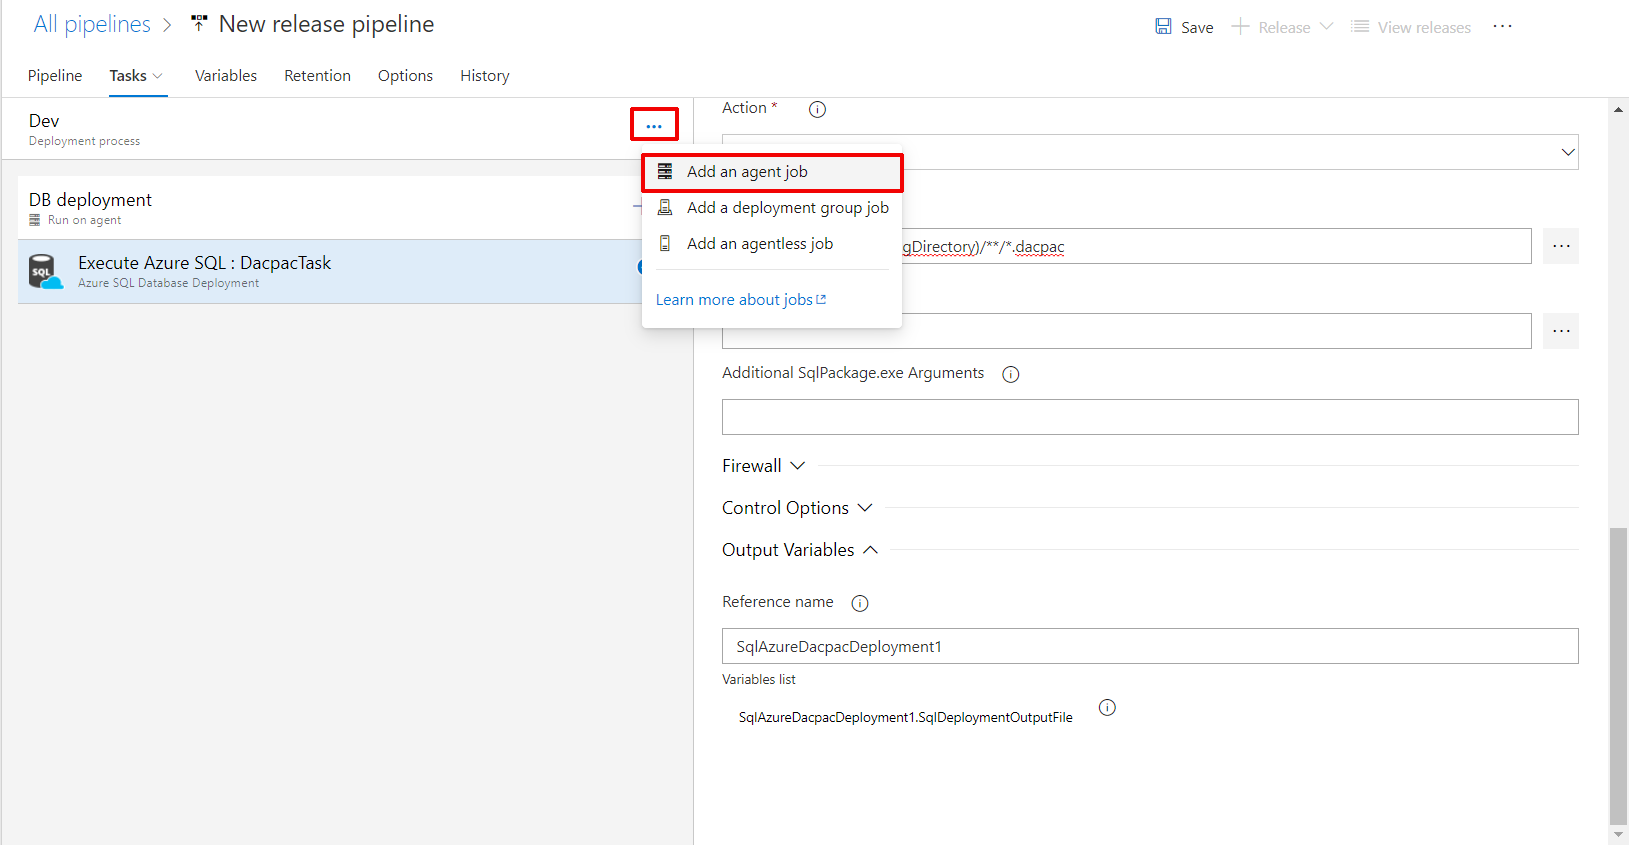
Task 3: Config your Web App deployment
- Click on Ellipsis button (…) on Dev (Deployment process) and select Add an Agent Job
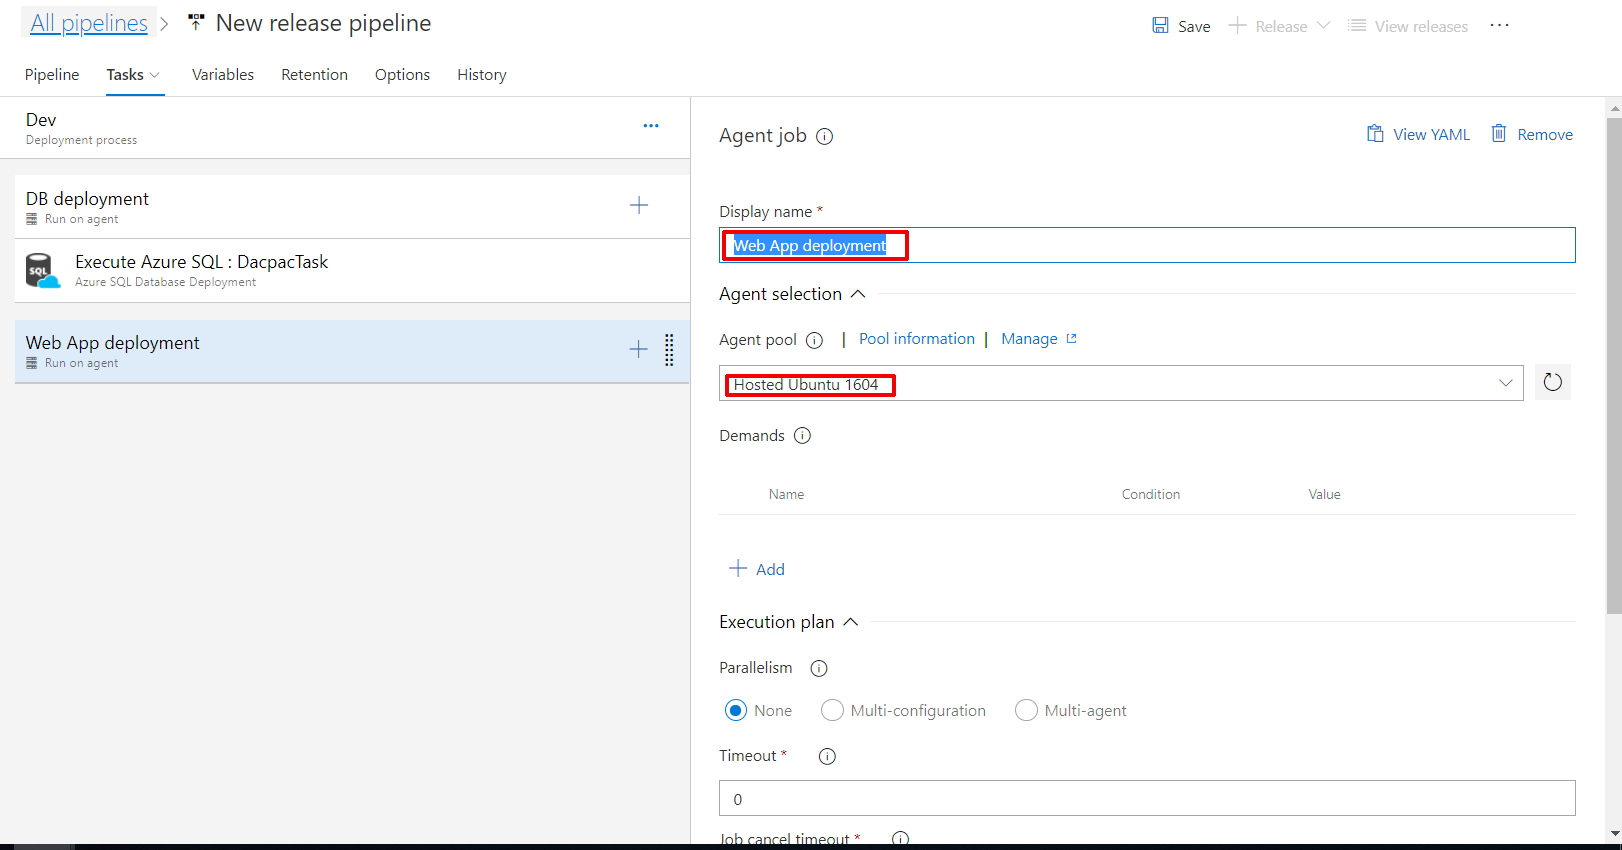
- Click on your new Agent job
- Set
Web App deploymentas your Display name - Select the Hosted Ubuntu 1604 option from Agent pool dropdown
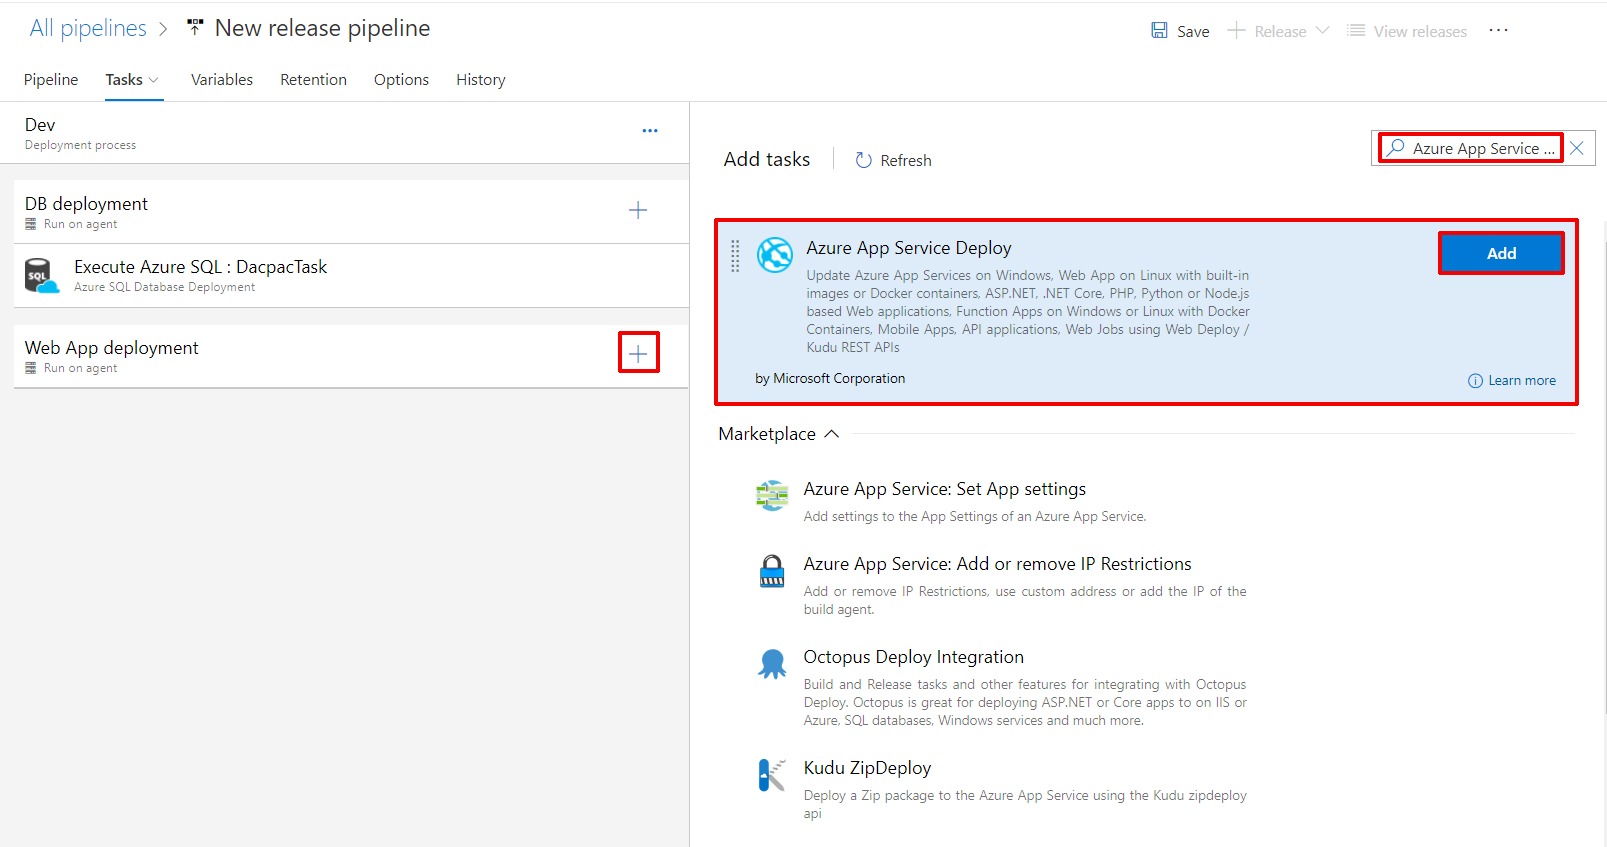
- Click on plus button (+) and search for
Azure App Service Deploy - Select the first one then click on Add
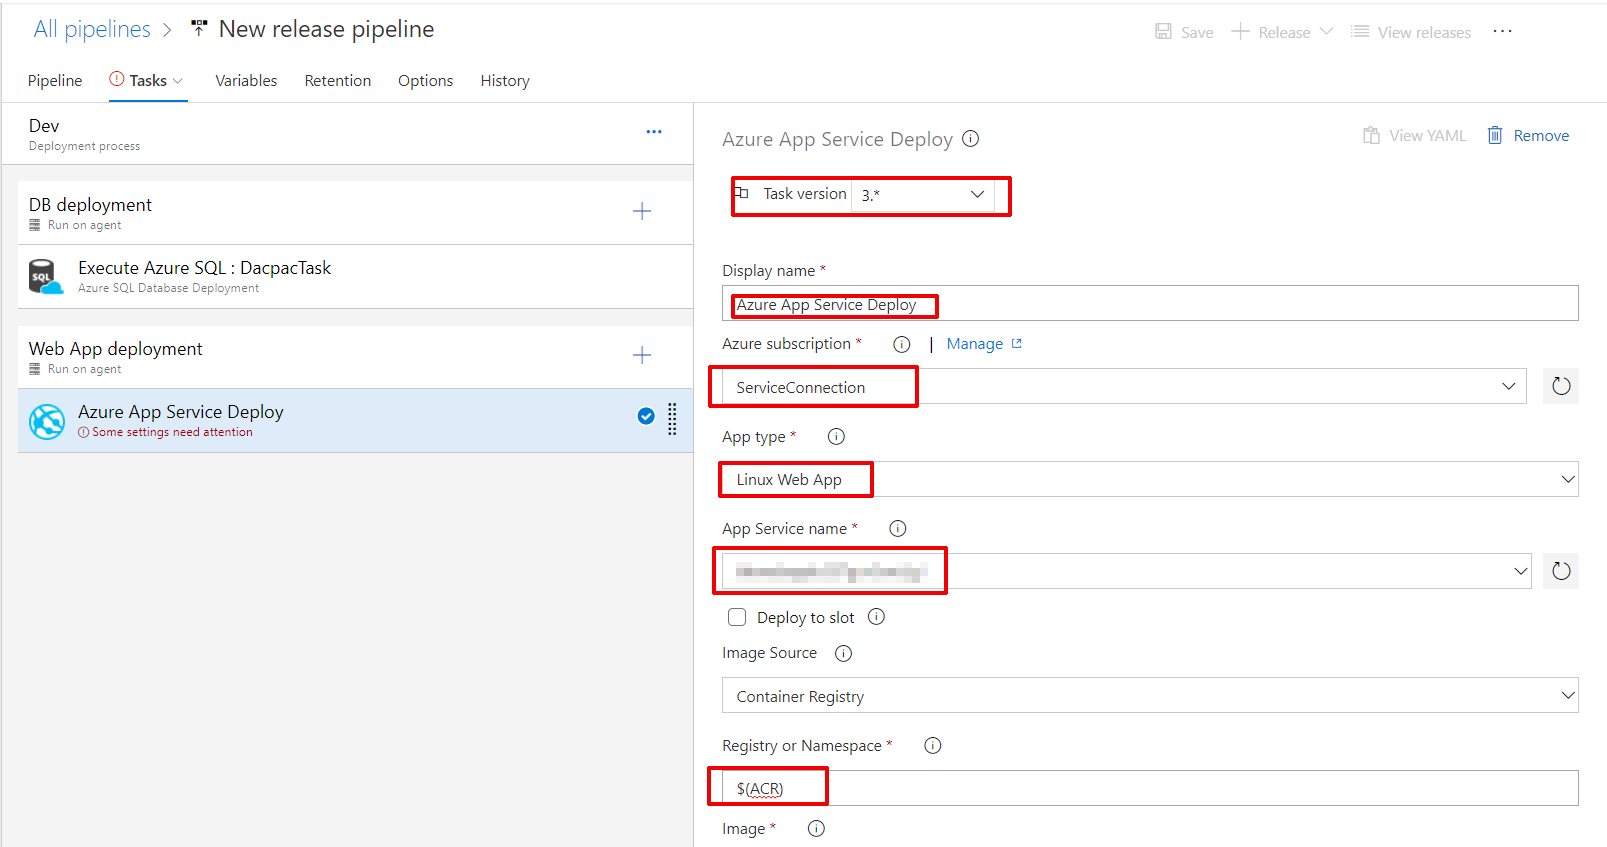
- Click on your new Azure App Service Deploy:
- Select 3.* option from Task version dropdown
- Set
Azure App Service Deployas your Display name - Select ServiceConnection on Azure subscription
- Select Linux web App on App type
- Select your webapp on App Service Name
- Set
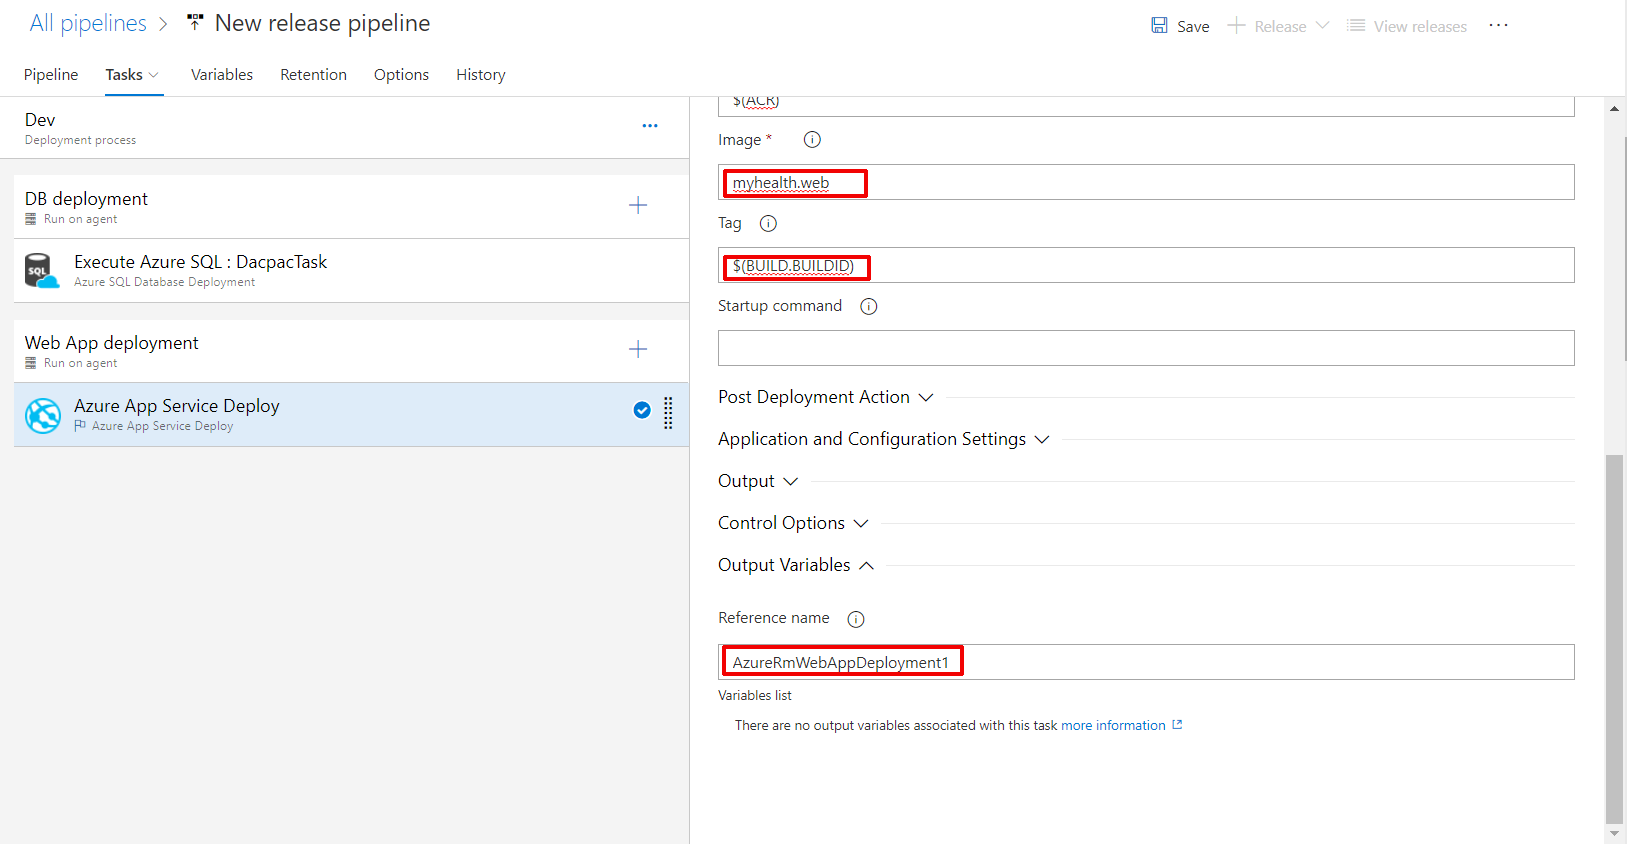
$(ACR)on Registry or Namespace input
- Put
myhealth.webin the Image input - Put
$(BUILD.BUILDID)in Tag input - Put
AzureRmWebAppDeployment1in Reference name on Output Variables section
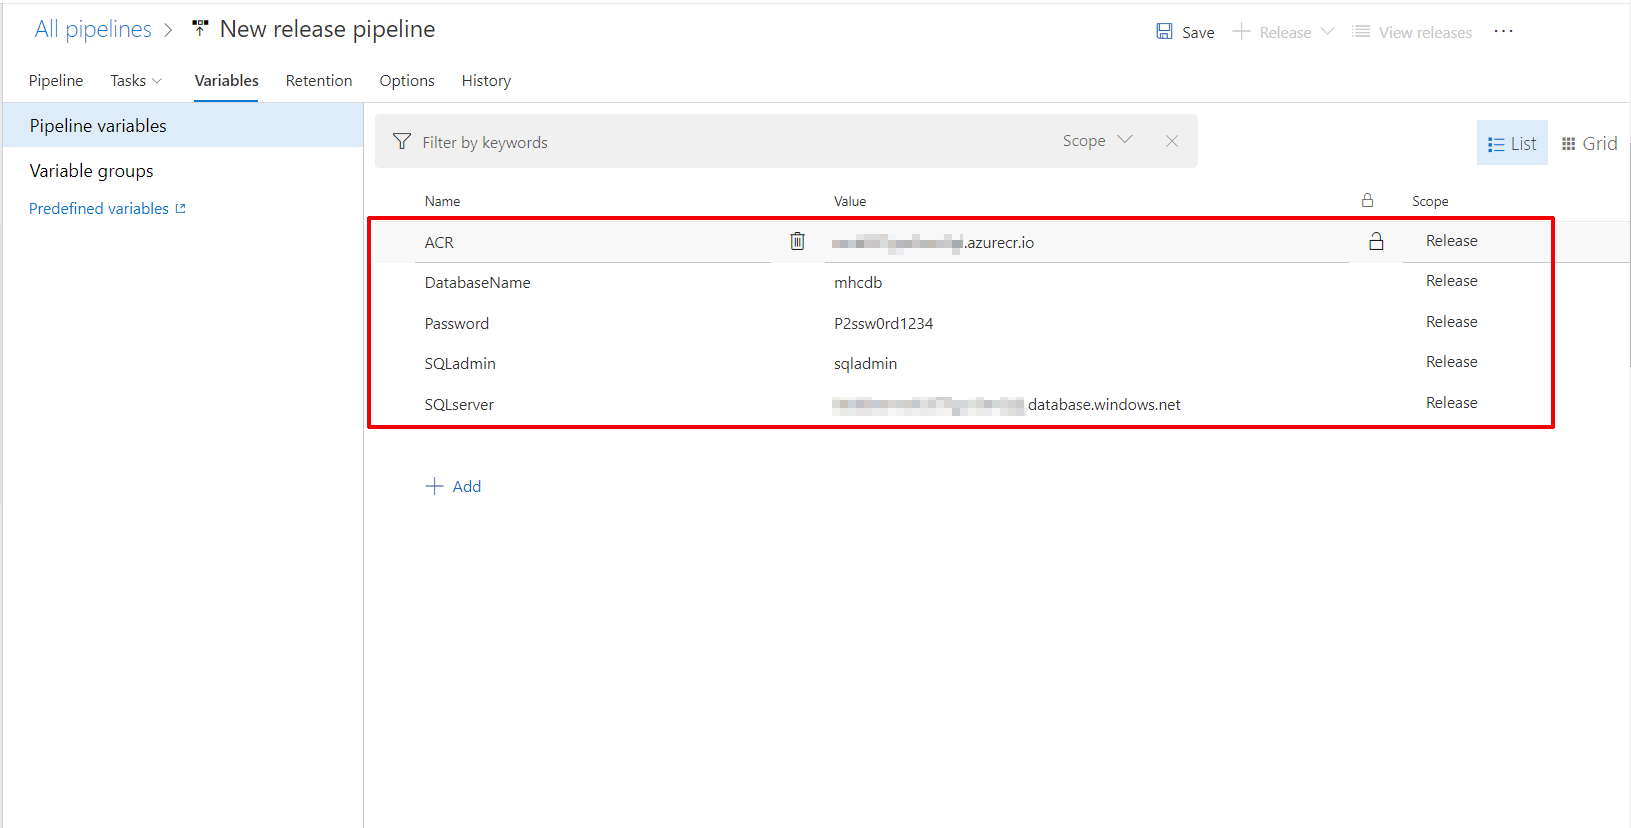
Task 4: Config your variables
- Click on Variables tab
- Add these variables clicking on + Add button
- Name:
ACRValue:YOUR_ACR.azurecr.ioScope:Release - Name:
DatabaseNameValue:mhcdbScope:Release - Name:
PasswordValue:P2ssw0rd1234Scope:Release - Name:
SQLadminValue:sqladminScope:Release - Name:
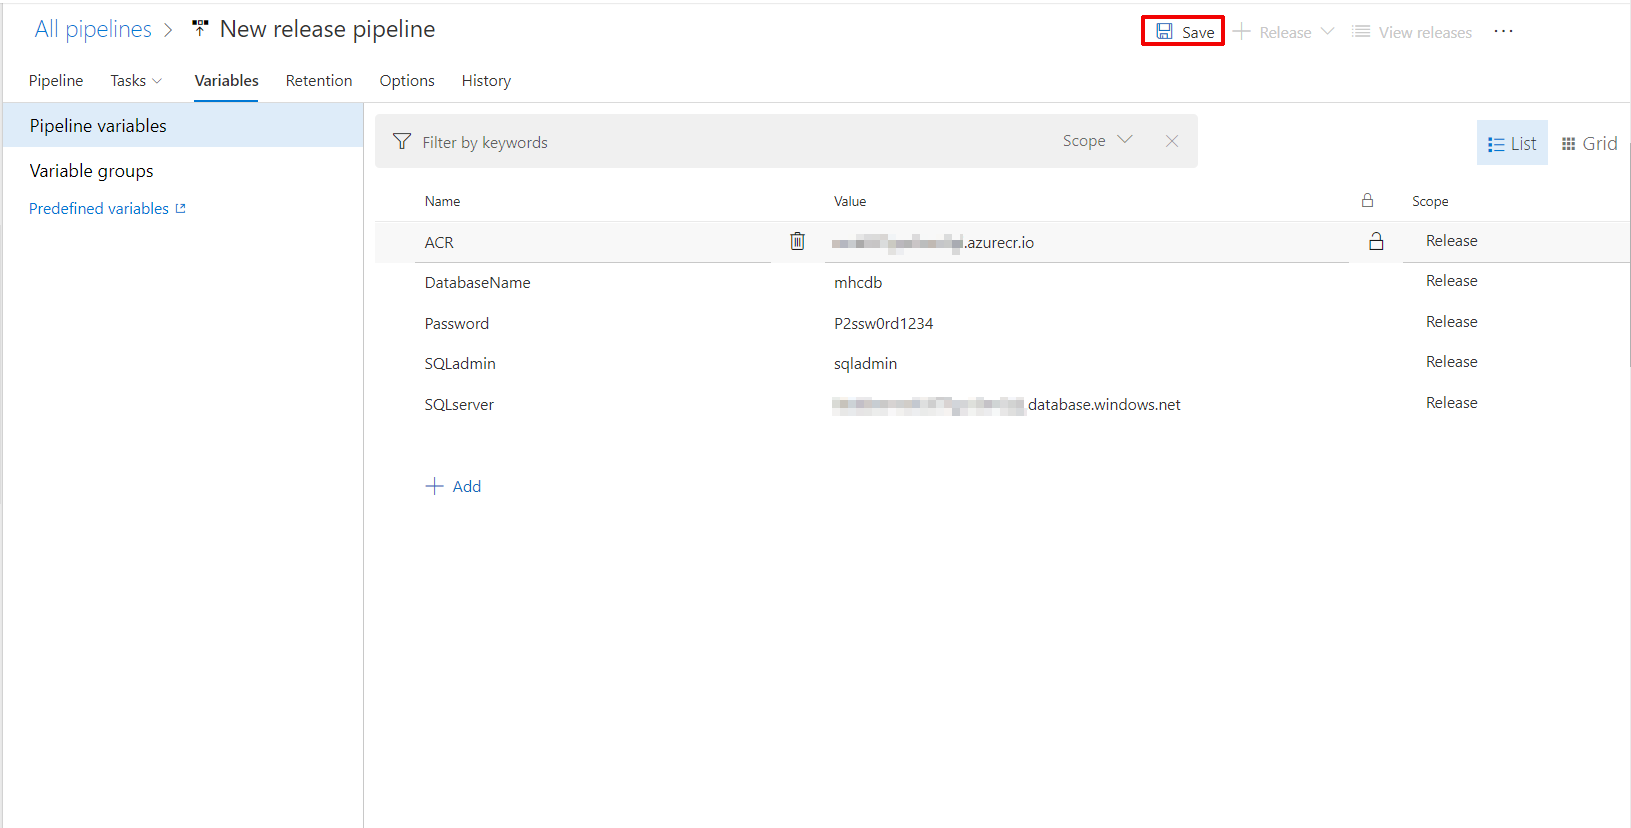
SQLserverValue:YOUR_DBSERVER.database.windows.netScope:Release
- Click on save button
Exercise 4: Initiate the CI Build and Deployment through code commit
- Click on Files section under the Repos tab and navigate to the (ProjectName)/src/MyHealth.Web/Views/Home folder and open the Index.cshtml file for editing
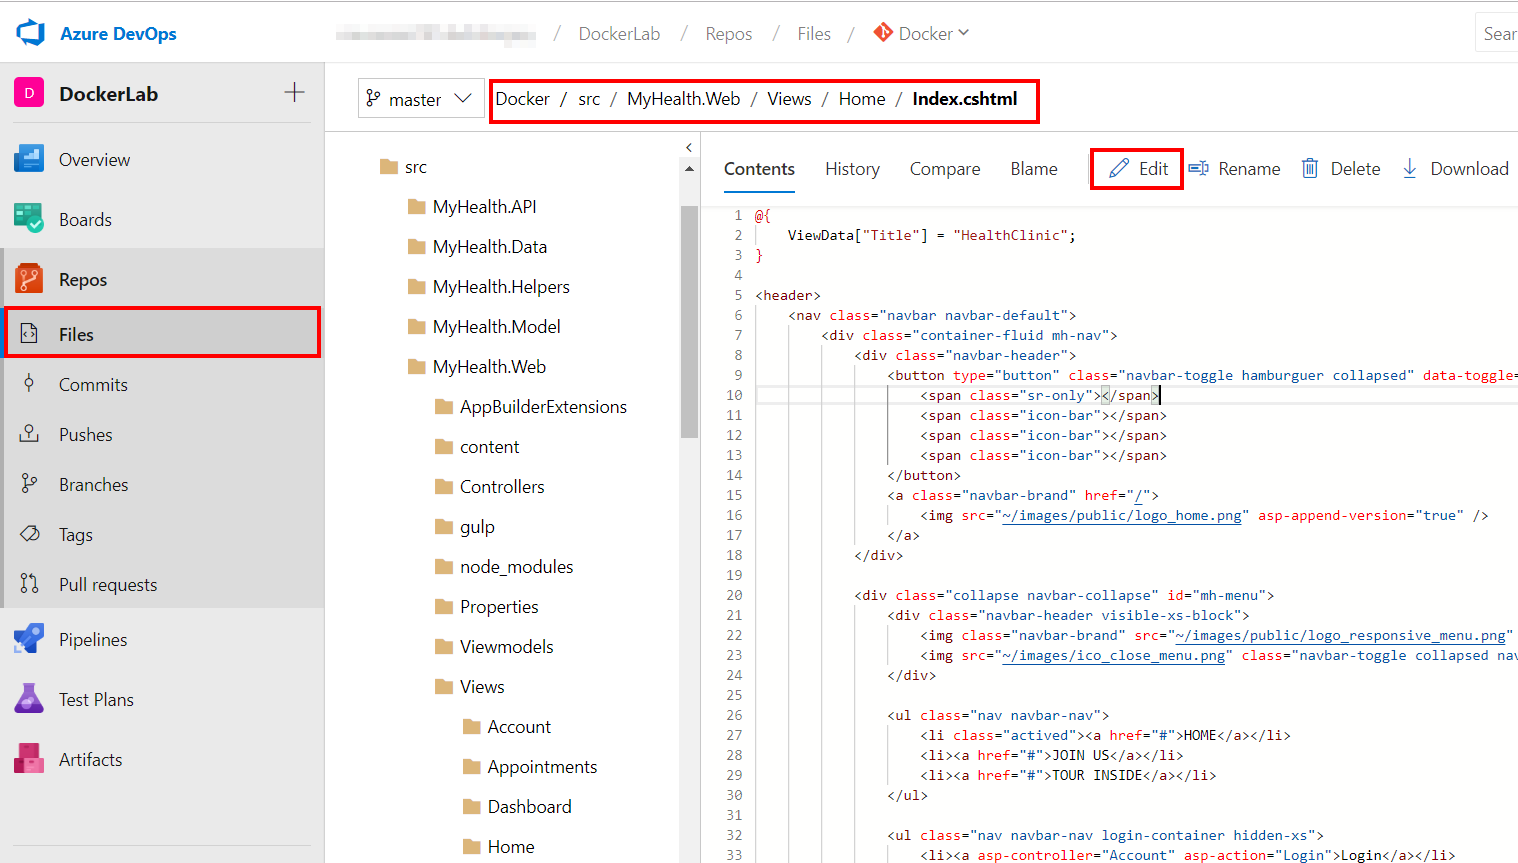
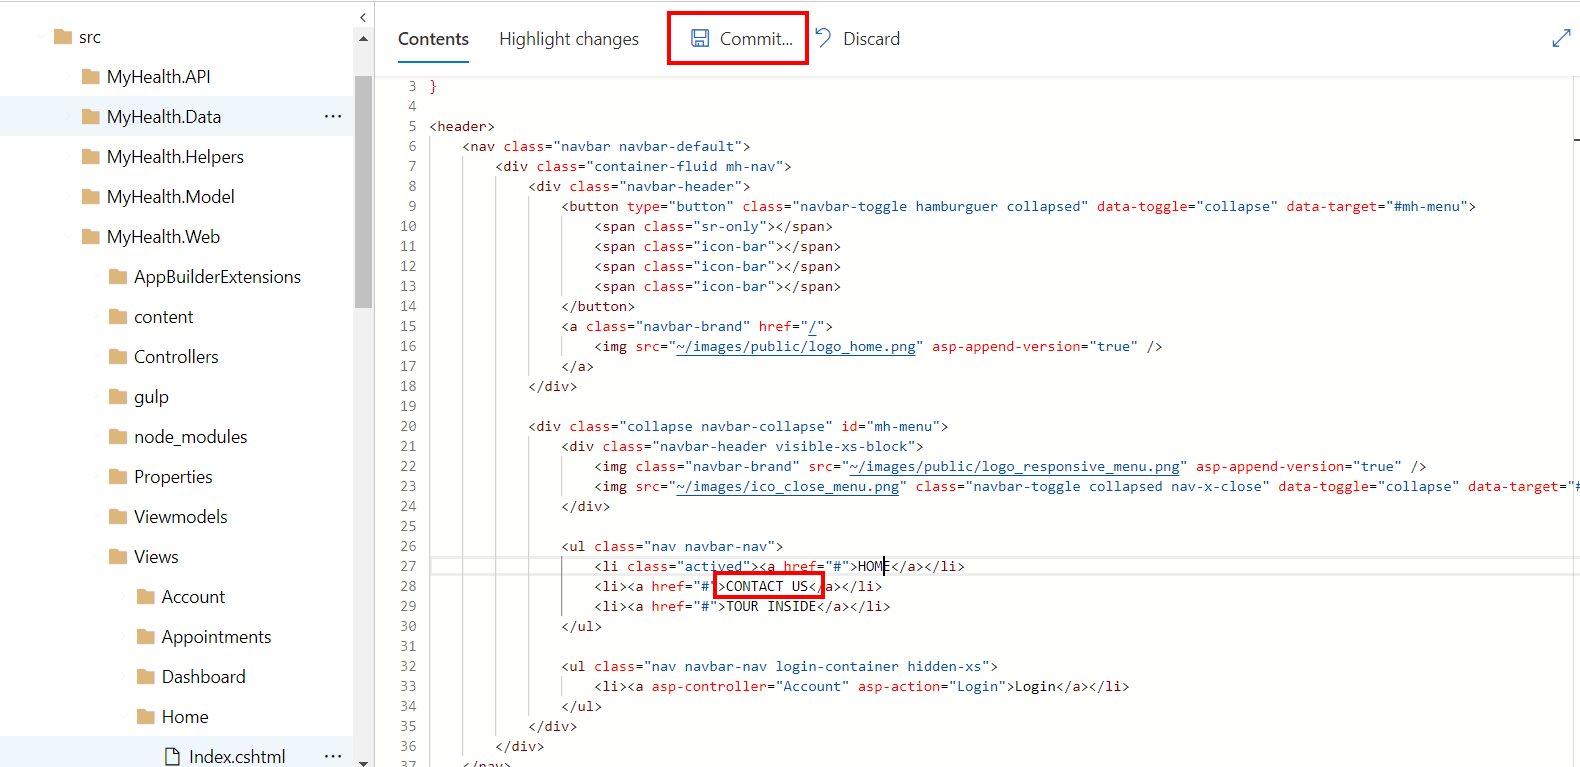
- Modify the text JOIN US to CONTACT US on the line number 28 and then click on the Commit button.This action would initiate an automatic build for the source code
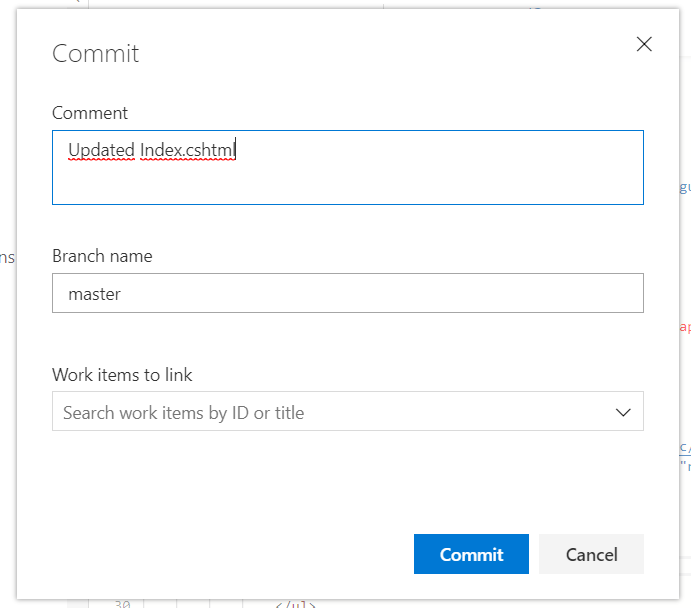
- After clicking Commit button, add a comment and click on Commit
- Click on Builds tab, and subsequently select the commit name
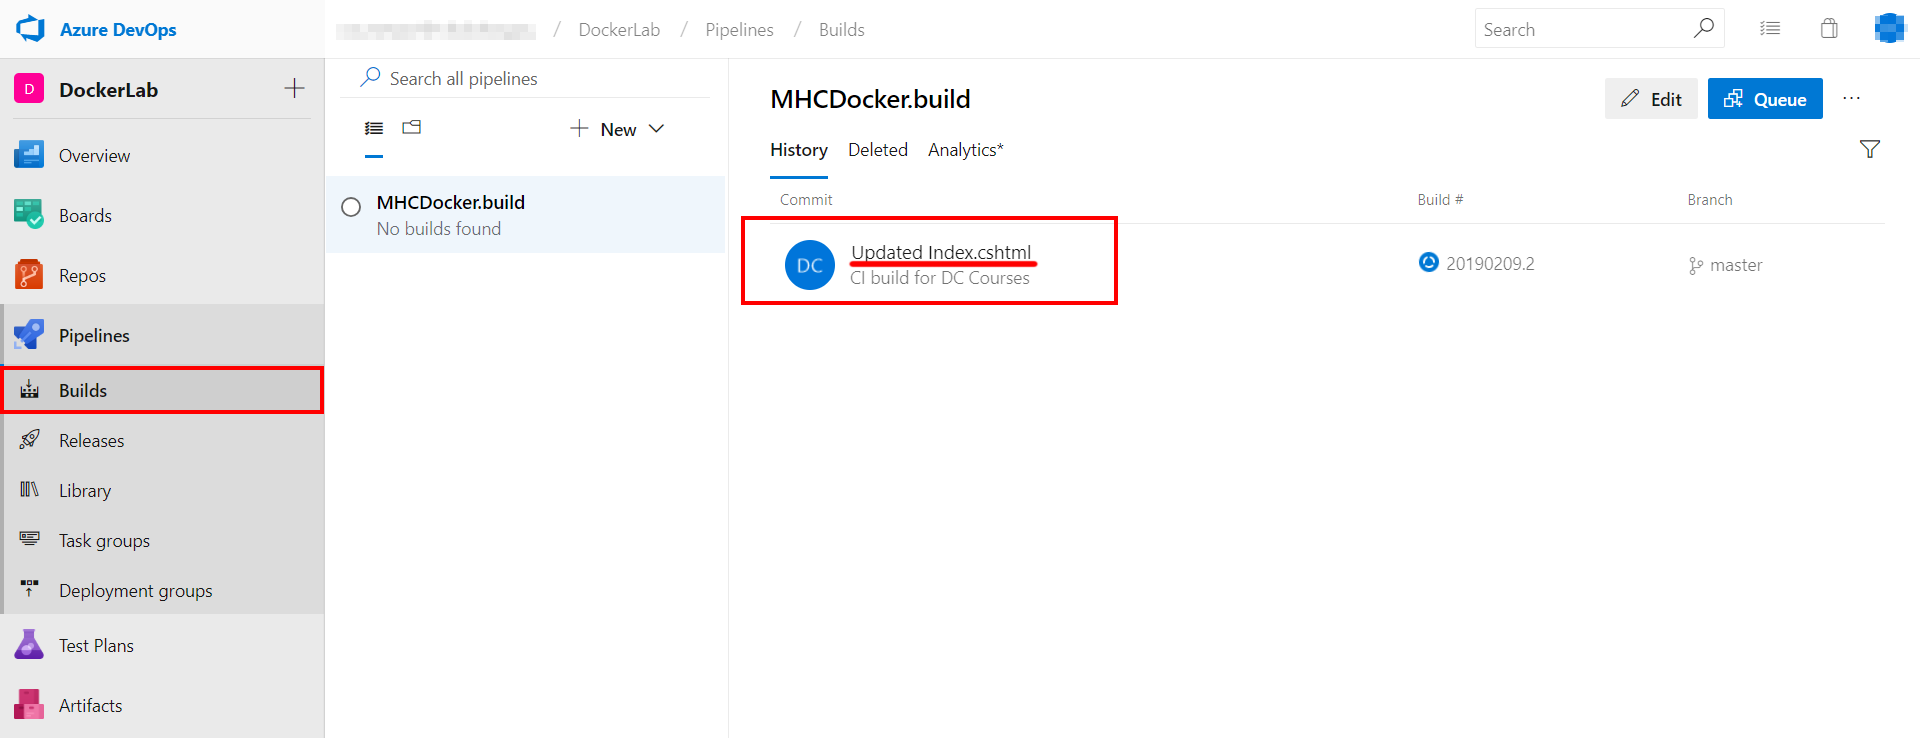
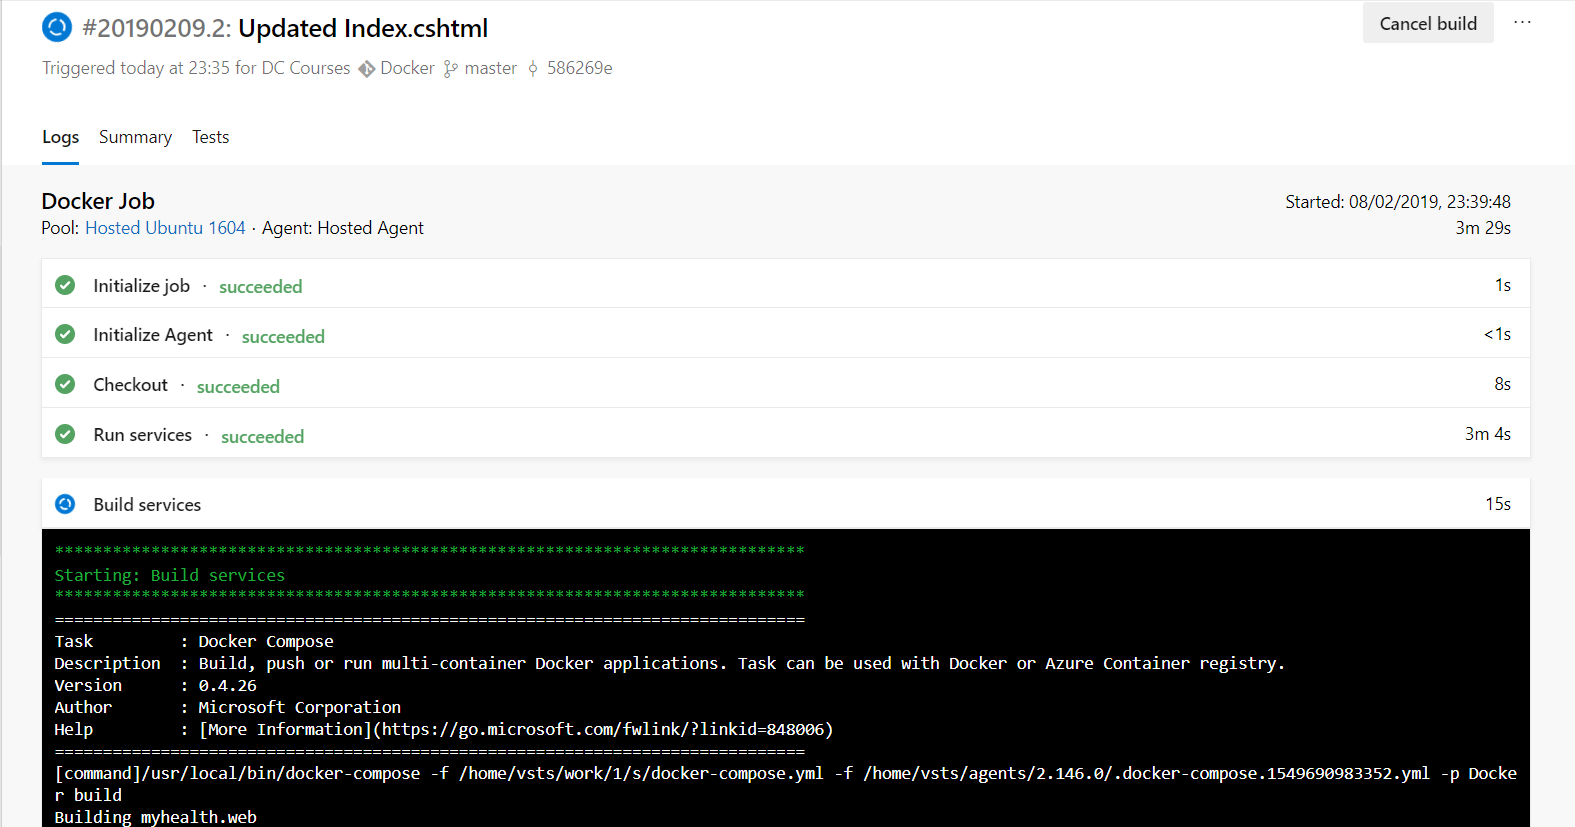
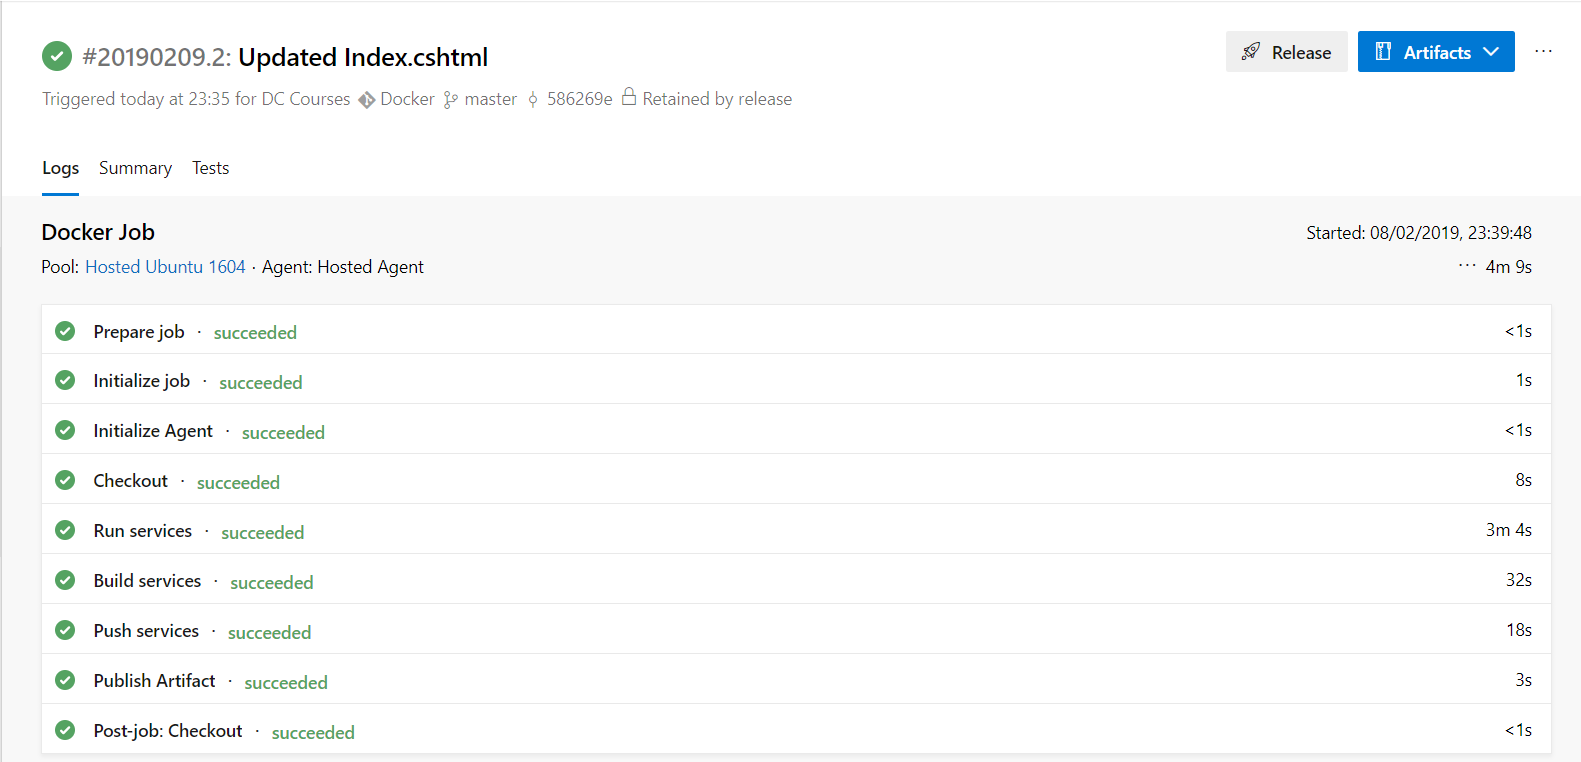
- The Build will generate and push the docker image of the web application to the Azure Container Registry. Once the build is completed, the build summary will be displayed.
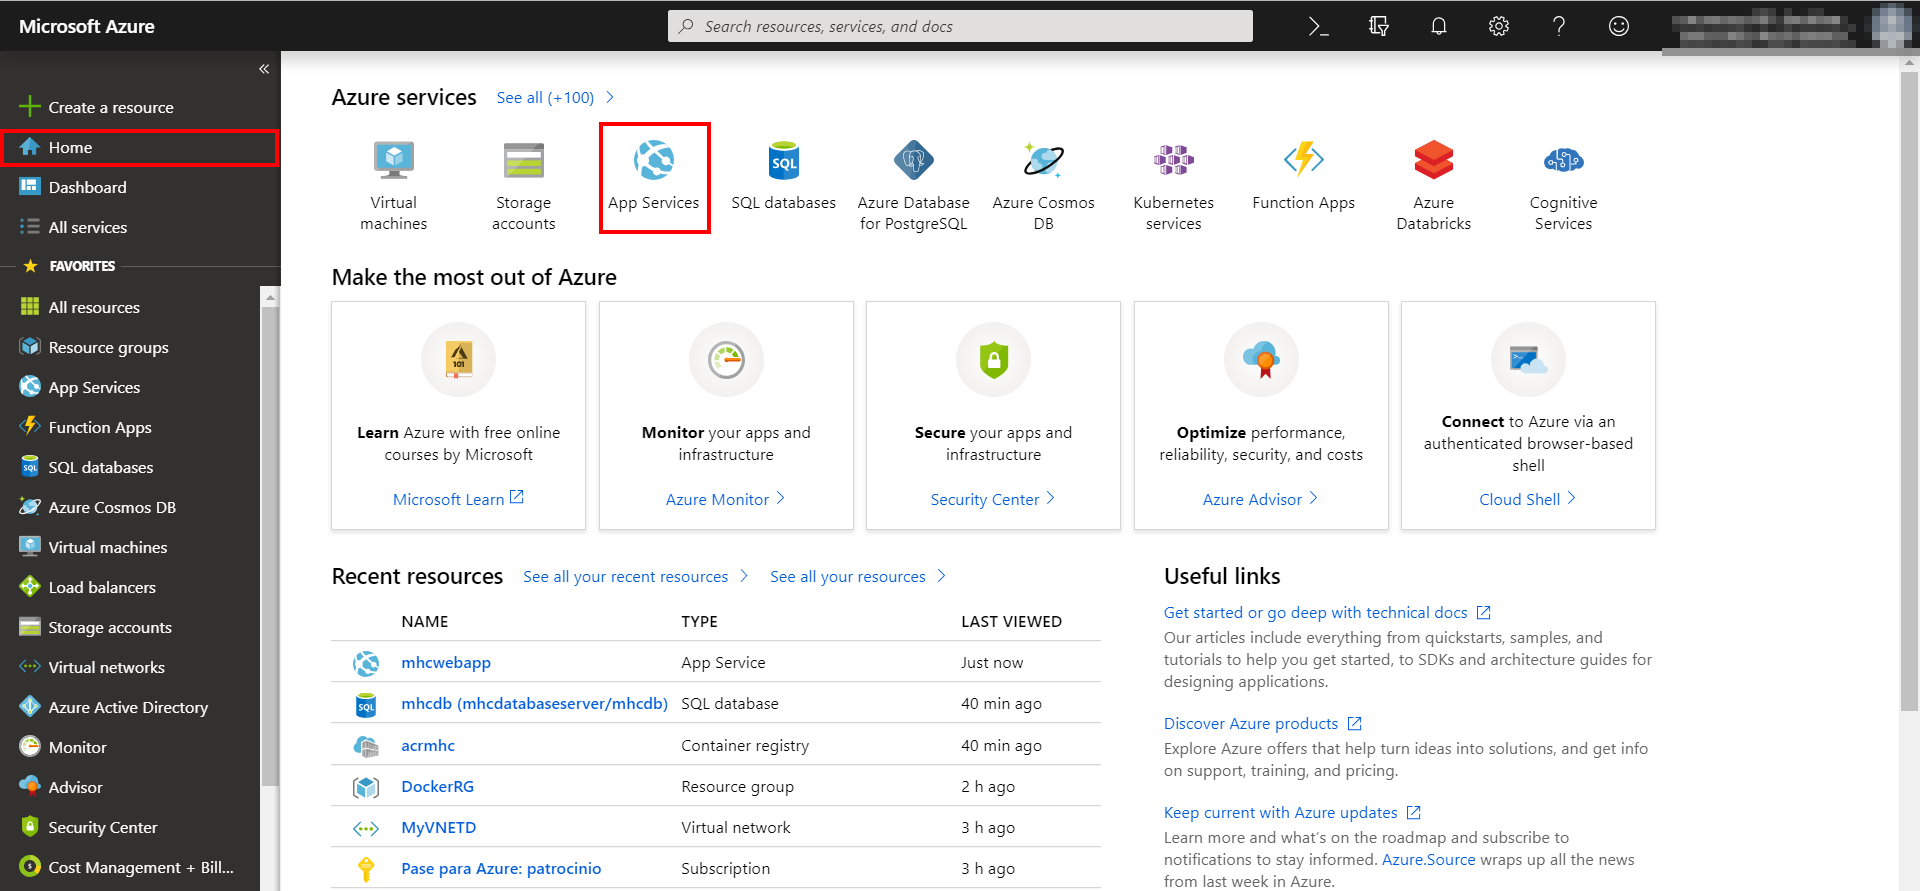
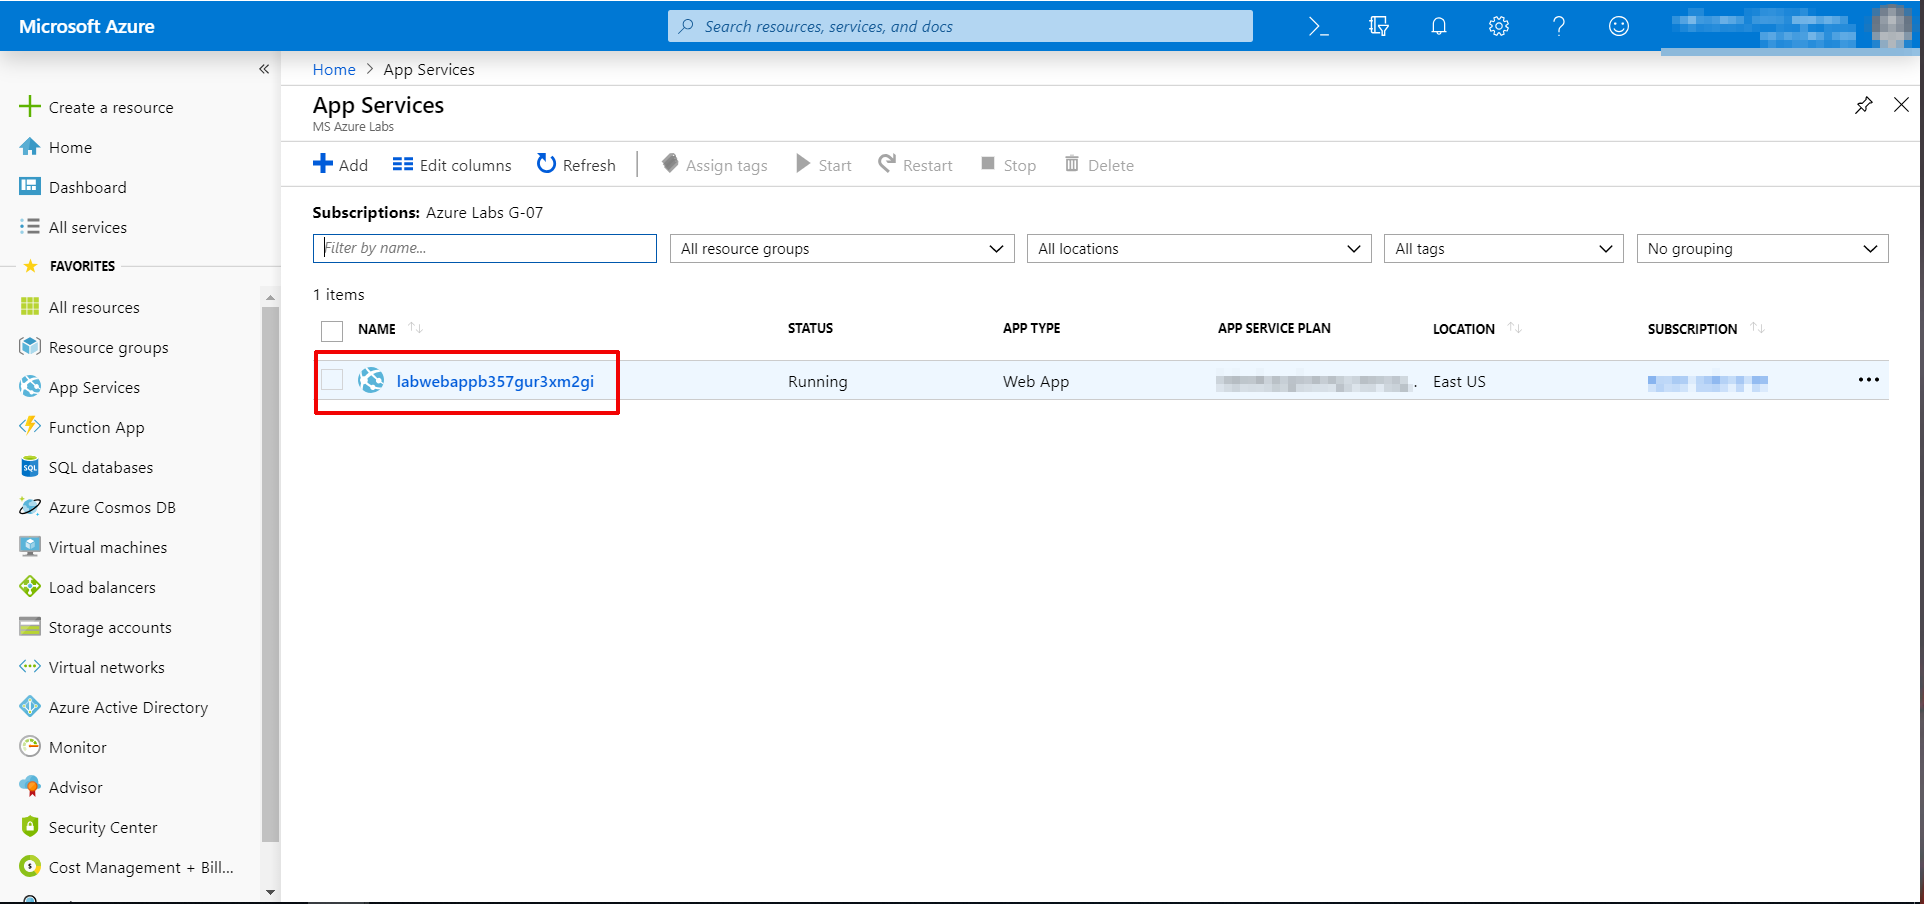
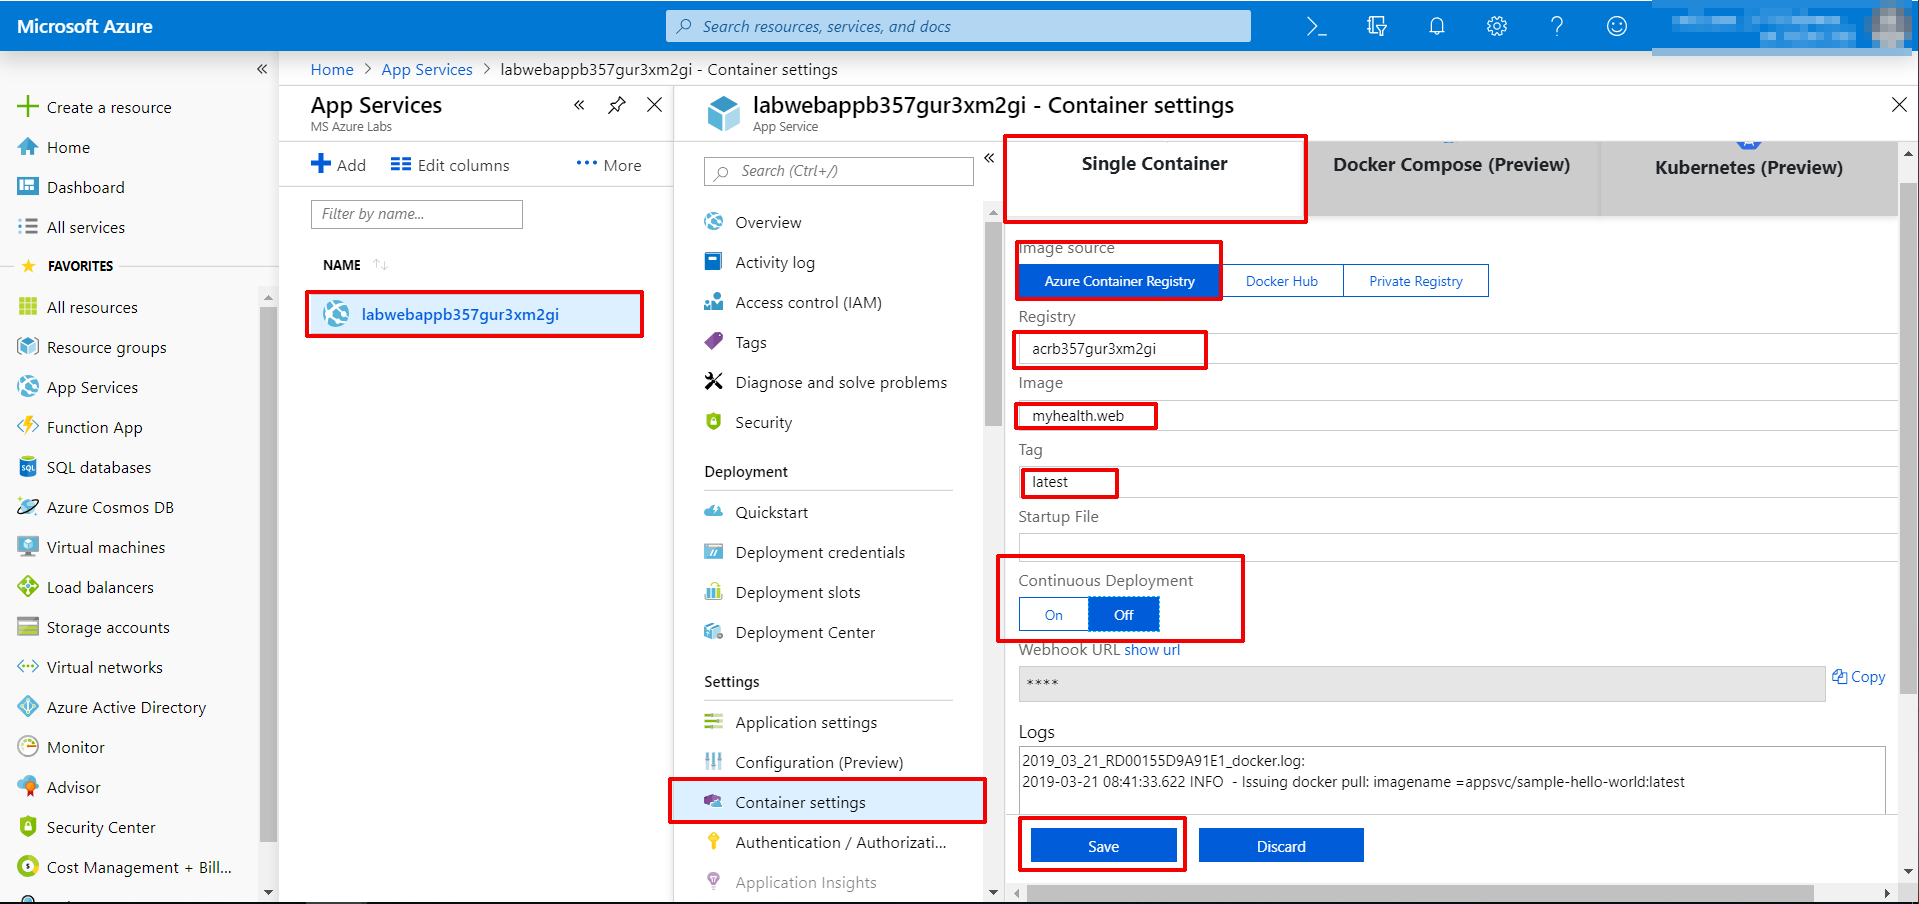
- Navigate to the Azure Portal and click on the App Service that was created at the beginning of this lab. Select the Container Settings option and provide the information as suggested and then click the Save button
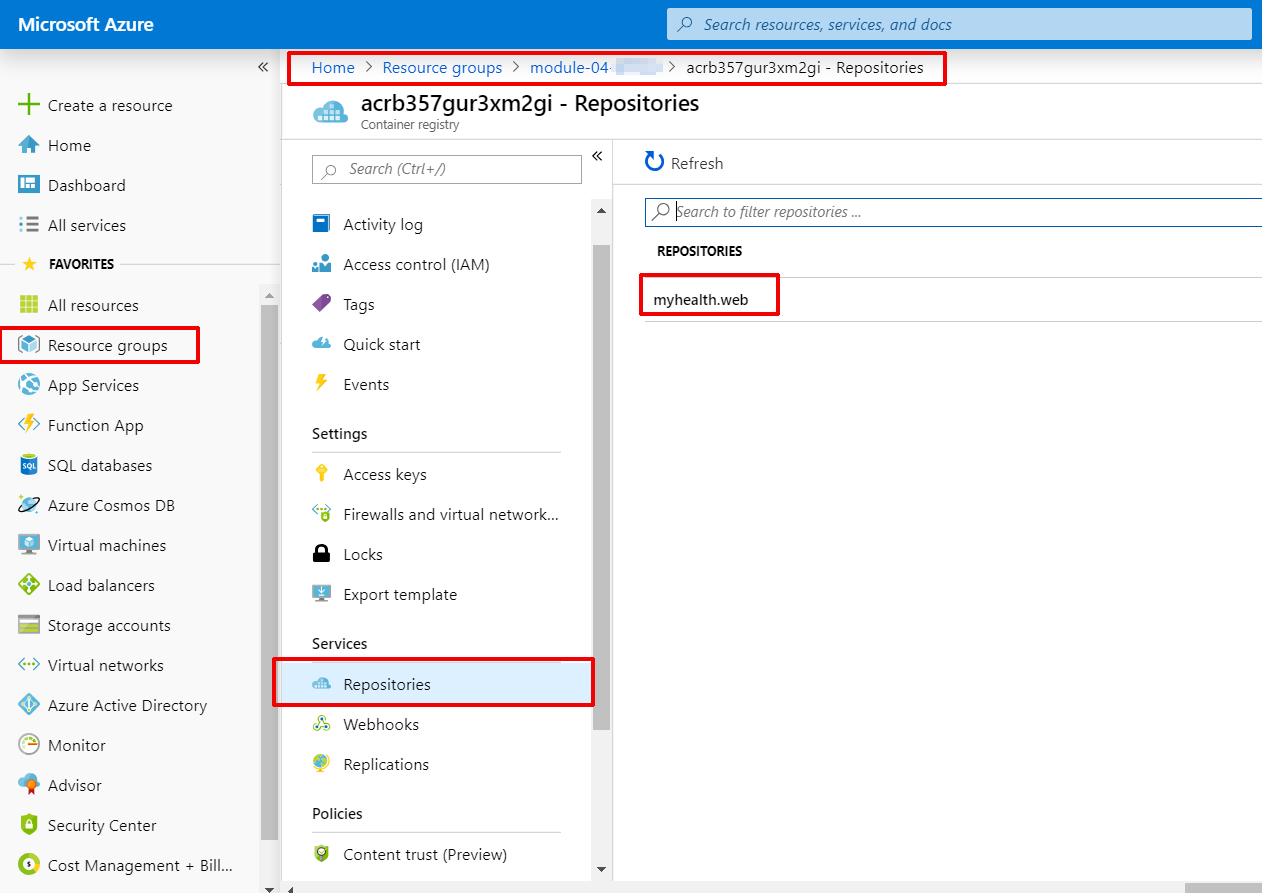
- Navigate to the Azure Container Registry and then select the Repositories option to view the generated docker images
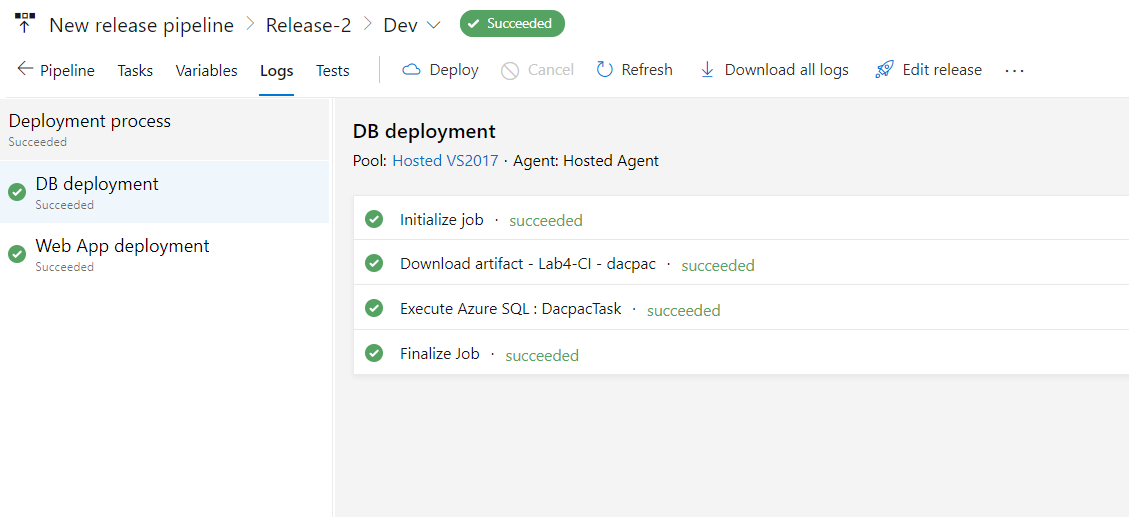
- Navigate to the Releases section in Azure DevOps under Pipelines tab and double-click on the latest release displayed on the page. Click on Logs to view the details of the release in progress
note In case doesn´t exist any release you can create a new one clicking on create a release and selecting the Dev from the pipeline
-
Navigate back to the Azure Portal and click on the Overview section of the App Service. Click on the link displayed under the URL field to browse the application and view the changes
-
Use the credentials Username: user and Password: P2ssw0rd@1 to login to the HealthClinic web application.